5
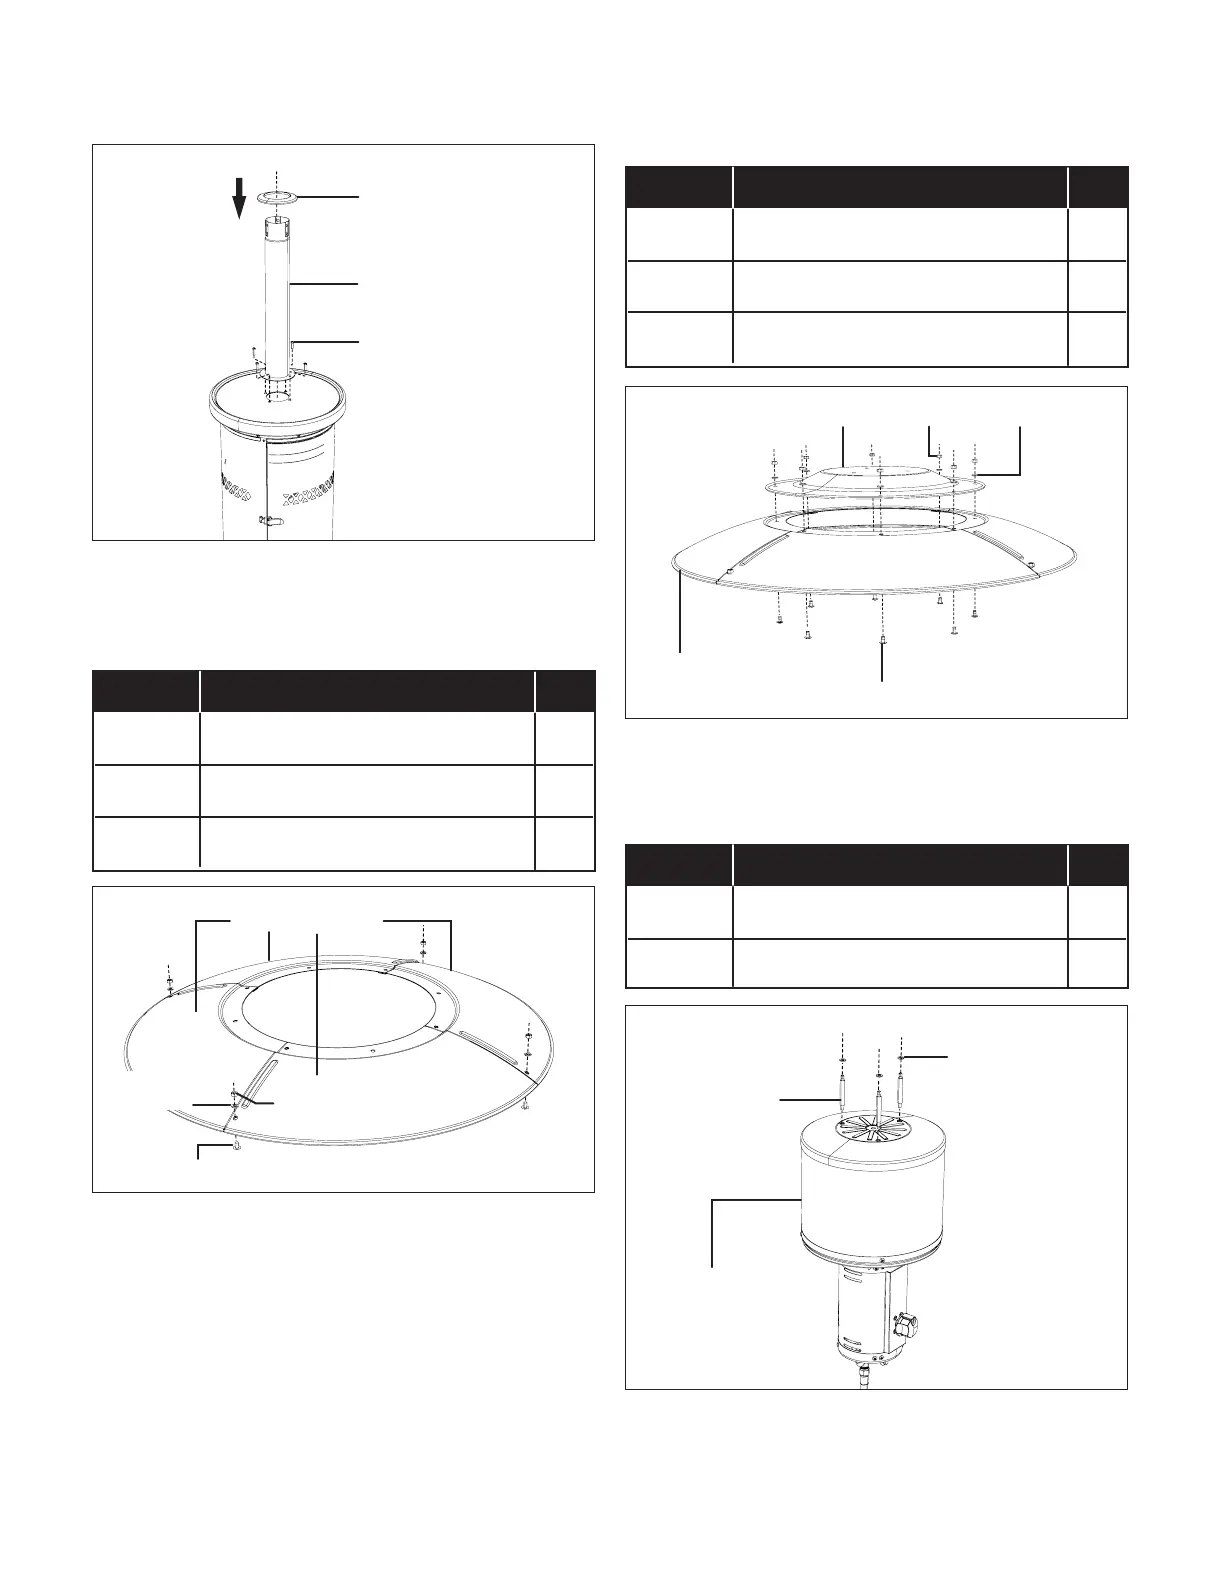
3. Attach the 4 reector panels together using 4 M6x10
Phillips head bolts (A) and 4 plain washers (B). Secure
with 4 cap nuts (C), as shown (Fig. 3).
Hardware Required
4. Attach the assembled reector panels with the reector
center cap using 8 M6x10 Phillips head bolts (A) and 6
plain washers (B). Secure with 6 cap nuts (C) (Fig. 4).
Hardware Required
5. Attach the 3 reector studs (D) and 3 plain washers (B) to
the top of the burner assembly. Tighten the reector studs
(Fig. 5)
Hardware Required
Fig. 2
Lower pole
Hexagon socket
head bolt
(M6x14)
Deck ring
Slide down
ITEM DESCRIPTION QTY.
A
Phillips head bolt (M6x10) 4
B
Plain Washers (6 mm) 4
C
Cap nut (M6) 4
Fig. 3
Reector panels
Phillips head bolt (M6x10)
Plain
washer
Cap nut
ITEM DESCRIPTION QTY.
A
Phillips head bolt (M6x10) 8
B
Plain Washer (6 mm) 8
C
Cap nut (M6) 8
Assembled
reector panels
Fig. 4
Reector center cap
Phillips head bolt (M6x10)
Cap nut Plain washer
ITEM DESCRIPTION QTY.
D
Reector stud (M6x70) 3
B
Plain Washer (6 mm) 3
Fig. 5
Reector stud
Plain washer
Burner
assembly