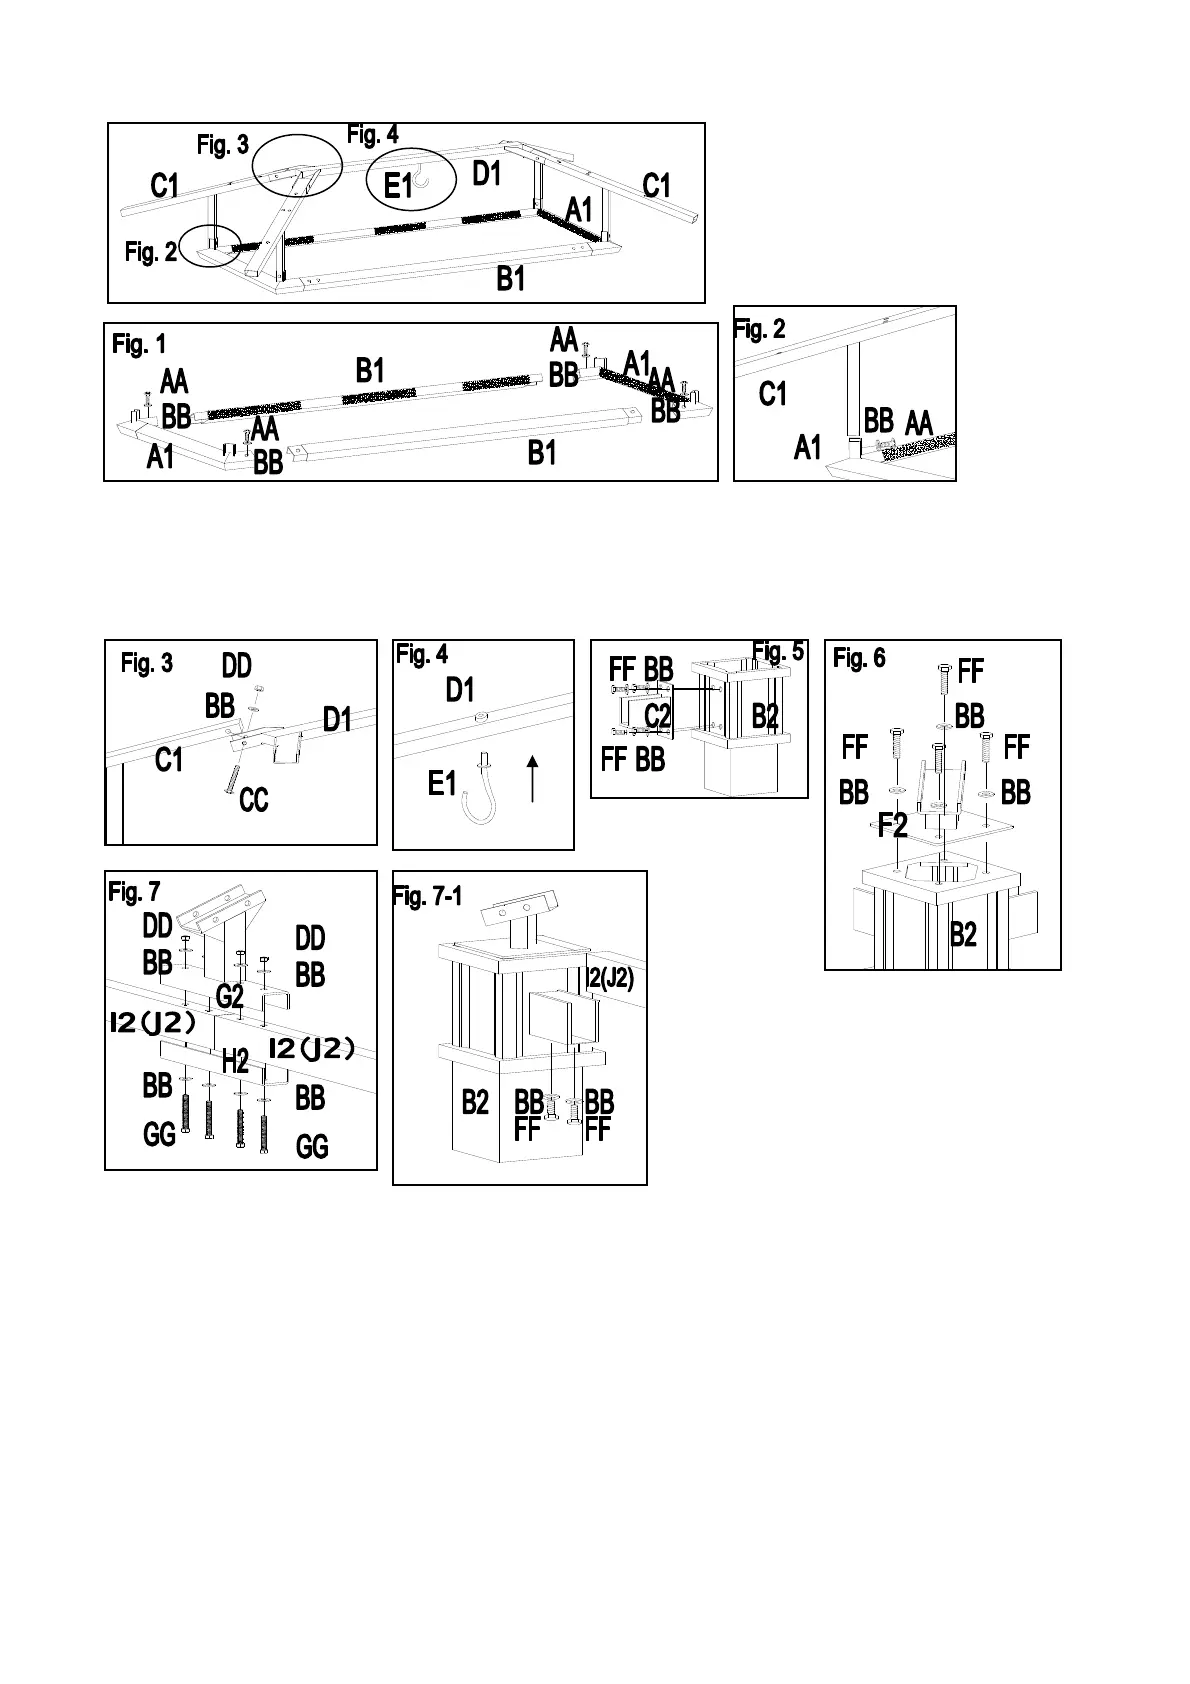
Fig.1: Connect Short big top frame bar (A1) and Long big top frame bar (B1) by using bolt (AA) and washer
(BB).
Fig.2: Attach Small top slanting bar (C1) to Short big top frame bar (A1) by using bolt (AA) and washer (BB).
Please do not tighten the bolts.
Fig.3: Connect Small top slanting bar (C1) and Small top connector (D1) by using bolt (CC), washer (BB) and
nut (DD).
Fig.4: Screw the Pothook (E1) to Small top connector (D1).
Fig.5: Connect Corner beam connector (C2) and Post connector (B2) by using bolt (FF) and washer (BB).
Fig.6: Attach Slanting bar connector (F2) to Post connector (B2) by using bolt (FF) and washer (BB).
Fig.7: Attach Middle beam connector (G2, H2) to Long beam (J2)/short beam(I2) by using bolt (GG), washer
(BB) and nut (DD).
Fig.7-1: Fix Short beam (I2), Long beam (J2) and Corner beam connector (C2) by using bolt (FF) and washer
(BB).