Unpack each wall segment from the shipping material. Stage each
wall segment in the room you will be assembling the unit.
STEP 1
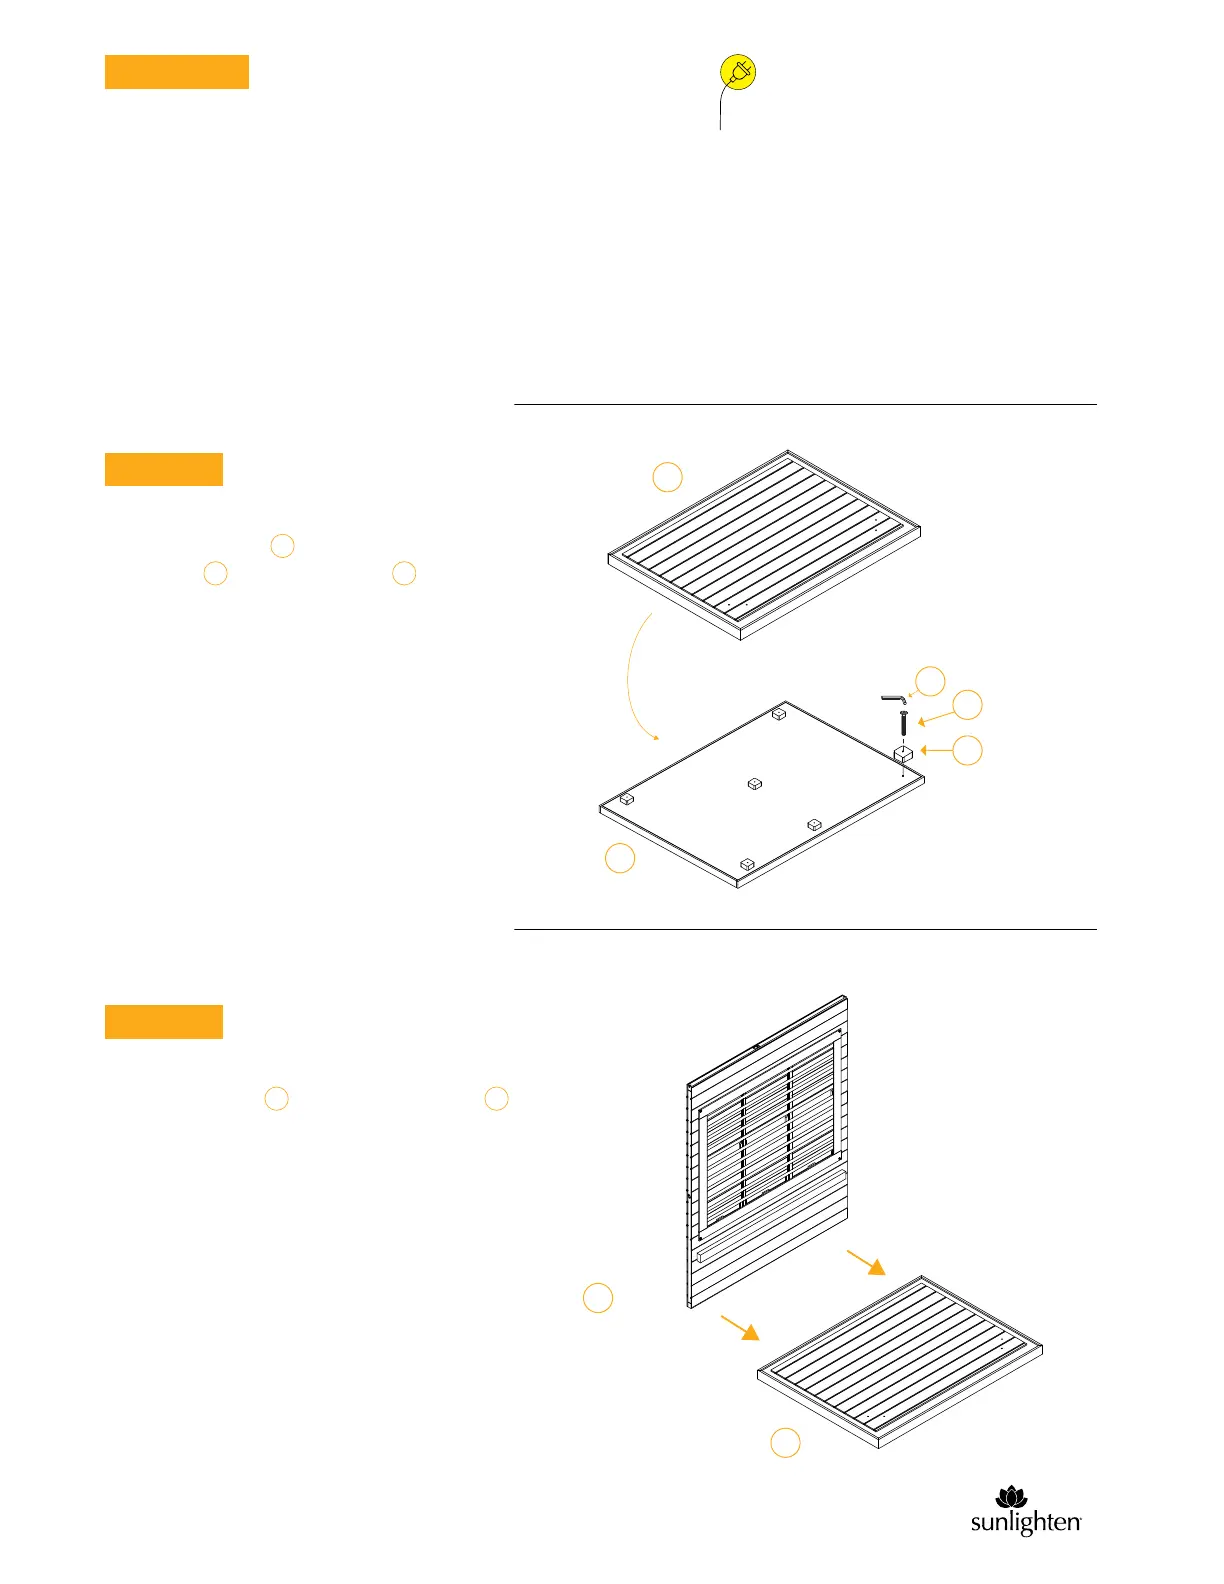
Place the back wall on the back of the floor panel .
Be sure you have two people assisting with this step.
This is the side with the sauna information label
on the bottom edge.
STEP 2
PRE-STEPS
A
2
12
F
E
*
Failure to do so will void your sauna's warranty and
customer will assume liability for any electrical
damages to the sauna itself
or the residence/business
in which the sauna is installed.
120V, 2020 watts. Dedicated 20A circuit* and
NEMA 520 power socket without GFCI.
10 ft cord exists from back left of roof.
See USER MANUAL
E
E
E
F
Attach the feet pegs with supplied Allen wrench
and bolts to the underside of floor .
NOTE: Make sure the floor panel is on a surface
that is perfectly level and relatively smooth.
2 E
A
1
sunlighten.com
2
sunlighten.com