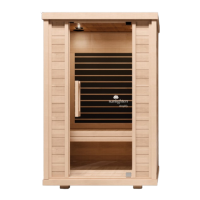
EasyManuals Logo

Sunlighten Amplify III Assembly Instructions

Sunlighten Amplify III
8 pages
To Next Page IconTo Next Page
To Previous Page IconTo Previous Page
Page #3 background imageLoading...
Page #3 background image
STEP 3
As you insert each wall segment, you will insert the
U-clips in the pre-drilled holes in the corner.
This will keep the walls sealed together.
The front wall will be inserted next. Be careful
of the glass door and panel as you insert the wall.
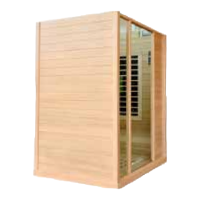
Place right wall on the right side of floor panel .
This wall panel should sit flush once properly seated.
Make sure no gaps are visible in the corner of the two
walls as you insert it. It should be inserted flush.
STEP 4
H
G E
3
3
H
E
G
1
sunlighten.com
3
sunlighten.com

Other manuals for Sunlighten Amplify III

Questions and Answers:

Question and Answer IconNeed help?

Do you have a question about the Sunlighten Amplify III and is the answer not in the manual?

Sunlighten Amplify III Specifications

General IconGeneral
BrandSunlighten
ModelAmplify III
CategoryPlumbing Product
LanguageEnglish

Related product manuals