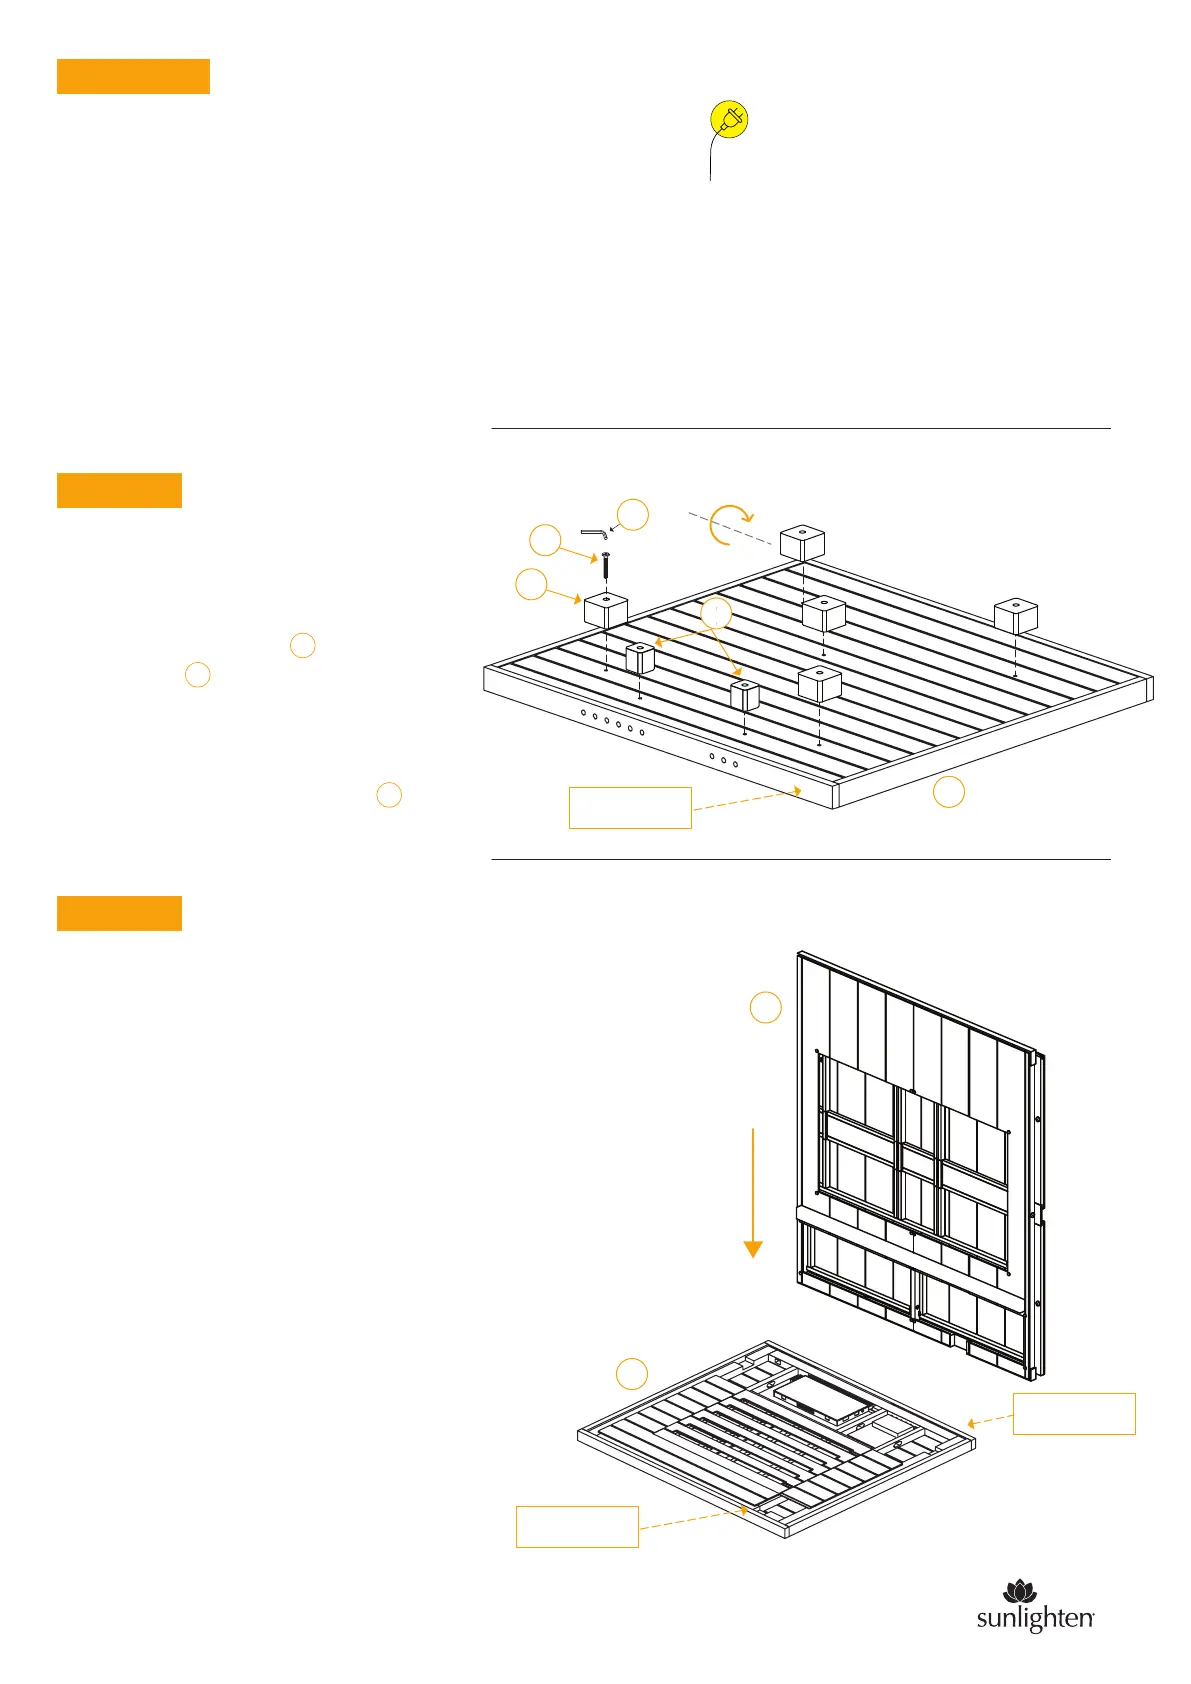
The first step to installing your new sauna
will be to insert the legs underneath the
floor panel. The holes are already pre-drilled
so all you need are the bolts and the
Allen wrench . This is necessary to allow
air circulation to flow underneath and
maintain the integrity of the unit. After legs are
in place, please turn floor panel 180° so the back
of the sauna connects with the back wall
as shown below.
4
6
STEP 1
Before you begin installing the walls, be sure you
have at least:
•
15cm between the back of the sauna and the
outlet wall.
•
30 cm gap from the top of the sauna to the ceiling.
•
Place the sauna next to the wall power outlet to
ensure you have access to the wall power socket
outlet to cut the power to the unit if required.
Unscrew the screws holding the floor covers at the
rear of the floor. Then remove the floor covers (take
care not to step on the electrical components).
Make sure the floor panel is placed on a surface that
is relatively smooth and perfectly level. Failure to do
so can cause the door to not close all the way in the
later steps.
In this step, make sure one person is holding the
wall while the other helps balance it and press it in
place.
STEP 2
PRE-STEPS
230 V, 3300 W
3m cord exists from back left of base.
G
*
Failure to do so will void your sauna's warranty
and customer will assume liability for any electrical
damages to the sauna itself or the residence/business
in which the sauna is installed.
See USER MANUAL
Unpack each wall segment from the shipping material, stage each
wall segment in the room you will be assembling the unit.
Remove the internal wooden heater frames during unpacking
of the wall segments, set these aside for installation after
the sauna is assembled.
Remove the small wooden wire covers at the base of each vertical
wall segment, set aside for placement after sauna is assembled.
sunlighten.com/gb-en
F
A
4
6
B
Back of sauna
180°
2
G
F
Back of sauna
Front of sauna
 Loading...