J
5
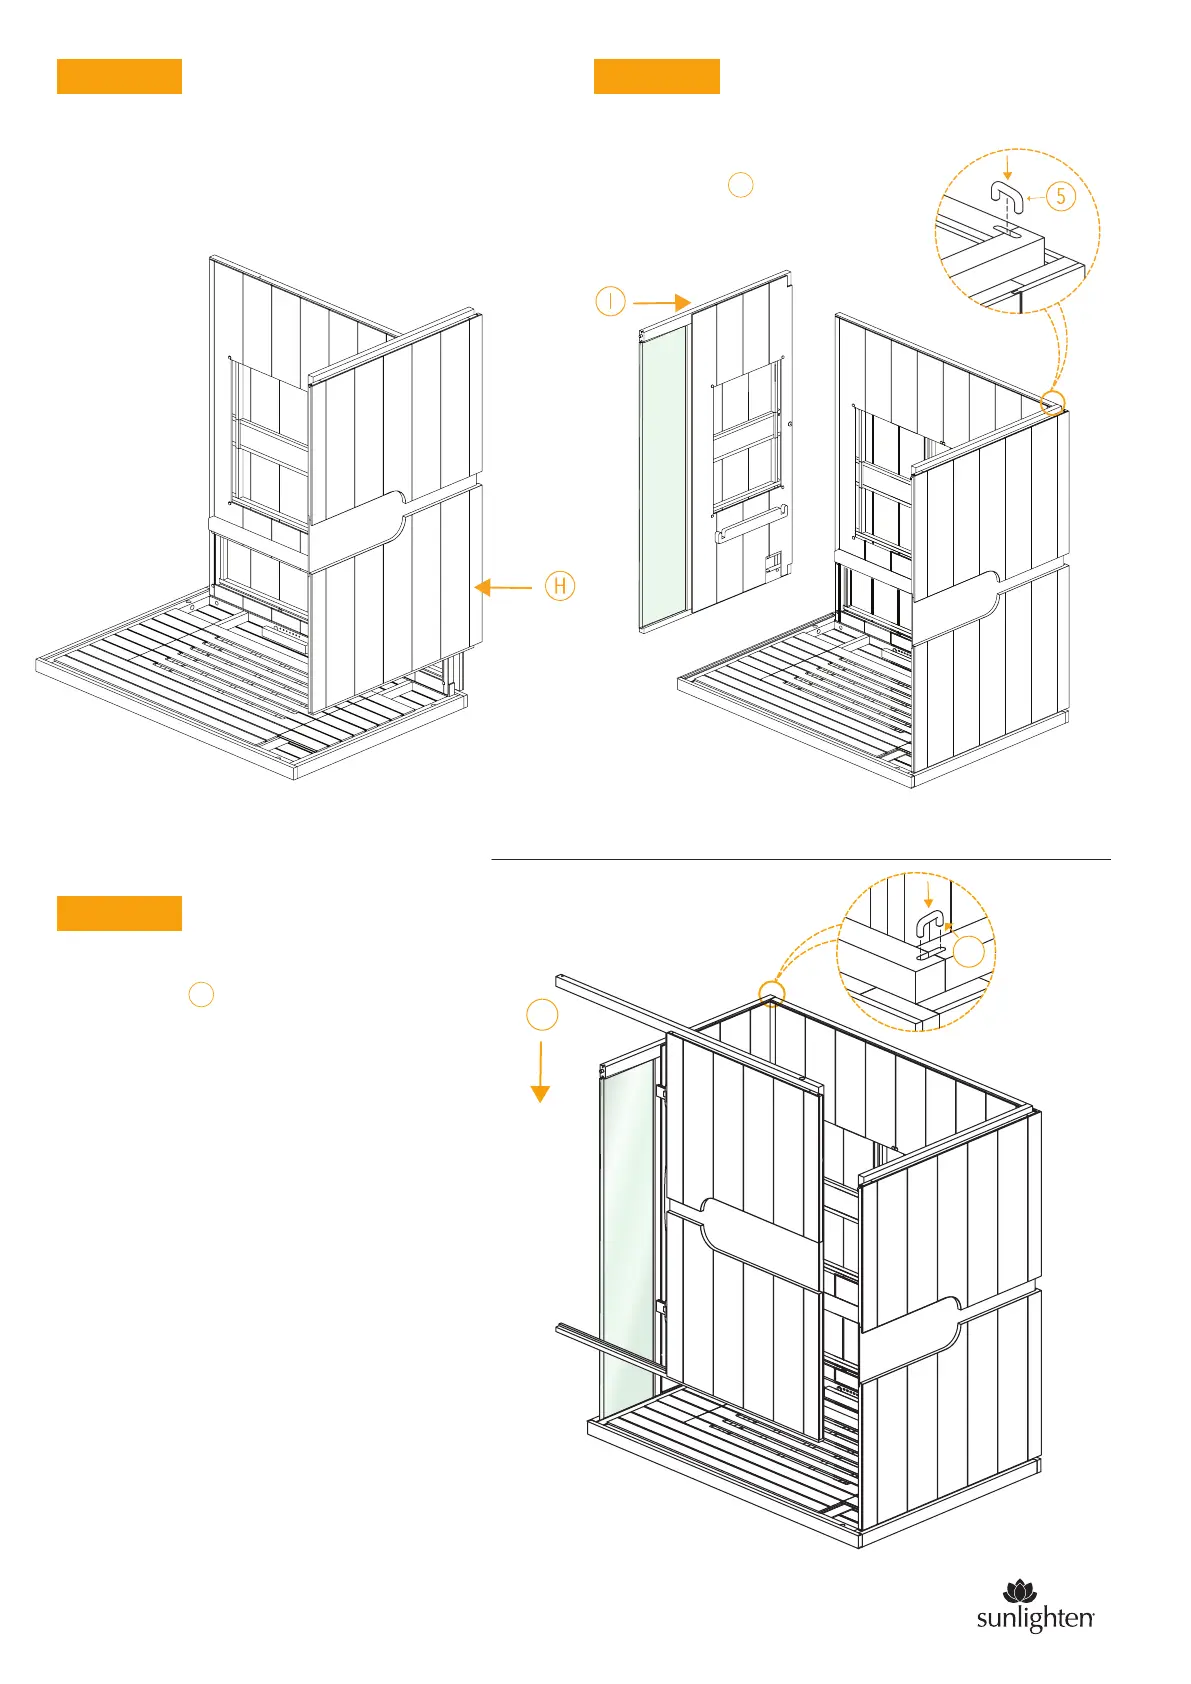
STEP 3 STEP 4
The front wall will be the last to install.
There will be wire connections that need to be made
at the base of each wall panel. These can be accessed
by small hatches on the walls (floor hatch for the
front). If a cable gets stuck in the floor it can be
accessed by removing the wood piece that covers
the power box.
A diagram showing the connection locations
can be found on STEP 8.
NOTE: If you ever have trouble getting
a U-clip to slide in, this can be resolved by
tapping it with a hammer.
The following walls will be inserted the same way
as STEP 2. Make sure the wires coming out from
the bottom hatches don’t pinch when you mount
the walls.
STEP 5
After you place each wall segement, please
use the U-clips and insert them in each
upper corner to hold the walls together.
5
J
sunlighten.com/gb-en
3
 Loading...