K
5
a
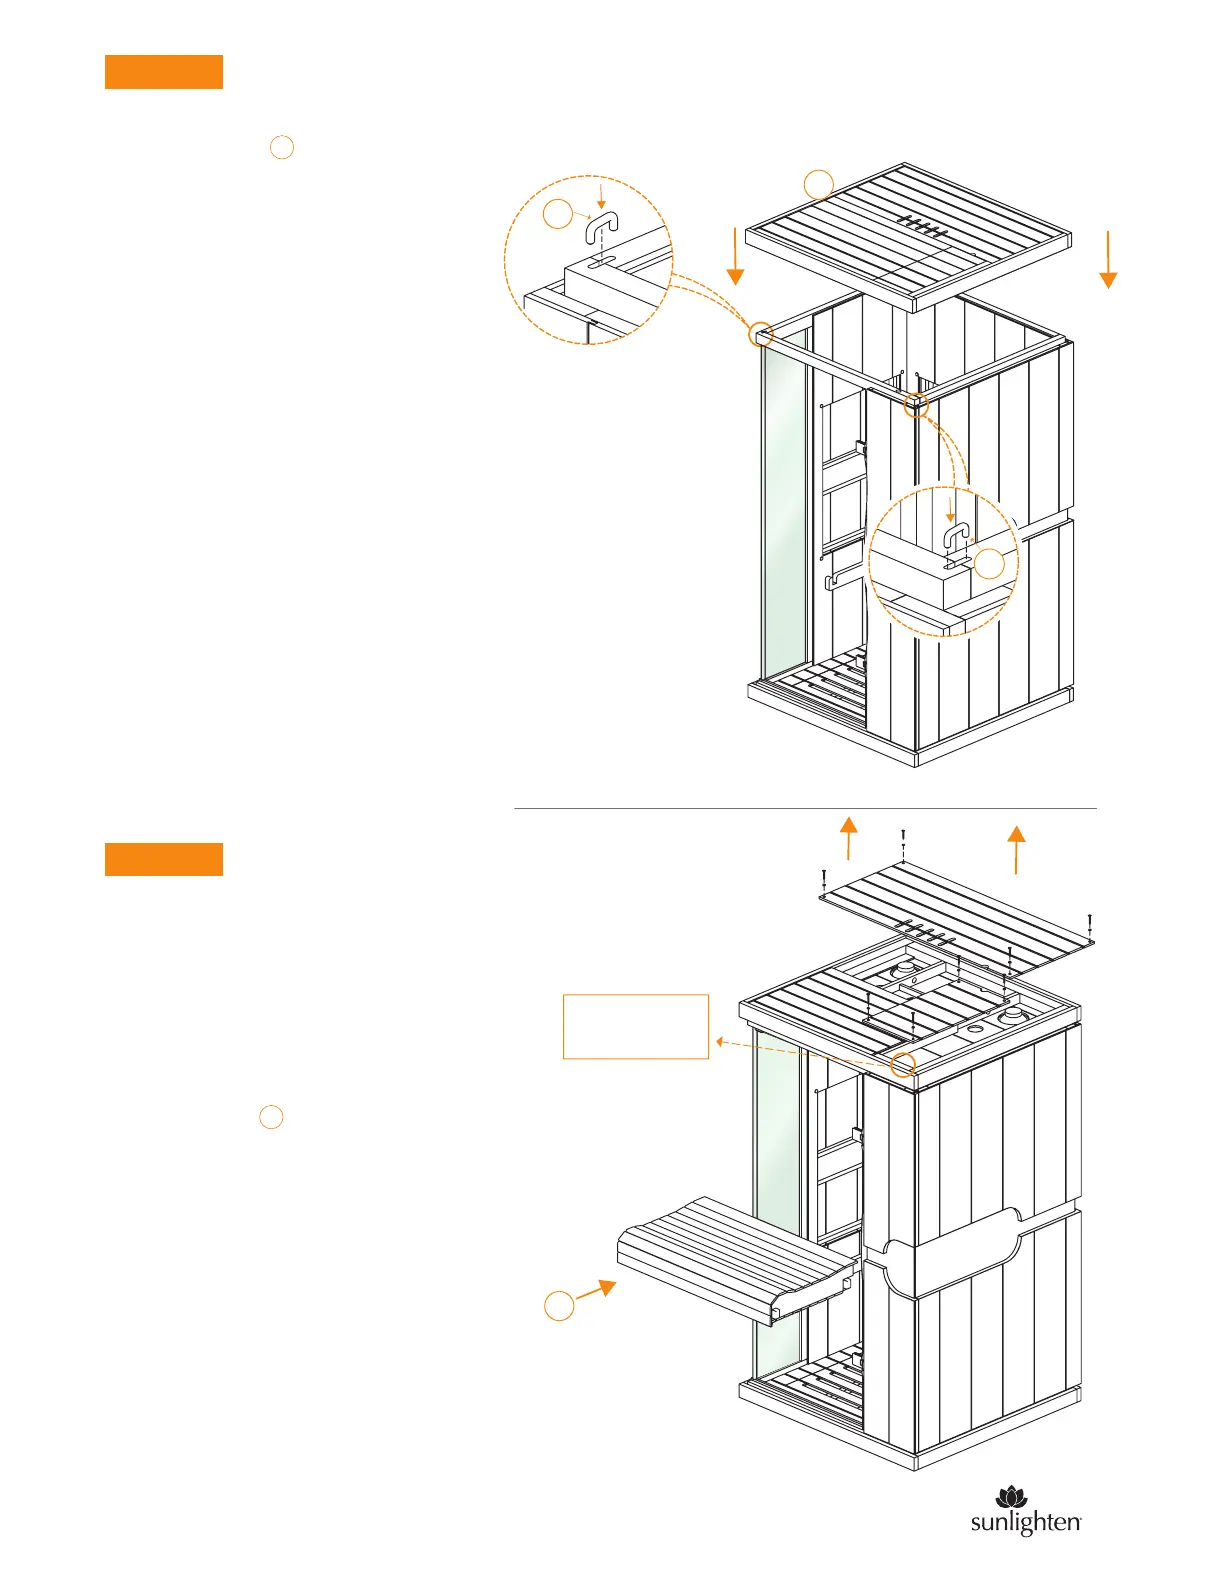
STEP 6
After the roof is placed, remove the dust covers.
There should be the connections to the lights and
speakers at the top front. Connect those so you
can turn on the lights and listen to sound.
In addition there will be one metal-loop lead.
Those can be screwed into the radio antenna.
Next is the bench . Make sure the heater
frames are not mounted, otherwise they will
prevent the bench from resting on the supports.
After all four U-clips are inserted in
the corners, the next step will be to place
the roof on top. The roof will also reinforce the walls
in position along with the clips.
NOTE: The roof may require some slight
manipulation to fall into place on top of
the wall panels.
STEP 7
5
K
Lights, Speakers,
Antenna
E
5
4
sunlighten.com
 Loading...