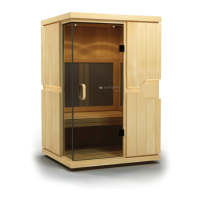
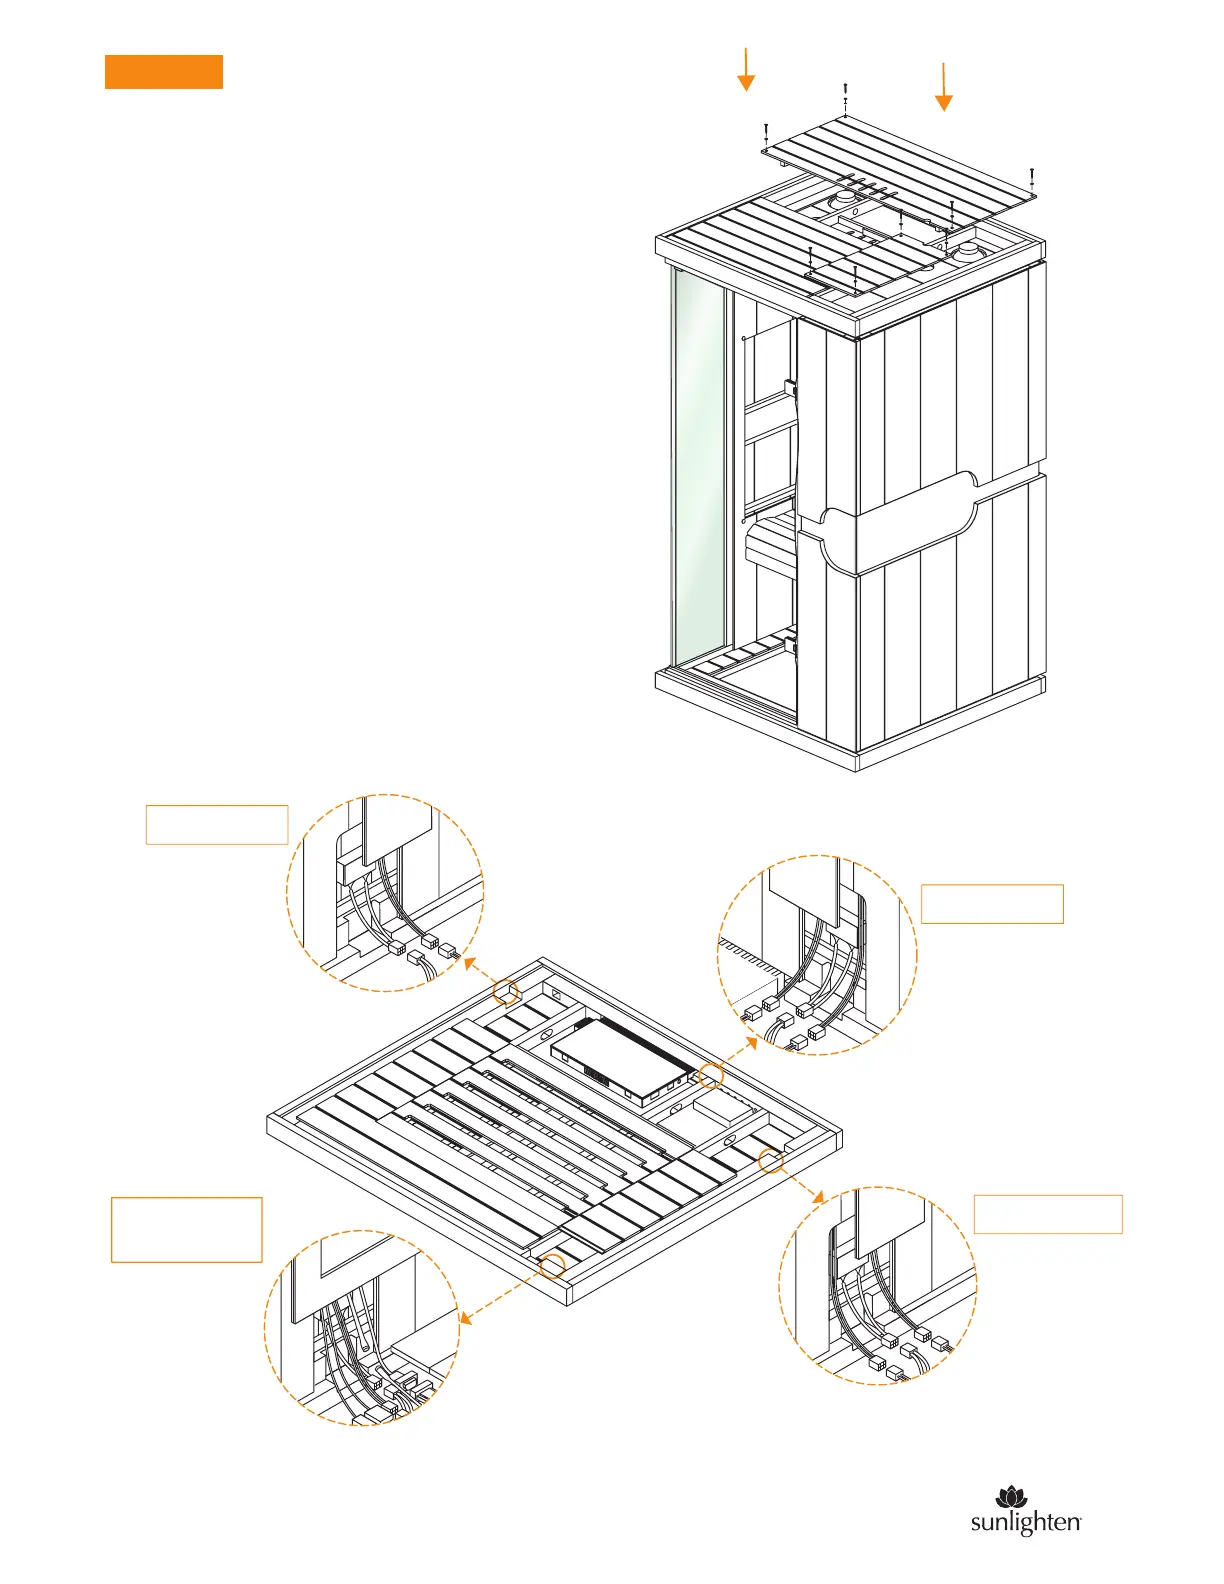
EasyManuals Logo

Sunlighten mPulse bELIEVE Assembly Instructions

Sunlighten mPulse bELIEVE
8 pages
To Next Page IconTo Next Page
To Previous Page IconTo Previous Page
Page #5 background imageLoading...
Page #5 background image
STEP 8
The dust cover should be replaced to protect
the lights and speakers from dust and other
floating residue. Place the heater frames in their
respective locations if you have not yet done so.
As mentioned in STEP 5, there are four
connections to be made in each bottom section
of the walls. If you have not yet done so, consult
with the diagram at the bottom of this page.
NOTE: Look at the back of the heater frames for
the “This Side Up” sticker for proper orientation.
Left Wall Heaters
Lights, Stereo,
Control Tablet
Back Wall Heaters
Right Wall Heaters
5
sunlighten.com

Other manuals for Sunlighten mPulse bELIEVE

Questions and Answers:

Question and Answer IconNeed help?

Do you have a question about the Sunlighten mPulse bELIEVE and is the answer not in the manual?

Sunlighten mPulse bELIEVE Specifications

General IconGeneral
BrandSunlighten
ModelmPulse bELIEVE
CategoryPlumbing Product
LanguageEnglish

Related product manuals