L
6
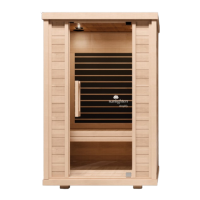
STEP 9
After the bench is placed in the unit, the next step
will be inserting the glass door . Please ensure
you have at least one other person to assist with this
step. Do not put the door handles on as that will be
done in a later step after the door has been safely
attached in this step.
NOTE: You can use a paint stick to shim the glass
door at a desirable angle above the threshold as
you mount it.
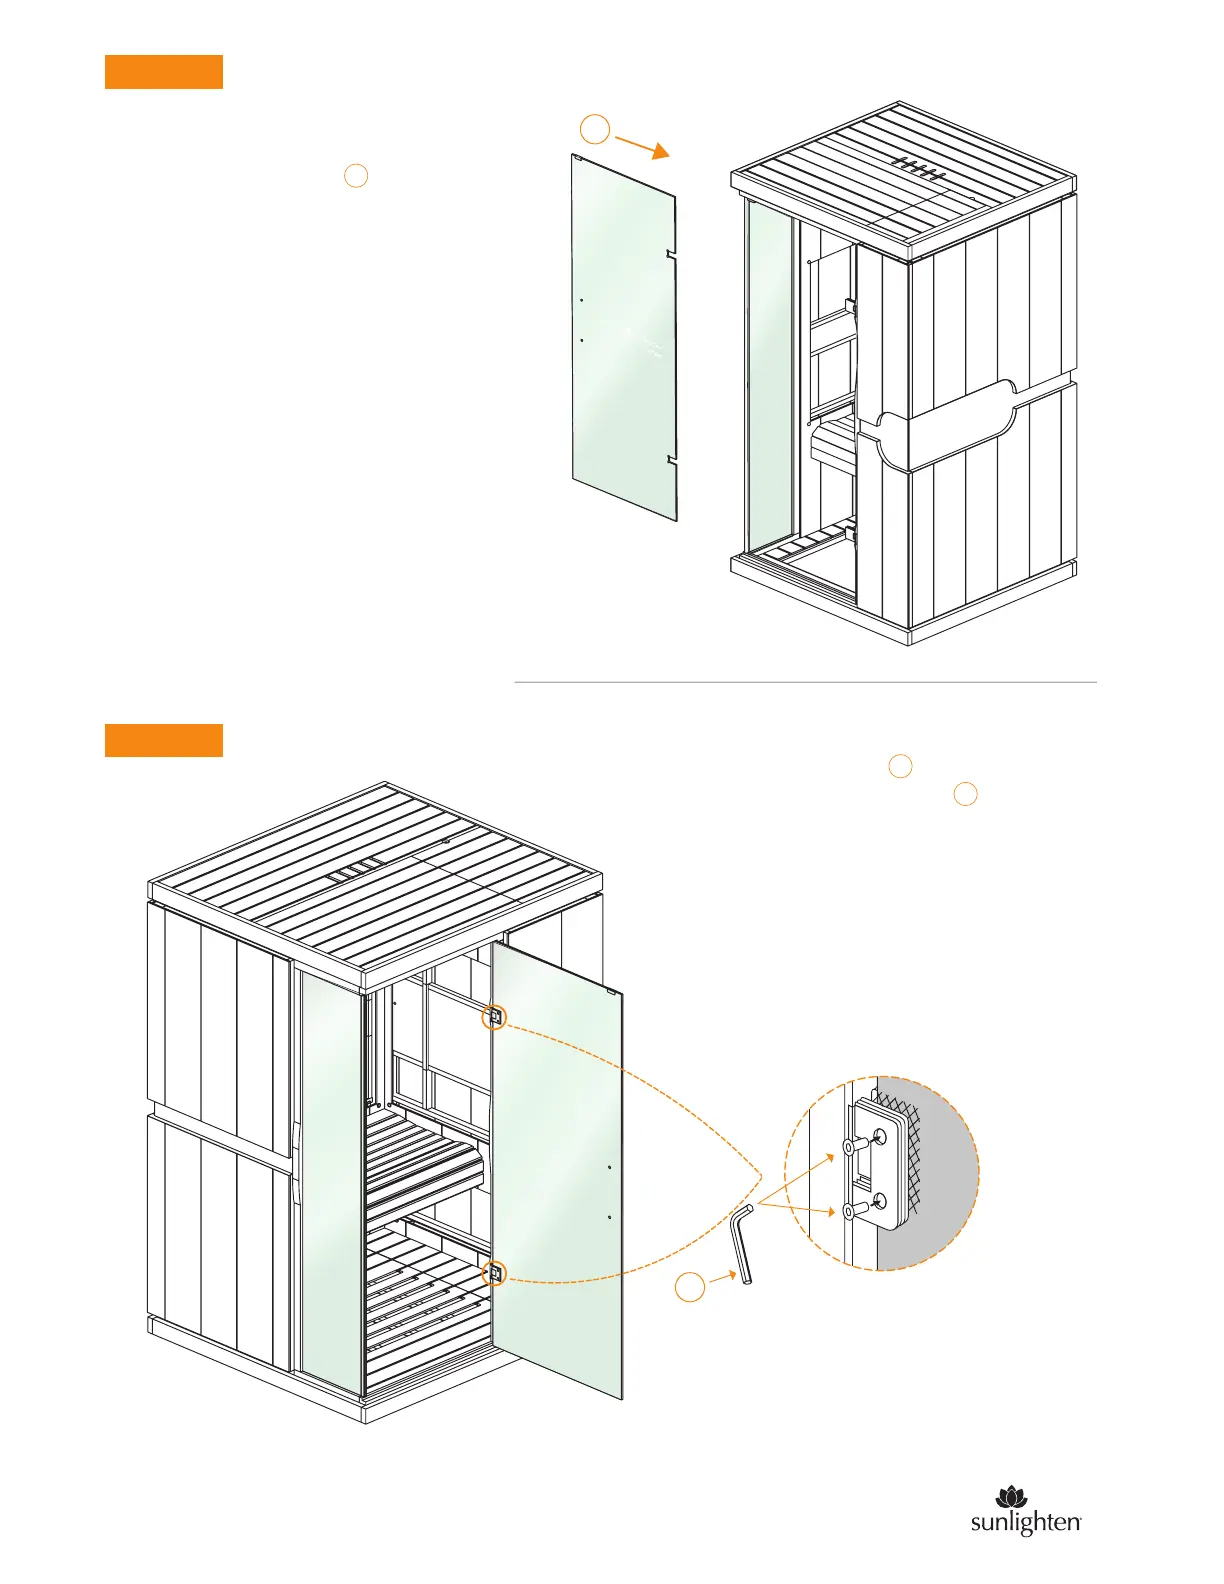
STEP 10
L
Using the Allen wrench , you will tighten the
bolts into the hinges as the door is inserted.
Make sure the bolt is inserted firmly. Each hinge
will have four plastic gaskets. The door will be
inserted between the four gaskets.
Make sure the rough-texture side of the gasket is
against the glass door as your insert it. This will
give it the grip needed to hang it. Likewise make
sure the gaskets touching the hinges also are
doing so by the rough side.
6
L
6
sunlighten.com
 Loading...