C
B
1
4
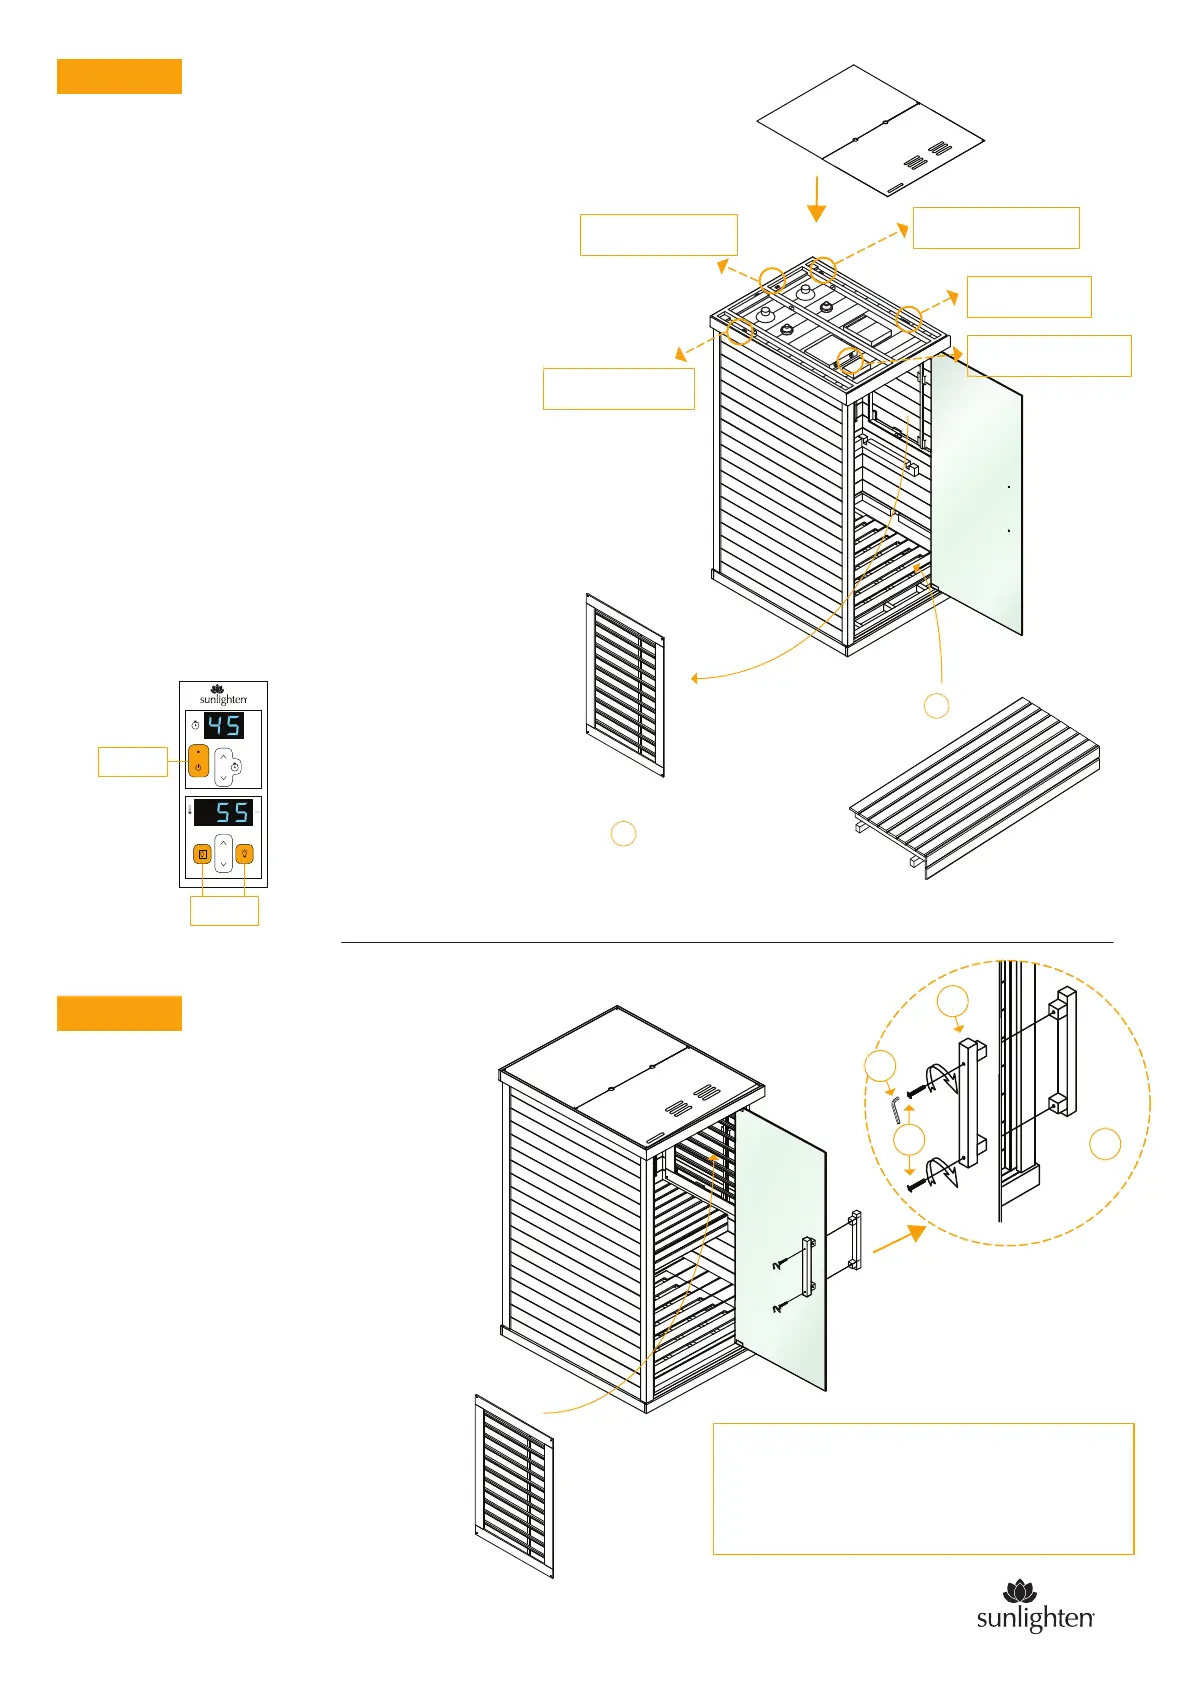
STEP 7
STEP 8
•
With the bench installed, the heater panel
frames can be inserted back into their
respectable walls.
•
The door handles come with the hard-
ware and can easily be screwed right in.
•
A second person should hold the handle
while the other screws the bolts in
with the Allen wrench.
•
The dust cover should also be replaced.
•
Please make all connections on the roof
of the sauna as illustrated
•
Connect sauna to external power.
•
Turn on the power to sauna (see illustration 7.1 below).
•
Check all of the heaters are working by placing your
hand against the heater cover to feel the heat.
•
Check the radio is operating by quickly tapping the SRC button.
•
Check the lights turn on using the control panel
(see illustration 7.1 below).
•
If all electronics are working, turn them off and
turn off the power to the sauna.
•
Replace the roof panels.
•
In the event a heater is not working, unplug the connection
and firmly plug back in. Then re-test with power on.
•
If you require any support, please contact
our Technical Service team.
Left Wall Heaters
Back Wall Heaters
Right Wall Heaters
Control Panel
Speakers & Lights
•
Before the bench is placed, make sure
the heater frames are taken out to allow the bench
to be placed on its support.
D
D
heater frame
heater frame
CONGRATULATIONS your sauna is now ready to enjoy!
If you have any queries please call
Sunlighten Customer Support at 1800 786 544.
Power
Lights
°C
°F
7.1
on/off
1
sunlighten.com.au
5
sunlighten.com.au

 Loading...