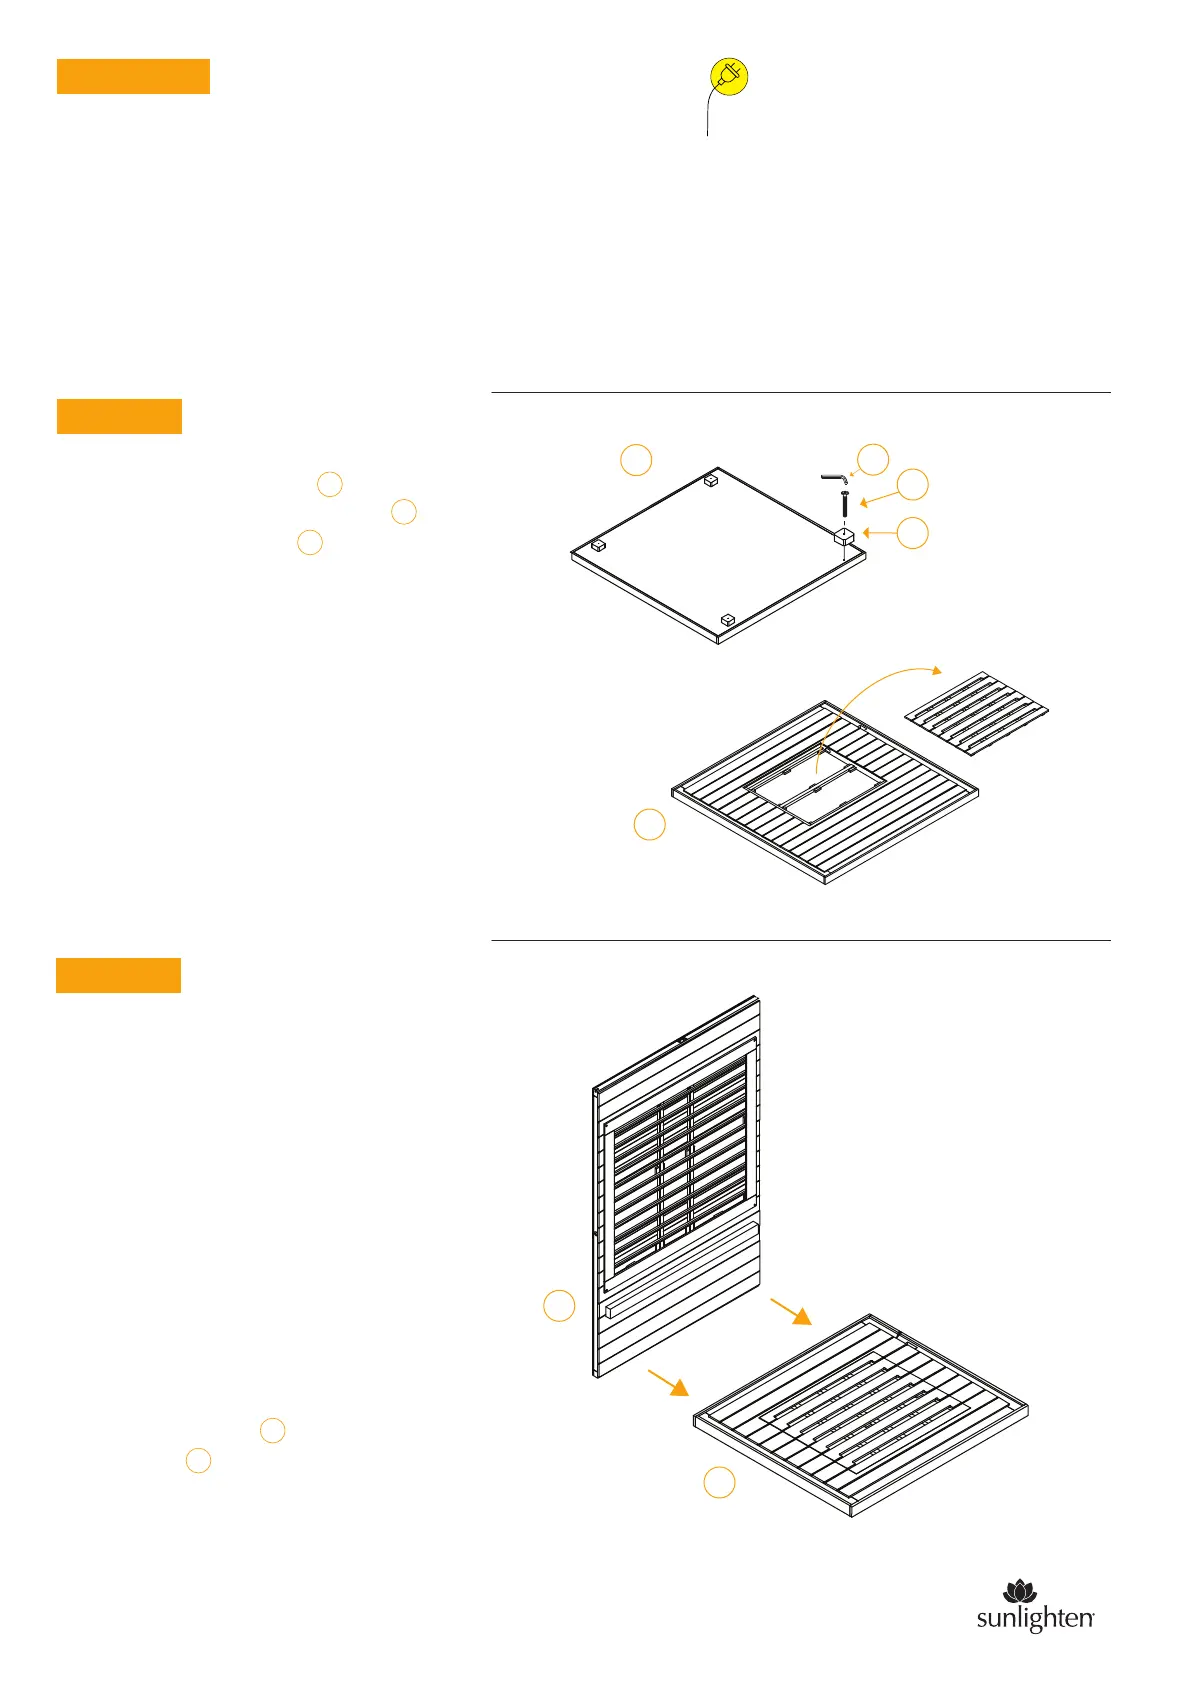
1.1 Attach the feet pegs with
supplied Allen wrench and bolts to
the underside of floor .
1.2 Cut the zip ties holding the floor
grate. The fabric will adhere to the
Velcro on the underside of the grate.
TIP: One side of the fabric adheres
better.
NOTE: Make sure the floor panel is on a
surface that is perfectly level and
relatively smooth. Failure to do so can
cause the door to not close all the way in
the later steps.
2
E
A
You will want two or more people to assemble your
sauna. Unpack each wall segment from the shipping
material. Stage each wall segment in the room you will
be assembling the unit.
*
Failure to do so will void your sauna's warranty
and customer will assume liability for any electrical
damages to the sauna itself or the residence/business
in which the sauna is installed.
120V, 1350 W. Dedicated 20 A circuit,*
without GFCI or AFCI, and NEMA 5-20 power
socket. 10 ft cord exists from back left of roof.
See USER MANUAL or spec sheet for
additional specs.
STEP 1
Place the back wall on the back of the
floor panel . Be sure you have two people
assisting with this step. This is the side with
the sauna information label on the bottom
edge.
STEP 2
PRE-STEPS
A
2
4
1.1
1.2
H
E
NOTE: Before you begin installing the walls,
be sure you have at least:
• 6 in between the back of the sauna and
the outlet wall.
• 12 in gap from the top of the sauna to the
ceiling.
• Place the sauna next to the wall power
outlet to ensure you have access to the
wall power socket outlet to cut the power
to the unit if required.
In this step, make sure one person is
holding the wall while the other helps
balance it and press it in place.
E
E
E
H
2
sunlighten.com
2
sunlighten.com

 Loading...