Do you have a question about the Sunny Health & Fitness PERFORMANCE INTERACTIVE Series and is the answer not in the manual?
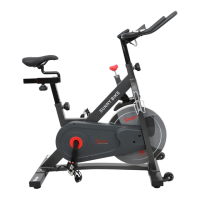
| Resistance Type | Magnetic |
|---|---|
| Drive Mechanism | Belt |
| Connectivity | Bluetooth |
| Display | LCD |
| Drive System | Belt |
| Seat Adjustment | Yes |
Attach Front/Rear Stabilizers and Support Pad to the Main Frame using hardware.
Connect tension cable, pulse/sensor wires, and attach the handlebar post.
Insert Long Axle into Handlebar Post, attach Swing Bars using washers and screws.
Attach left/right pedals to crank and connect swing bars to connecting arms.
Connect handlebars to swing bars and attach the meter to the handlebar post.
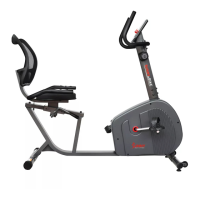
Attach Seat Rail to Main Frame and connect Adjustable Handle to the axle.
Attach Rear Handlebar, Seat, and Backrest to the Seat Support.
Adjust the Adjustable Pads on the Front Stabilizer to level the bike.
Move the Seat forward or backward using the Adjustable Handle.
Rotate the Tension Controller clockwise to increase resistance, counter-clockwise to decrease.
Lift by the Rear Stabilizer until Transportation Wheels touch the ground for easy transport.
Install 2 AAA batteries into the meter box, ensuring correct polarity.
Replace old AAA batteries in the meter with new ones, observing polarity.
Dispose of batteries according to local laws and regulations, avoid mixing types.
Overview of MODE, SET, and RESET buttons for meter operation.
Details on battery installation, auto on/off, auto scan, speed, distance, time, and calories.
Displays total accumulated distance. Can be viewed via MODE button.
Displays user's heart rate in BPM during training. Data is a rough guide.
Resets all values except odometer by holding the RESET button for 3 seconds.
Guide for downloading the app, registering, enabling Bluetooth, and connecting the equipment.