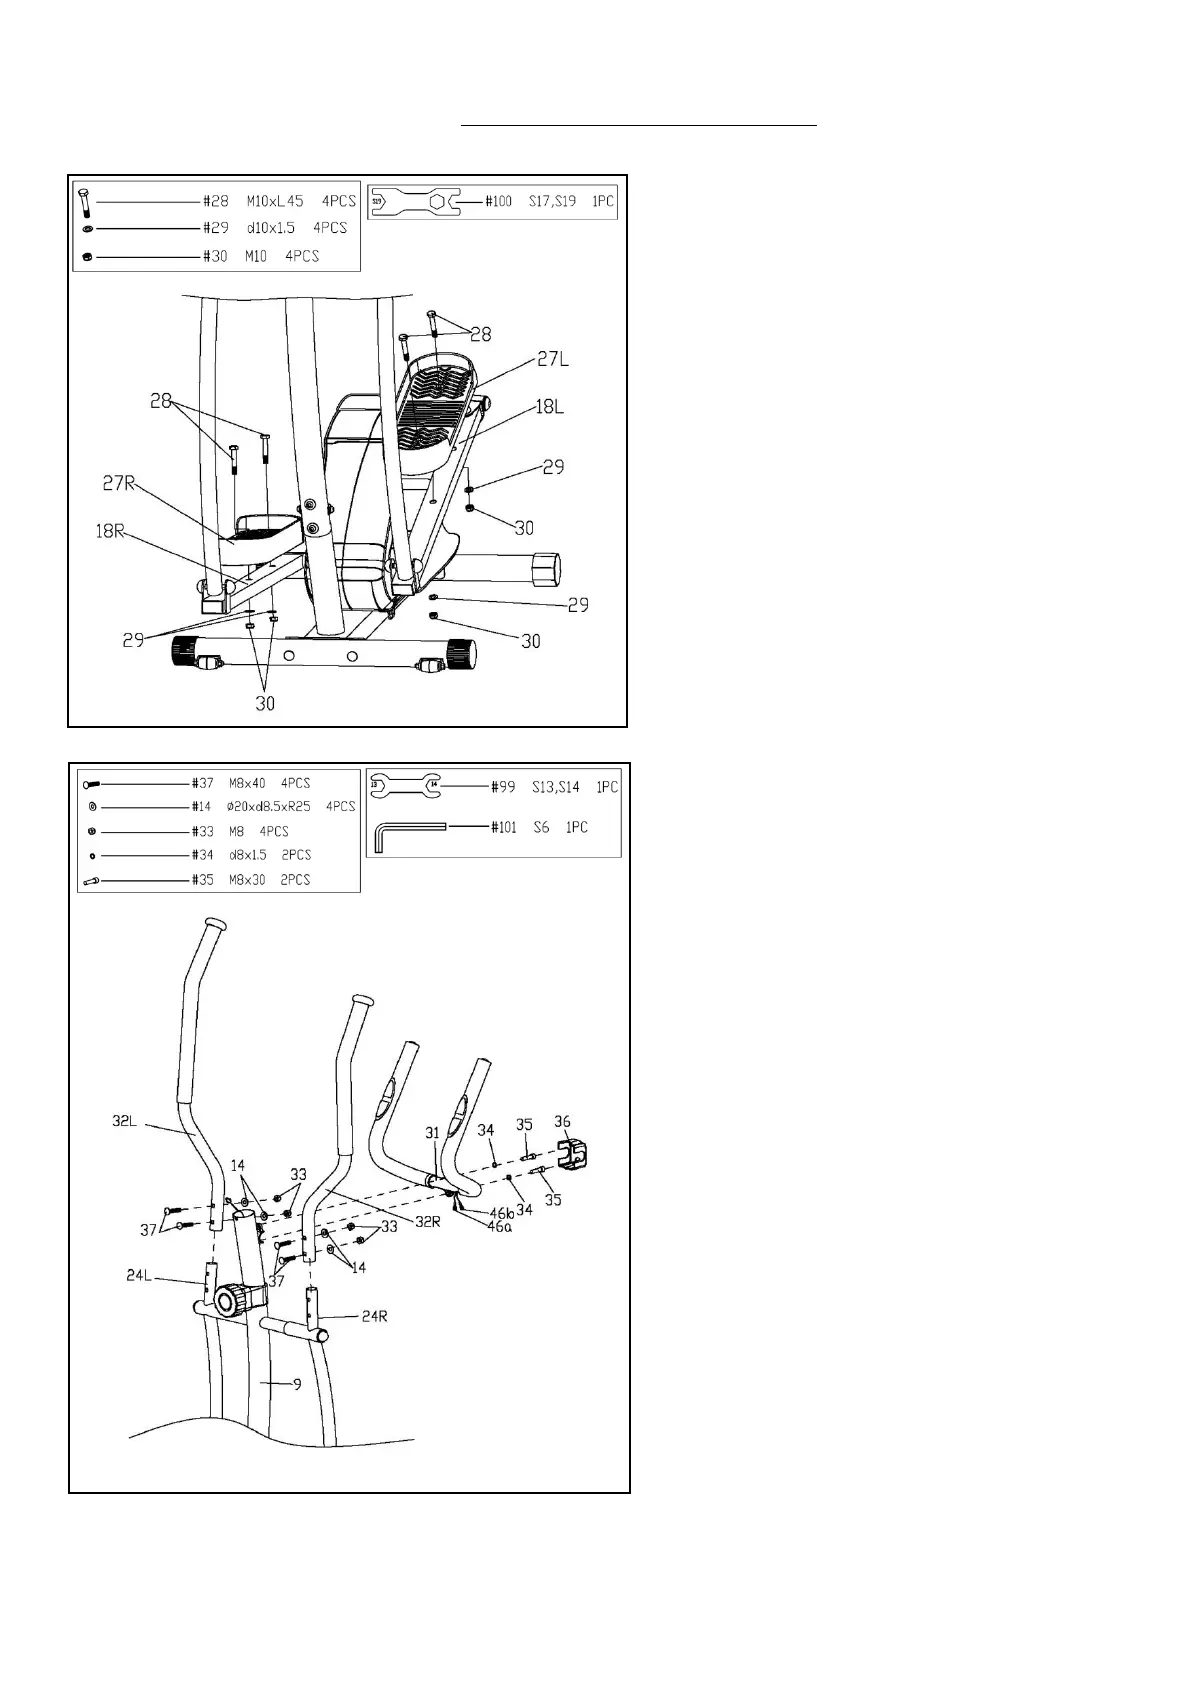
STEP 5:
Remove the preassembled 2 Spring
Washers (No. 34) and 2 Hex Bolts (No. 35)
from the Handlebar Post (No. 9) using
Allen Wrench (No. 101). Attach Armrest
(No. 31) to the Handlebar Post (No. 9) in
place. Secure it with 2 Spring Washers (No.
34) and 2 Hex Bolts (No. 35) that were just
removed using Allen Wrench (No. 101),
and then pull the Pulse Sensor Wires (No.
46a/b) out of the Handlebar Post (No. 9).
Finally attach the Decorative Cover (No.
36) onto the Armrest (No. 31).
Attach the 2 Handlebars (No. 32L/R) on the
2 Swing Bars (No. 24L/R) with 4 Carriage
Bolts (No. 37), 4 Arc Washers (No. 14) and
4 Domed Nuts (No. 33) using Spanner (No.
99).
NOTE: If the Handlebars (No. 32L/R) rub
against the Armrest (No. 31) during the
workout please recheck if the Handlebars
(No. 32L/R) are assembled correctly. You
should attach Handlebars (No. 32L/R) to
Swing Bars (No. 24L/R) according to the
label marked with L or R.
STEP 4:
Secure the 2 Pedals (No. 27L/R) to the 2
Pedal Support Tubes (No. 18L/R)
respectively using 4 Hex Bolts (No. 28), 4
Flat Washers (No. 29) and 4 Nylon Nuts
(No. 30) using Spanner (No. 100).
CAUTION:
Both pedals are labeled; L for LEFT and R
for RIGHT.