English
C.
For
an
intermediate
distance
range
in
auto-
matic operation,
move
the selector
switch
to the
yellow
"A"
position
so
that the
yellow
fine and fl4 appear.
Then
set
the same
aperture on
your
camera
(for
ISO 100 film,
the
lens
opening
istl4).
Your
flash
and
lens
are
now
set
for
correct
exposure
at
any
distance between
1.2 m and 9
m
(4
feet and
30 feet) .
(12)
D. For maximum depth-of-field
(greatest
sharpness
in front of, and
in back
of the
subject).
move
the Selector
Switch
to the
red
",A"
position
so
that the
red
"A",
red line
and
f/8 appear.
Then
set
your
camera
lens
opening
(for
ISO 100
film
the
lens opening
is f/8). Your
flash
and
lens
are
now adjusted
for
correct exposure at
any distnce
between
0.6
m and 4.5 m
(2
feet and
15
feet).
(13)
TAKTNG
THE
PTCTURE
(14)
1. Move
OnlOff Switch to the On
position.
2. ln a
few
seconds, the
Ready/Test
Button
on
the
back of the
flash
unit
will start to
glow.
This
confirms
that
your
flash is ready to
f ire.
3.
Take
the
picture!
Your
flash will
automatically
provide
the
correct amount of
light for
proper
exposure
within the distance
range indicated.
For
Eucceeding
exposures...
Just
wait until the
Ready/Test light
comes
on.
Make
sure
you
are
within
the usable auto
distance
range
for
the
lens
opening
in
use
and...Shoot!
To
Verify
Gorrect
Auto Exposure:
(15)
To verify
the correct
automatic exposure,just
aim
your
flash
directly towards
your
subject
and
press
the Ready/Test
Button. This will
cause
the
flash
to
fire without actually exposing any
film.
lf
the automatic
exposure
is
correct
for
your
subject,
the
green
"Auto
OK"
lamp
will
glow
immediately after the
"test"
exposure.
lf
the
lamp does not
glow,
move
closer to
your
subject
(or,
if
you
are shooting
in
yellow
or
red
auto
mode, switch to
green
and adjust the
aperture
accordingly).
The Auto
OK
provides
positive
verification in automatic operation
that
your picture
will be
correctly
exposed.
{G
POWER
RAT|O
(MANUAL)
OPERATION
With
Sunpak's
unique
Power
Ratio Control
you
can adjust
the light output over a
five stop
range
(from
full
to
1
116
power).
This feature
gives you
greater
depth-of
-f
ield
control,
the ability to con-
trol
battery
life
and
recycle times,
precise
full-in
flash
capability.
macro/close-up capability and
the
ability to control
flash
duration.
OPERATING
INSTRUCTION
FOR
STANDARD CAMERAS
Using
the
Power
Ratio
Gontrol
at
Full Power:
1.
Set
the
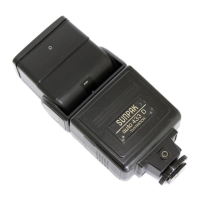
Auto/Manual Selector Switch
(on
the
back of
the
flash
body) to
the
top
so that
the
white
"M"
appears.
2.
Set
the
Film
Speed
Scale to the desired
ISO
setting.
(16)
(Example:
ISO 100)
3.
Adjust the
Power Ratio
Control
to
full
power
by sliding the Selector
Switch.
4.
The scales
for distance and
f/stop
now
show
the combination of
exposure.
Find the
flash-
to-subject
(not
camera-to-subject) dis-
tance.
(Example:
4.5 m/15')
5,
Set
your
lens
to
the
lens
opening
shown
for
this distance.
(17)
(Example:
with ISO 100
film,
the correct
lens opening at
4.5 ml15' is f/8)
Using
Power
Ratio
(18)
1.
As
when
using
the
Power
Ratio
at
full
power,
set the
Film speed scale
to the
appropriate
ISO
rating
and
be
sure
the
Auto/Manual Selector
is
at
"M".
2.
Determine the distance of
your
subject
from
your
flash.
When
the
auto
433D is mounted
to the camera,
you
can easily
do so by
focusing
your
camera's
lens
and
reading the
distance
indicated bv the distance
scale on
the lens barrel.
 Loading...