English
Using
the Multi-Voltage
AC
Adapter
or
the
Sunpak
Powerpak
for
51O-Volt
Batteries
(Both
Optional):
1)
For AC
operation, be sure
to check that the
voltage selector on
your
AC Adapter is set to
the
appropriate
voltage.
Your AC Adapter
has been
factory
set
for 220V.
For
use
in
other countries
where 117V,127Y and
24OV
are standard,
you
may adjust the setting as
illustrated.
Remove
the small
Phillips head
screw located
next
to
voltage window and
rotate
the
selector
switch
with
a screw driver
to the
proper
voltage setting.
After
the
volt-
age setting
has
been
made, the screw must
be
reinstalled
to
prevent
accidental
move-
ment
of the selector switch.
(4)(5)
Note: lf the
Multi-Voltage AC Adapter is
incorrectly set. the adapter
will not
function
properly
and
may
damage
your
auto
433D.
.
For
auto
433D,
do
not
use the
AC
Adapter
other than the
AD-27.
2)
When using
Multi-Voltage AC Adapter
or Sunpak
Powerpak for 51O-Volt
Bat-
teries,
always set
BatterylAC HV
Se-
lector
Switch
to AC/HV
position.
Plug
into
the
AC/High
Voltage
socket on the
flash
and
into
a standard
wall
outlet
as
illustrated. The AC Adapter will
supply
vir-
tually unlimited
flashes
and
is ideal for in-
door use.
(6)
3)
When
you
use the optional accessory
Sunpak
Powerpak for 51O-Volt
Battery,
first
attach the supplied
plug
adapter to the end
of
Powerpak
cord and
plug
it into
the auto
433D in
the same
manner
as
you
would
with
the
Multi-Voltage
AC Adapter. The
Sunpak
Powerpak for 510-Volt Battery
allows ex-
tremely
rapid recycle
times and the
greatest
number of
flashes.
(7)(8)
CAUTION:
Even
when
your
auto
433D is
used
with
external
power
sources, always
store bat-
teries
inside for
dedicated
function. Your auto
433D is not interfaced
to the camera
without
internal batteries.
4
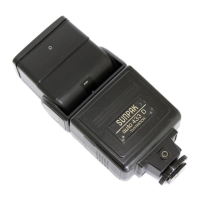
Mounting the
Flash to the
Gamera:
CAUTION:
For mounting
or detaching the
autozoom
433D
on or
from
the camera, always
make
sure the On/Off
Switch
is
at
"OFF"
posi-
tion or the camera
may be damaged.
Slio
the unit onto the
camera's hot
shoe.
Turn
the
knurled lock
ring
clockwise to
in-
sure
secure
mounting
to
your
camera's shoe.
(e)
Note: When using Olympus cameras,
make
sure that
the appropriate
accessory shoe
as
below
is
attached
to
your
camera and then
put
the autozoom
433D
on
it.
o
For
OM-2N,
OM-1N: accessory shoe
#4
.
For
OM-2:
accessory shoe
#3
o
For
OM-10:
mount
the autozoom
433D
onto the
built-in
hot
shoe.
Set
the
Camera shutter to the fastest
shutter
speed
synchronized
for electronic flash. For
SLR
cameras, the
highest
usable speed
is
generally
1/60th
second;
however.
some
permit
f lash
synchronization of up to
1l125th
second.
To
be sure, refer
to
your
camera's
instruction manual.
(10)
AUTOMATIC OPERATION:
The sensitive Silicon
Photo
Transistor
of
your
autozoom
433D
Sensor
measures
the
light re-
flected
by
your
subject and automatically con-
trols the
flash
duration to
assure correct
expo-
sure
within
a
wide range of distances.
lt's
easy
to
use:
A.
Slide the
ISO Film
Speed Scale
till
the
ISO of
film
in use is
visible in
the
ISO speed
window.
(Example:
ISO 100)
B.
For the maximum distance
range in auto-
matic
operation,
move
the
Auto/Manual
Se-
lector
Switch
to the
green
"A"
position
so
that the
green
"
A"
is visible in
the
Auto/Manual
Mode
Window and
f
l2
will
appear.
Then
set
your
camera
lens
opening
(for
ISO 100 film,
the
lens
opening
is'tl2).
Your flash and
lens
are
now
set
for
correct
exposure
at any
distance
between 2.3
m
and
1
8
m
(8
feet
and
60 feet).
(1
1
)
1.
2.
 Loading...