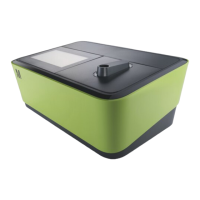
The Reflectoquant® RQflex® 20 reflectometer is an analytical instrument designed for performing chemical parameter analyses in water, food & beverage samples, and environmental samples using Reflectoquant® test strips. It is intended for use in laboratories, on production lines, or in the field. The RQflex® 20 system is versatile and precise, comprising the instrument itself, Reflectoquant® tests, and test- and batch-specific barcode strips. The reflectometer measures reflected light from the test strip, and the difference in intensity of emitted and reflected light allows for a quantitative determination of the concentration of specific analytes.
Technical Specifications:
- Dimensions: 184 x 79 x 30 mm
- Weight: 253 g (including battery)
- Memory: Stores 50 test methods, 200 measurement results, 50 RQcheck results, and 50 calibration results.
- Interface: Yes (for technical service only)
- Light source: 4 LEDs (green/red, double optics)
- Power source: 4 x 1.5-V batteries (AAA)
- Display: Reflective LCD Graphic Module (256 x 160 dot)
- System diagnosis: Yes
- Measurement range: 4 - 90 % rel. remission
- Reflection area: 4 x 6 mm
- Resolution: 0.1 % rel. remission
- Operating temperature: 5 - 40 °C for ideal measurements
- Operating humidity: Below 80 % for ideal measurements
Usage Features:
The instrument features an intuitive interface with several buttons for operation:
- Power On/Off: Turns the device on and off.
- OK: Confirms selections and actions.
- START measurement: Initiates a measurement.
- Menu: Accesses the main menu.
- Left (Back): Navigates back in menus or changes columns in settings.
- Right (Next): Navigates forward in menus or changes columns in settings.
- Up/Down: Scrolls through menu items or adjusts values.
- Barcode reader: Scans barcode strips.
The display provides essential information such as battery status, time, menu item, timer area, method number, status bar, content area, and info bar.
Starting the RQflex® 20 for the first time:
Before initial operation, the batteries must be inserted. The instrument performs an electronic self-check upon power-on. The serial number of the RQflex® 20 is displayed at the bottom right of the initialization screen. The main menu then appears, offering options like Method List, Result List, Settings, and Quality Assurance. The device is supplied with English as the standard language setting, but other languages can be selected in the settings. The date and time should also be set. Initial calibration is required before the first measurement.
Settings:
The "Settings" menu allows users to configure various parameters:
- Languages: Select the desired language (EN, DE, FR, ES, PT, JP, CN).
- Date Format: Choose the desired date format (yyyy-mm-dd, dd.mm.yyyy, mm/dd/yyyy).
- Time Format: Select the desired time format (24 h, am/pm).
- Date: Set the current date.
- Time: Set the current time.
- Auto Power Off Time: Set the desired power off time (00 = Off, 15, 30, 45, 60 min).
- Audible Signal: Turn the audible alert on or off.
- Acoustic. Countdown Warning: Set the desired duration of the warning signal for the countdown (00 = Off, 5, 10, 15, 20, 25, 30 sec).
- Memory Capacity Warning: Turn the memory capacity warning on or off.
Initial Calibration:
Calibration is crucial for accurate measurements. The instrument needs to be calibrated before the first measurement. This involves using a Reflectoquant® Recalibration Set, which includes a barcode strip and a plastic test strip. The instrument should be kept at ambient temperature for at least 30 minutes before calibration.
The calibration process involves:
- Selecting "Quality Assurance" from the main menu, then "Calibration."
- Inserting the barcode strip from the Recalibration Set into the barcode reader.
- Inserting the calibration strip into the strip adapter.
- Pressing the START measurement button.
- The instrument will display "Calibration passed!" upon successful calibration.
Measurement Procedures:
The RQflex® 20 supports different measurement procedures:
- Add a new method (Guided way): This involves inserting two barcode strips from the Reflectoquant® test package. The first barcode strip corresponds to the method number, and the second barcode strip corresponds to the batch number.
- Shortcut: A method can be saved and started directly by inserting the barcode strip of the Reflectoquant® test.
- Continue with last used method: This allows repeating a measurement using the previously selected method.
- Choose from method list: Users can select a method from a stored list.
Measurement Procedure A (One reaction time):
- Select the correct method and insert the barcode strip supplied with the Reflectoquant® test.
- Immerse the test strip into the sample and press the START measurement button.
- Carefully remove excess liquid from the strip.
- Insert the test strip into the strip adapter.
- The measurement starts automatically after the end of the reaction time.
- The result is displayed and automatically stored.
Measurement Procedure B (Two reaction times):
- Select the correct method and insert the barcode strip.
- Prepare the test strip according to the instructions.
- Immerse the test strip into the sample and press the OK button.
- Carefully remove excess liquid.
- Immerse the test strip into the corresponding solution and press the OK button to start the timer.
- After the reaction time, carefully remove excess liquid.
- Insert the test strip into the test strip adapter and press the START measurement button.
- The measurement starts automatically after the end of the reaction time.
- The result is displayed and automatically stored.
Skip the timer: It is possible to cancel the timer countdown without affecting the measurement. This feature is useful if the reaction time is observed by other means, such as an external stopwatch.
Serial measurements: The instrument can perform consecutive measurements directly without the countdown function. After the first measurement, another immediate measurement can be carried out by pressing the START measurement button again. This is useful for measuring several separate samples or for repeated serial measurements.
Method details: The "Method details" menu displays information about the chosen method, including Article Number, Method name, and Range. Users can also delete a method from this menu.
Result list: The "Result list" menu displays all stored measurement results, including the date, time, method, and measured value. Users can view details of each result and delete individual results or all results.
Quality Assurance:
The quality assurance section covers recalibration, RQcheck procedures, and analytical quality assurance (AQA).
- Recalibration: Required after the first start, after cleaning the strip adapter, in case of suspect measurement results, error messages (E07, E08, E09, E10, E11), severe mechanical distress, changing ambient temperature, or each working day. The procedure is similar to initial calibration.
- Checking the instrument (AQA): Includes monitoring of the instrument (AQA1) and total system monitoring (TSM).
- RQcheck procedure: This involves inserting an RQcheck barcode strip and a test strip into the instrument to verify its performance. The results indicate if the RQcheck passed, along with remission values and intensity values.
The "Information" menu displays details about the instrument, including the software version, free memory space, battery status, serial number, date, and time.
Maintenance Features:
To ensure consistent and accurate measurement results, regular cleaning and maintenance are essential.
- Handling: Treat the instrument with care, avoid liquid ingress, and do not expose it to excessive heat or humid conditions.
- Cleaning the external casing: Wipe the casing and display carefully with a moist cloth.
- Cleaning the optics and strip adapter: Clean the optics and strip adapter only with distilled water or ethanol (max. 70% v/v) on a tissue or cloth after dismantling the strip adapter. Do not rinse the instrument or parts of it.
- Strip adapter cleaning procedure:
- Switch off the reflectometer.
- Carefully pull the strip adapter out of the casing.
- Remove the upper part of the strip adapter by sliding the components into opposite directions.
- Dismantle the adapter into its four components.
- Clean the components with distilled water and a mild detergent, or ethanol. Never clean the internal standard (light grey plastic component) with abrasive cleaner.
- Dry the components carefully and reassemble the adapter.
- Reinsert the adapter into the instrument.
Troubleshooting:
The manual provides a comprehensive list of display messages, possible causes, and remedies for common issues, including:
- Low Battery: Replace batteries.
- Barcode not readable/Wrong barcode: Insert a valid barcode or recalibrate.
- Measurement timeout: Start again.
- Memory write/read error: Try again.
- Measurement not possible: Remove strip and continue, or clean optics.
- RQcheck not possible/Calibration not possible: Repeat measurement or insert new barcode/calibration strip.
- Display is frozen: Switch off the instrument, remove batteries, insert again, and switch on anew. If Auto Power Off is activated, the instrument switches off automatically after the defined time.
- Buttons/barcode reader do not respond: Switch off the instrument and start anew.
Service / Warranty:
The instrument is 100% quality-controlled and maintenance-free. Detailed instructions should be followed for problem-free operation. The manufacturer grants a total replacement warranty of 12 months from the date of purchase. Improper handling, water damage, or other liquid ingress will void the warranty. Any unauthorized repairs or alterations will also void the warranty.