Fig. 5
Super Feeder Installation, cont.
for safety since it may be loose. Small loose parts may
present a hazard for children and pets.
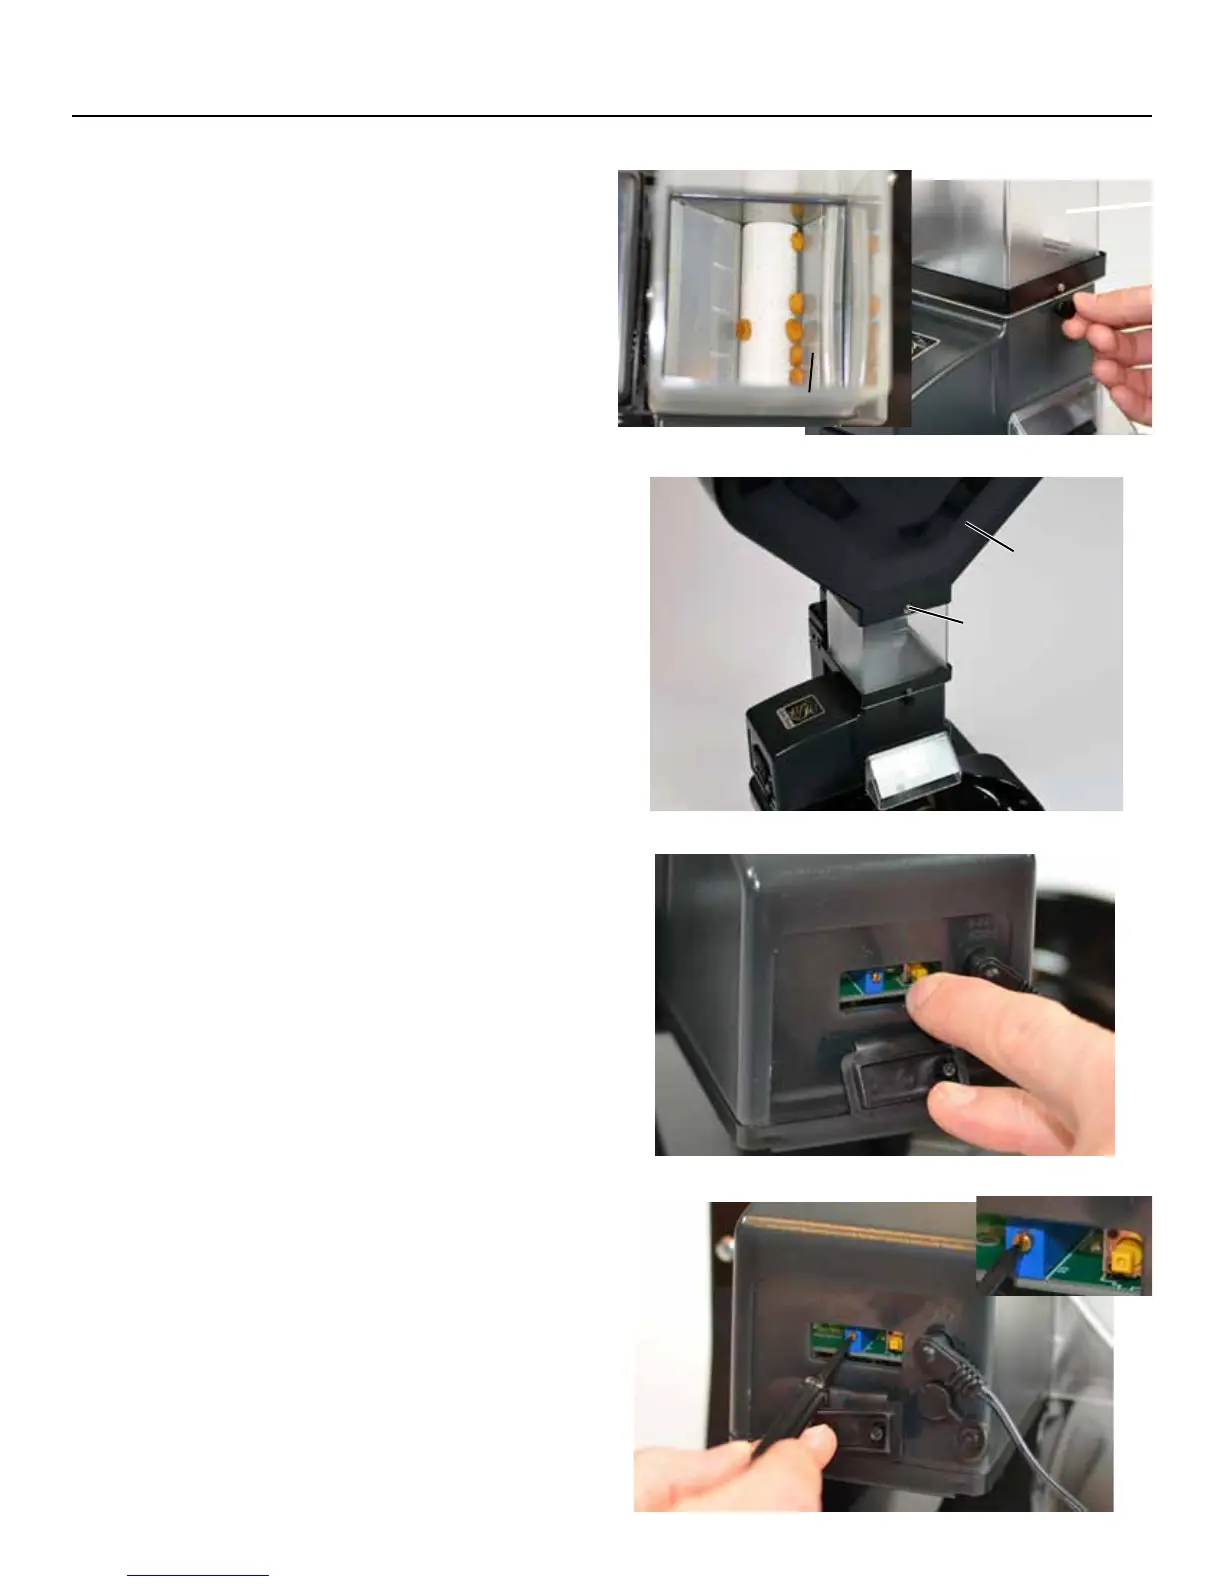
STEP 7
If you did not purchase the 1.5 gallon hopper, install
the second clear extension onto the rst extension and
nish lling your feeder with dry food. Some pieces may
initially fall through, but this is normal. en install the
lid. You may not need to install lid screws for indoor use.
If you do use screws, you do not need to take them out to
take o the lid. Simply squeeze front and back of upper
extension to remove lid.
If included, install the 1.5 gallon hopper on top of one
clear extension (only one recommended with large
hopper) of two supplied with basic feeder, securing it
with one small 3/16" screw and metal washer on each
side. Instructions are included with the large hopper.
(See Fig. 6)
STEP 8 - Feed cycle duration calibration
Open rubber plug to expose feed cycle duration control
and push reset button momentarily to activate feeder
(see Fig. 7). Activate a cycle a few times to settle the food
before ne tuning the feed cycle.
If not enough food was dispensed, with small adjustment
screwdriver, turn brass dial screw clockwise, then push
reset button again and note amount of food dispensed.
If too much food came out, turn brass dial screw
counter-clockwise. Approximately 1/4 turn will increase
or decrease the food cycle by 1 second. 10 full clockwise
turns will be the max cycle time available. (See Fig. 8)
If still not enough food is dispensed at maximum time
setting, turn the volume screw counter-clockwise and
try again. If still not enough, program extra feed cycles
with remote timer (timer of choice).
Note: e amount of food dispensed is determined
by the feeder’s adjustable feed cycle not by the remote
timer. When your timer of choice turns on at the
desired time, the feeder will only run the calibrated feed
cycle duration that your previously set. You must have
a minimum o-time (blue power light o or green
depending on model) of approx. 1-2 minutes on your
Fig. 6
Fig. 7
Page 4
Fig. 8
Top view
4-40 3/16" screw
& washer on
both sides
Optional Hopper
Roller
Slide
Volume gate
Screw holes
have no threads.
The screw will
create their own
threads.
 Loading...