Superiorfireplaces.US.com
126622-01D
10
VENTING INSTALLATION Continued
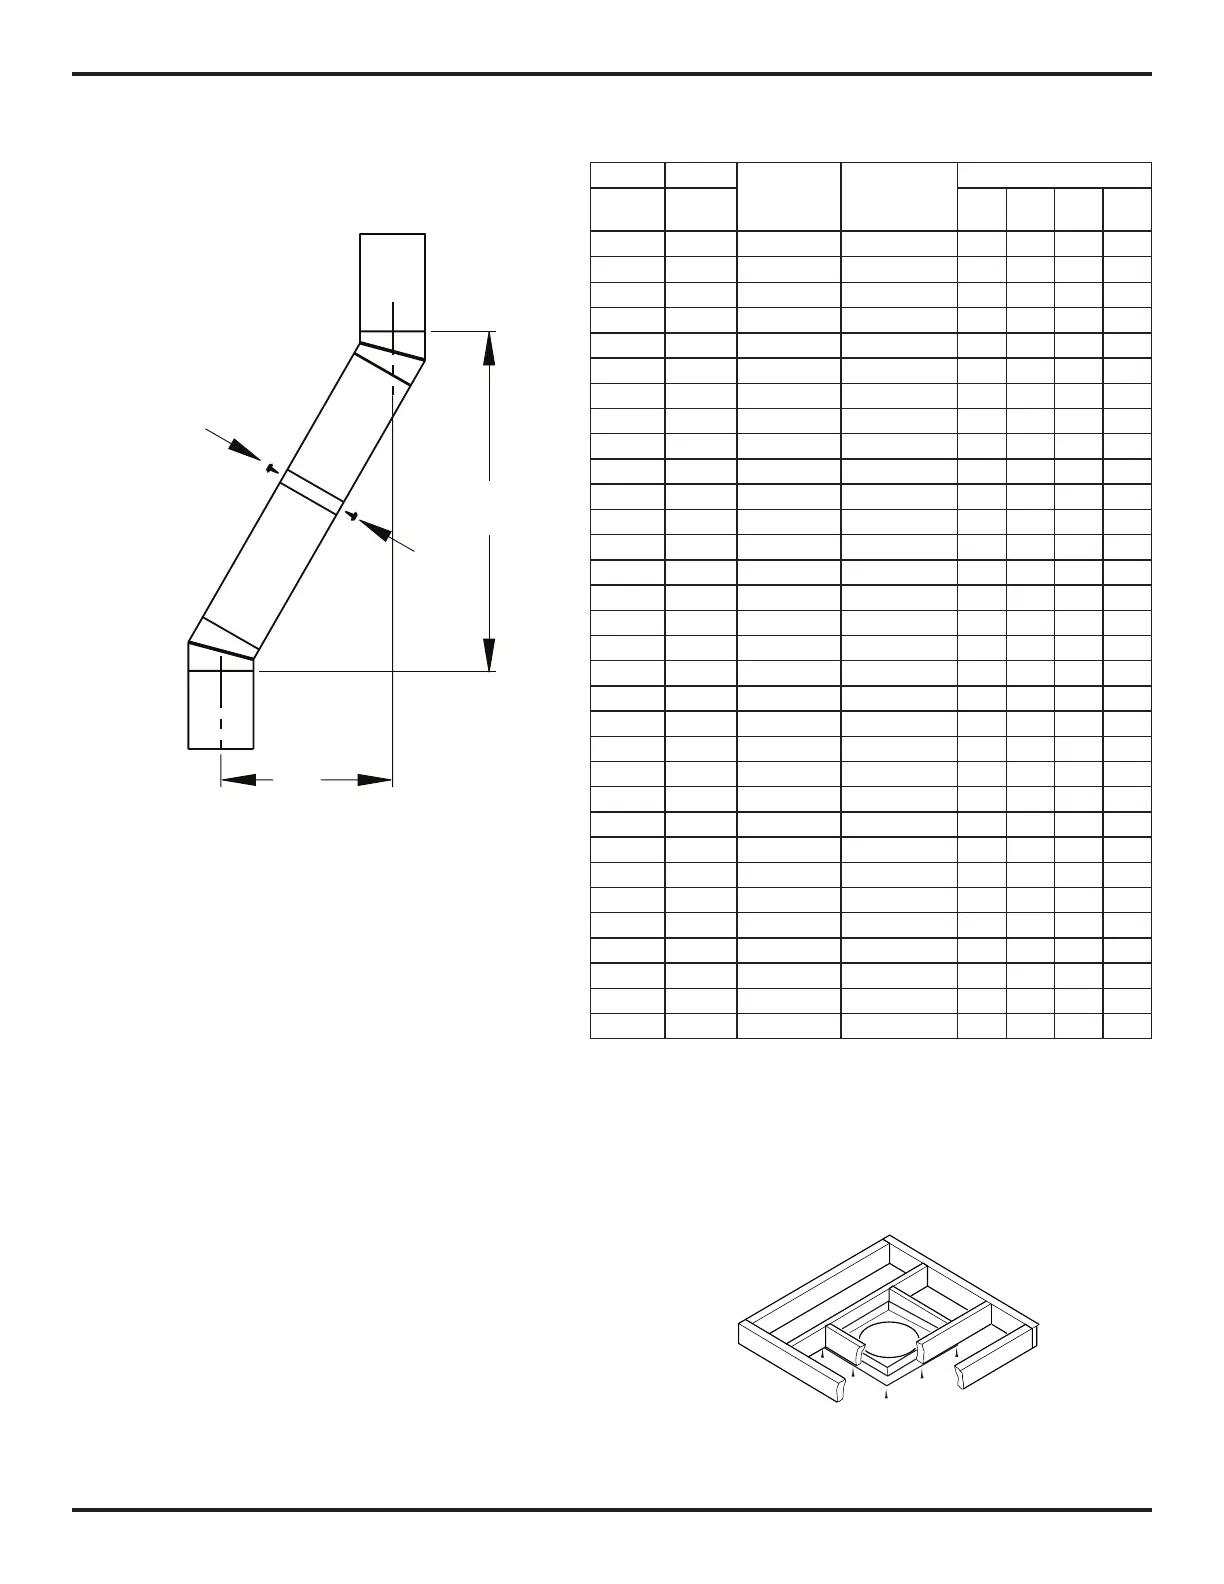
Figure 12 - Elbow Offset
B
A
Screws
OFFSETCHARTWITHTRANSITIONPIPE
FIRESTOP SPACERS (3600FS-8DM-1)
Figure 13 - Firestop Spacer with Living Space Above Ceiling
If area above is a living space, install firestop
below framed hole.
OFFSET RISE OFFSET/
RETURN
ELBOW
TRANSITION
PIPE
CHIMNEYLENGTH
A B 12" 18" 36" 48"
13
3
/
4
" 32
1
/
2
" 1 1
19" 41" 1 1 1 1
22" 46
3
/
4
" 1 1 1
24
1
/
2
" 50
3
/
4
" 1 1 2
27
1
/
2
" 56 1 1 1 1
30
1
/
4
" 61 1 1 2
31 62
1
/
2
" 1 1 1
32
1
/
2
" 65" 1 1 2 1
35
1
/
2
" 70
1
/
4
" 1 1 1 2
36
1
/
4
" 71
1
/
2
" 1 1 1 1
37 72
3
/
4
" 1 1 1
38
1
/
2
" 75
1
/
2
" 1 1 3
39
1
/
4
" 76
3
/
4
" 1 1 1 1
41
1
/
2
" 80
1
/
2
" 1 1 2 1
42
1
/
4
" 81
3
/
4
" 1 1 1 1
44
1
/
2
" 85
3
/
4
" 1 1 1 1 1
45
1
/
4
" 87" 1 1 1 1
47
1
/
2
" 91" 1 1 2 1
48
1
/
4
" 92
1
/
4
" 1 1 2
49
3
/
4
" 94
3
/
4
" 1 1 2 1 1
52" 98
3
/
4
" 1 1 1 4
53
1
/
2
" 101
1
/
4
" 1 1 1 2
54
1
/
4
" 102
3
/
4
" 1 1 1 1
55
3
/
4
" 105
1
/
4
" 1 1 3 1
56
1
/
2
" 106
1
/
2
" 1 1 1 2
58
3
/
4
" 110
1
/
2
" 1 1 2 2
59
1
/
2
" 111
3
/
4
" 1 1 1 1 1
60
1
/
4
" 113" 1 1 2
61
3
/
4
" 115
3
/
4
" 1 1 1 1 2
64
3
/
4
" 120
3
/
4
" 1 1 2 2
65
1
/
2
" 122
1
/
4
" 1 1 1 2
67" 124
3
/
4
" 1 1 2 1 2
Firestop spacers are required at each point where chimney penetrates
a floor space. Their purpose is to establish and maintain required
clearancebetweenchimneyandcombustiblematerials.Whenpipe
passes through a framed opening into a living space above, firestop
must be placed onto ceiling from below as shown in Figure 13.
They also provide complete separation from one floor space to an-
otheroratticspaceasrequiredbymostcodes.Whendoublewall
pipe passes through a framed opening into an attic space, firestop
must be placed into an attic floor as shown in Figure 14, page 12.