3-2
AOC-CTG-i2S Add-on Card User's Guide
Note: For 2U systems, install the I/O bracket to the add-on card before
installing the card inside the system.
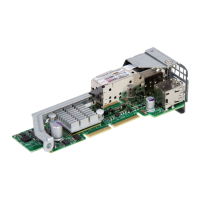
Removing/Installing the IO Bracket
Refer to the illustration at right for the following
instructions on removing/installing the I/O bracket.
To remove the I/O bracket: Loosen and remove
the I/O bracket screw, then gently pull the bracket
away from the add-on card.
To install the I/O bracket: Position the bracket so
that the I/O cut-outs align with the connectors on
the add-on card. Connect the I/O bracket to the
add-on card, making sure that the screw hole in
the PCB bracket and the I/O bracket are aligned.
Secure the bracket to the add-on card using the
I/O bracket screw.
BKT-0056L (Factory installed
MicroLP PCB bracket)
BKT-0061L (Factory
installed I/O bracket)
BKT-0062L (Customer installed
I/O bracket for 2U system)
For 2U System
I/O bracket
PCB
bracket
I/O bracket
screw
For 1U System
3-2 Add-On Card Brackets
The add-on card ships with a PCB bracket that is pre-installed at the factory. For
1U systems, an I/O bracket is also pre-installed on the card. For 2U systems, the
I\O bracket is bundled with the card and must be installed by the customer. See
the drawings below for bracket details.
 Loading...