Do you have a question about the Supermicro SuperServer SYS-821GE-TNHR and is the answer not in the manual?
Describes the manual's purpose and audience for system integrators and technicians.
Locates the tool for securely erasing data from storage devices on the website.
Explains the significance of various warning symbols used throughout the manual.
Provides the primary contact address, phone, fax, and email for Supermicro.
Details contact information for Supermicro's European operations.
Provides contact details for Supermicro's Asia-Pacific regional office.
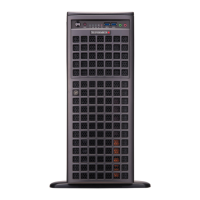
Introduces the SuperServer SYS-821GE-TNHR and its general capabilities.
Details the comprehensive specifications of the server hardware components.
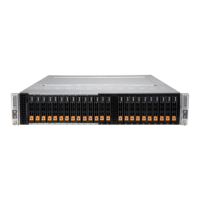
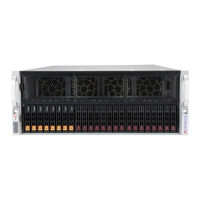
Highlights the main features of the system with a front view illustration.
Illustrates the front panel, identifying key components and drive bay numbering.
Explains the status and activity LEDs for drive carriers.
Describes the function and components of the server's control panel.
Details the purpose of each button and LED on the control panel.
Explains the various states and meanings of the Information LED.
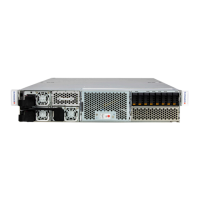
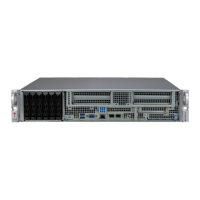
Shows the rear panel of the server, detailing ports and connectivity options.
Lists and describes the components and features visible on the rear of the server.
Details the type, quantity, and connectivity of all PCIe expansion slots.
Describes the I/O ports and the Unit Identifier switch functionality.
Explains the LED indicators for the power supply modules.
Explains the LED indicators for the system's fan modules.
Illustrates the layout of key components on the motherboard tray.
Lists and describes the components found on the motherboard tray.
Identifies specific add-on modules and boards within the motherboard tray.
Shows the configuration of the GPU tray with multiple GPUs installed.
Visually represents the internal connections and data flow between system components.
Provides a detailed diagram of the motherboard, showing component placement.
Offers a concise summary of motherboard jumpers and connectors for easy identification.
Lists and describes various connectors on the motherboard for peripheral and internal connections.
Details the function and status indications of the motherboard's onboard LEDs.
Illustrates the complex internal architecture and data pathways of the motherboard.
Introduces the server installation process and essential safety precautions.
Guides users through inspecting and unpacking the server unit.
Covers preliminary steps and considerations before physical installation.
Details environmental and spatial requirements for server placement.
Outlines safety measures related to rack stability and installation procedures.
Lists important safety considerations for handling and installing the server.
Discusses factors affecting server installation within a rack environment.
Specifies the acceptable temperature range for optimal server operation in a rack.
Explains the importance of proper airflow for server cooling and safe operation.
Addresses potential hazards from uneven distribution of weight within the rack.
Advises on connecting the server to power supply circuitry without overloading circuits.
Emphasizes the necessity of a proper grounding for the server rack and system.
Provides critical safety guidelines for rack mounting to prevent physical injury.
Provides detailed, step-by-step instructions for mounting the server rails in a rack.
Guides users on physically placing and securing the server into the installed rack rails.
Details the essential procedure for safely disconnecting power from the system.
Explains how to gain access to internal components by removing system trays.
Provides instructions for safely detaching and removing the GPU tray.
Provides instructions for safely detaching and removing the motherboard tray.
Provides instructions for safely detaching and removing the PCIe expansion tray.
Introduces the supported CPU types and the process of heatsink installation.
Describes the different Intel Xeon Scalable processor variants supported by the motherboard.
Details processor specifications, carrier types, and associated part numbers.
Outlines the steps for assembling and installing the Processor Heatsink Module (PHM).
Provides detailed instructions for assembling the processor onto its carrier.
Details the procedure for attaching the processor carrier assembly to the heatsink.
Explains how to safely remove the plastic protective cover from the CPU socket.
Provides step-by-step instructions for securing the Processor Heatsink Module (PHM) into the CPU socket.
Details the procedure for safely removing the Processor Heatsink Module (PHM) from the motherboard.
Explains how to detach the processor carrier assembly from the heatsink component.
Describes the steps to carefully remove the processor from its carrier.
Introduces the system's memory support and installation guidelines.
Lists the types, capacities, and speeds of DDR5 memory supported by the motherboard.
Details specific memory configurations based on CPU and DIMM types.
Provides tables for correct memory slot population based on CPU count.
Offers essential rules for balanced memory configuration and installation.
Advises on best practices and potential issues when mixing different DIMM modules.
Provides a detailed, step-by-step guide for inserting memory modules into DIMM slots.
Explains the procedure for safely removing installed memory modules.
Explains the function of the CMOS battery and its importance for system settings.
Details the step-by-step process for replacing the motherboard battery.
Introduces the system's support for NVMe and SATA storage drives.
Provides instructions for installing and replacing hot-swap storage drives.
Illustrates the numbering scheme for the front-accessible drive bays.
Guides users on how to detach and remove a drive carrier from the system.
Provides detailed steps for mounting a storage drive into its carrier.
Briefly describes the location and type of M.2 NVMe SSDs supported by the system.
Explains the process of hot-swapping NVMe drives using the BMC Dashboard for safety.
Details the steps to safely eject an NVMe drive via the BMC interface.
Details the steps to insert a replacement NVMe drive via the BMC interface.
Describes how to monitor NVMe drive temperatures using the BMC Dashboard.
Explains the specific BMC menu paths to view drive temperatures.
Introduces the system's cooling fans and their replacement procedure.
Provides step-by-step instructions for replacing a system cooling fan.
Describes the function and installation of the air shroud for optimized airflow.
Explains the purpose and installation of air blockers for GPU cooling.
Introduces the system's redundant power supply modules.
Explains the status indicators for the power supply units.
Provides step-by-step instructions for replacing a power supply module.
Introduces the system's PCIe expansion card slots and capacity.
Details the specific location, type, and connectivity of each PCIe expansion slot.
Provides instructions for installing expansion cards into the primary PCIe slots.
Details the process for installing expansion cards using riser cards in the rear slots.
Describes the connectors located on the rear of the motherboard.
Introduces the system's main power supply connectors.
Details the 8-pin power connectors for the system and additional devices.
Introduces various headers and connectors on the motherboard.
Describes the 4-pin fan headers used for CPU heatsink fans.
Explains the TPM header for security features and port 80 diagnostics.
Explains the NC-SI connector for network controller sideband interface communication.
Describes the M.2 slots for NVMe SSDs and associated mounting holes.
Details MCIO connectors used for high-speed PCIe storage devices.
Introduces motherboard jumpers and their configuration options.
Details the procedure for clearing the CMOS using the JBT1 jumper.
Describes the various LEDs present on the motherboard.
Explains the BMC LAN LEDs indicating connection speed and activity.
Guides users through installing the Windows operating system.
Details the initial steps for OS installation, including boot device selection.
Explains how to load necessary drivers during Windows setup if storage devices are not detected.
Provides instructions for downloading and installing system drivers and utilities.
Shows the interface used for installing drivers and system tools.
Introduces SuperDoctor 5 software for system monitoring and management.
Displays the graphical interface of SuperDoctor 5 for monitoring system health.
Explains the role of the Baseboard Management Controller (BMC) for remote system management.
Details how to locate the default administrator password for the BMC.
Describes optional power supply modules that can be added to the system.
Details the components and purpose of the optional Network Interface Card (NIC) Kit.
Lists various resources available for troubleshooting and support.
Directs users to the Supermicro website for comprehensive product information and support.
Provides direct links to specific system documentation and pages.
Offers links to frequently asked questions and other support resources.
Continues the list of helpful links for system support and information.
Explains the BMC interface and provides a link to the BMC user guide.
Shows an example of the BMC dashboard interface used for system monitoring.
Outlines general methods and specific steps for diagnosing system issues.
Provides initial steps for troubleshooting unstable operation or boot failures.
Details troubleshooting steps for issues related to system power.
Describes troubleshooting steps for scenarios where no video output is received.
Offers guidance on resolving issues that prevent the system from booting successfully.
Provides steps for diagnosing and resolving memory-related problems.
Explains potential causes for losing CMOS settings and how to address them.
Lists checks to perform when the system experiences instability.
Explains the meaning of audible beep codes during the Power-On Self-Test.
Lists common beep codes and their corresponding error messages for POST diagnostics.
Provides information and links for further BIOS POST code diagnostics.
Explains how to generate and download crash dumps for internal processor errors.
Details how to access and verify the BMC event log for error identification.
Provides instructions for recovering the system's Unified Extensible Firmware Interface (UEFI) BIOS.
Explains the UEFI BIOS architecture and its recovery mechanisms.
Details the process of restoring a corrupted UEFI BIOS image.
Guides users on using a USB device to restore the main BIOS block.
Explains the process of clearing the system's CMOS settings.
Provides step-by-step instructions for clearing the CMOS configuration.
Describes how to reset the Baseboard Management Controller (BMC) to its default state.
Guides users on sourcing legitimate replacement parts for the system.
Provides guidelines for effectively reporting system problems to technical support.
Outlines the necessary steps to take before contacting technical support.
Explains the procedure for obtaining a Return Merchandise Authorization (RMA).
Mentions systems for filing issues related to specific vendors like Intel or Red Hat.
Invites users to provide feedback on the quality and content of the manuals.
Provides comprehensive contact information for various Supermicro departments.
Introduces the purpose and scope of industry-standard safety warnings.
Explains the meaning of the universal danger symbol used in warnings.
General advice to read installation instructions before connecting power.
Warns about ensuring the building's circuit protection device rating is adequate.
Stresses the critical need to disconnect all power sources before accessing the chassis interior.
Warns that only qualified and trained personnel should install or service the equipment.
Warns about the requirement for special tools or access methods for restricted installation areas.
Warns about the explosion hazard from incorrect battery replacement and proper disposal.
Warns to disconnect all power connections when dealing with units having multiple power supplies.
Warns of hazardous voltage or energy present on the backplane during system operation.
States that equipment installation must adhere to all applicable electrical codes.
Warns that product disposal must be handled according to all national laws and regulations.
Warns about dangerous moving parts in fans and keeping fingers/tools away from openings.
Warns to use only provided or designated cables and adapters to prevent malfunctions or fire.
Details the specifications of the supported dual 4th Gen Intel Xeon Scalable processors.
Specifies the Intel PCH C741 chipset used in the system.
Details the BIOS type, size, and interface.
Lists the supported memory types, capacities, speeds, and DIMM slot configurations.
Details the specifications of the HGX H100 8-GPU system.
Lists the types, sizes, and bay counts for supported storage drives.
Details the number and type of PCIe 5.0 expansion slots available.
Lists the available I/O ports, including LAN, USB, and Video.
Specifies the motherboard model and its physical dimensions.
Details the chassis model, form factor, and overall dimensions.
Describes the cooling system, including fans and air management components.
Details the redundant power supply modules, their wattage, and input/output specifications.
Lists the specified operating and non-operating temperature and humidity ranges.
Lists all applicable regulatory standards and certifications for the product.
Details the specific EMC/EMI directives and standards the system complies with.
Lists directives related to environmental compliance, such as RoHS and WEEE.
Lists product safety directives and standards, including UL/CSA certifications.
Provides a specific warning related to perchlorate materials in lithium coin cells.
| Brand | Supermicro |
|---|---|
| Model | SuperServer SYS-821GE-TNHR |
| Category | Server |
| Language | English |