Model: Supreme Plus Revised, August 2008
9
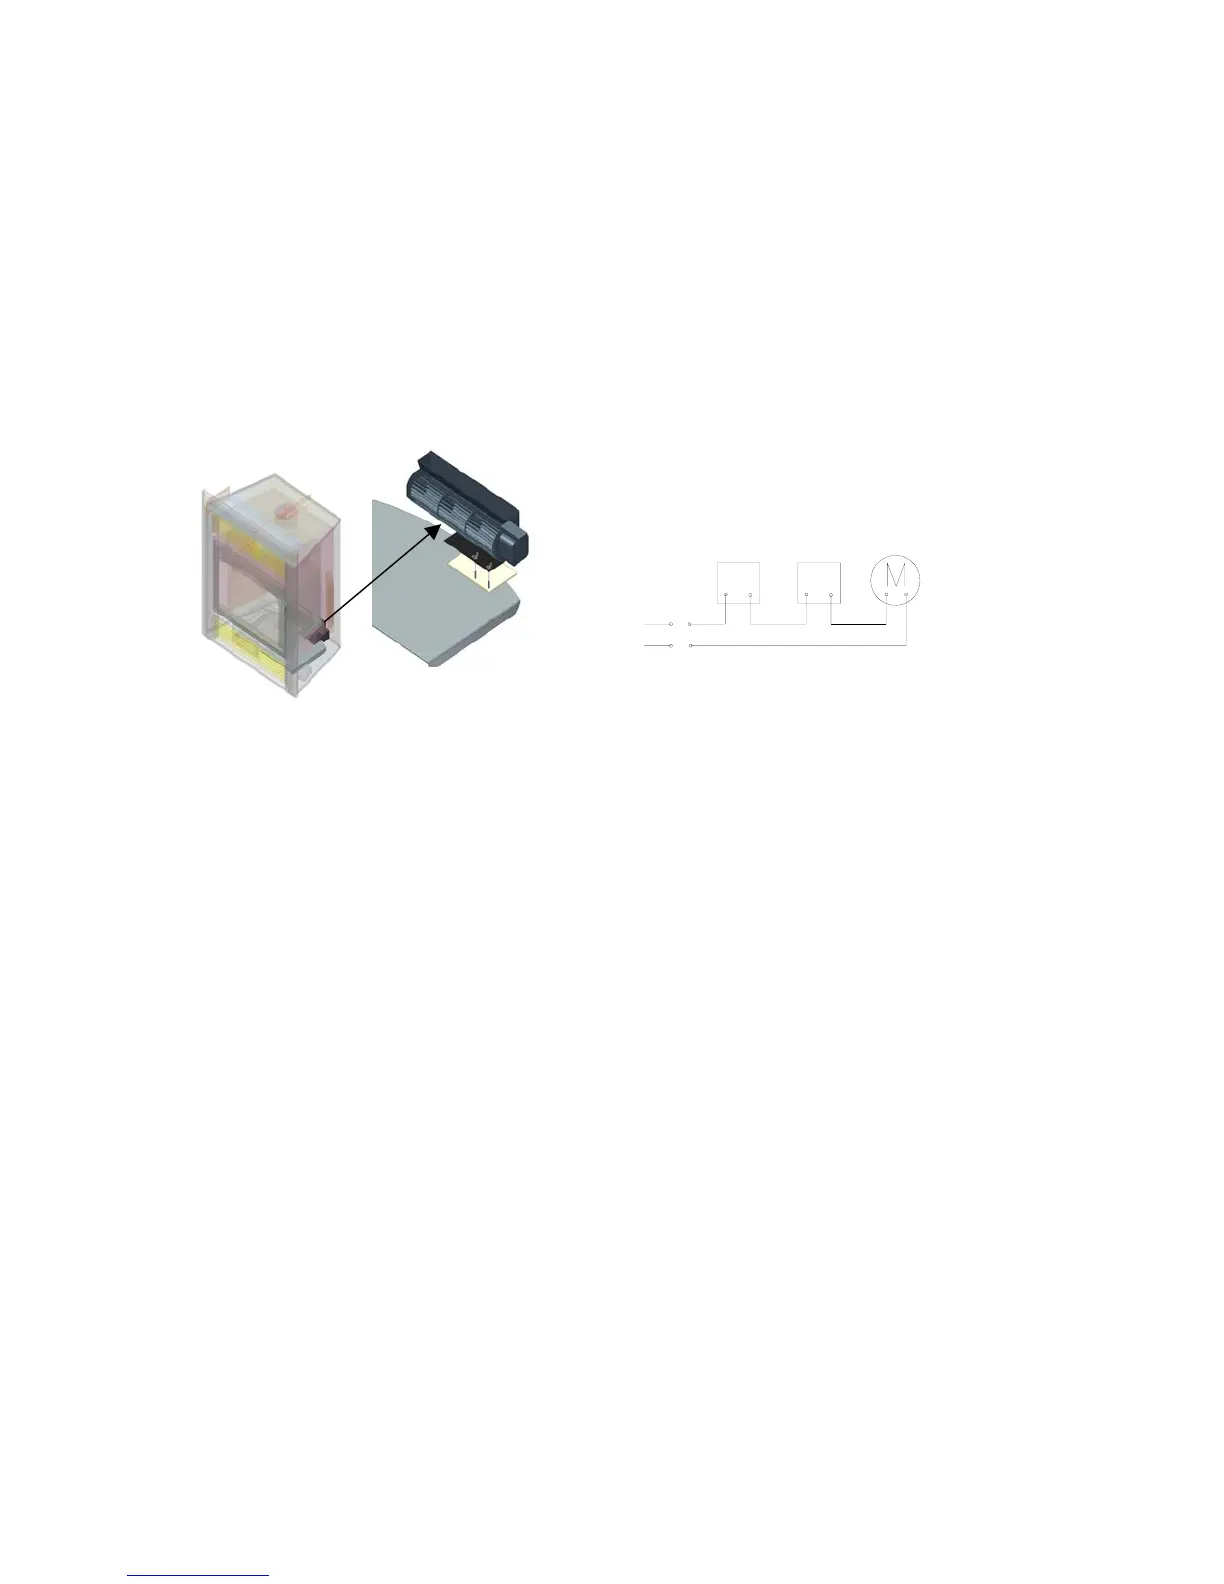
BLOWER KIT INSTALLATION
A blower kit is supplied with the SUPREME PLUS fireplace. It includes a bracket already fixed to the blower.
Do not install a substitute kit as this may result in overheating and risk of fire.
The location of the blower is shown in Figure 8.
To install the blower:
• Pull down the lower louver.
• Make the electrical connections (Figure 9). The electric power must be 115 volts and the speed control must be
installed beside the fireplace at a convenient place.
• Slide the blower behind the ashtray until both holes on the blower bracket fits with both screws welded to the base
support and fix it with both wing nuts.
Note: All electrical connections must be made by a qualified electrician.
Figure 8 Figure 9
HOT DUCT (OPTIONAL)
The air duct system is an optional kit intended to bring warm air to remote area of the same room or to rooms other than
the room where the fireplace is installed. It is possible to install up to three air ducts.
Note that the hot air duct must be insulated and approved for temperatures of at least 210 °F.
WARNINGS:
1. The blower must not be installed in the fireplace casing.
2. When the hot air duct passes through the chase of the fireplace, the minimum distances to combustible materials must
be respected. The duct must be secured to prevent accidental displacement.
3. The minimum distance between the blower and the fireplace is 3 feet.
4. Do not use a speed control for the blower.
Installation
To install the hot air system:
1. Knock on a knockout of the fireplace to clear an opening (Figure 10)
2. Install the fireplace duct connector item #5 on the side of the fireplace. Secure with four screws.
3. Choose the room in which the hot air is desired to flow through. Cut an opening of 6 in. x 7.5 in.
4. Find a suitable location to install the blower (item #2).
5. Install the wall-duct connector (item #7).
6. Install the air duct and secure it with a clamp (item #4).
7. Install the wall grill (item #6).
8. Make the electrical connections (Figure 12). The electric power must be 115 volts.
CAUTION: Only remove the knockouts where the air duct will be installed. Removing a knockout without installing
an air duct could compromise the safety of your fireplace.
WARNING: If the grill is installed near a wall, the grill openings must be positioned in such a way to direct hot air
away from the wall.
Thermodisc
Speed
control
motor
Blower
Neutral
115V line