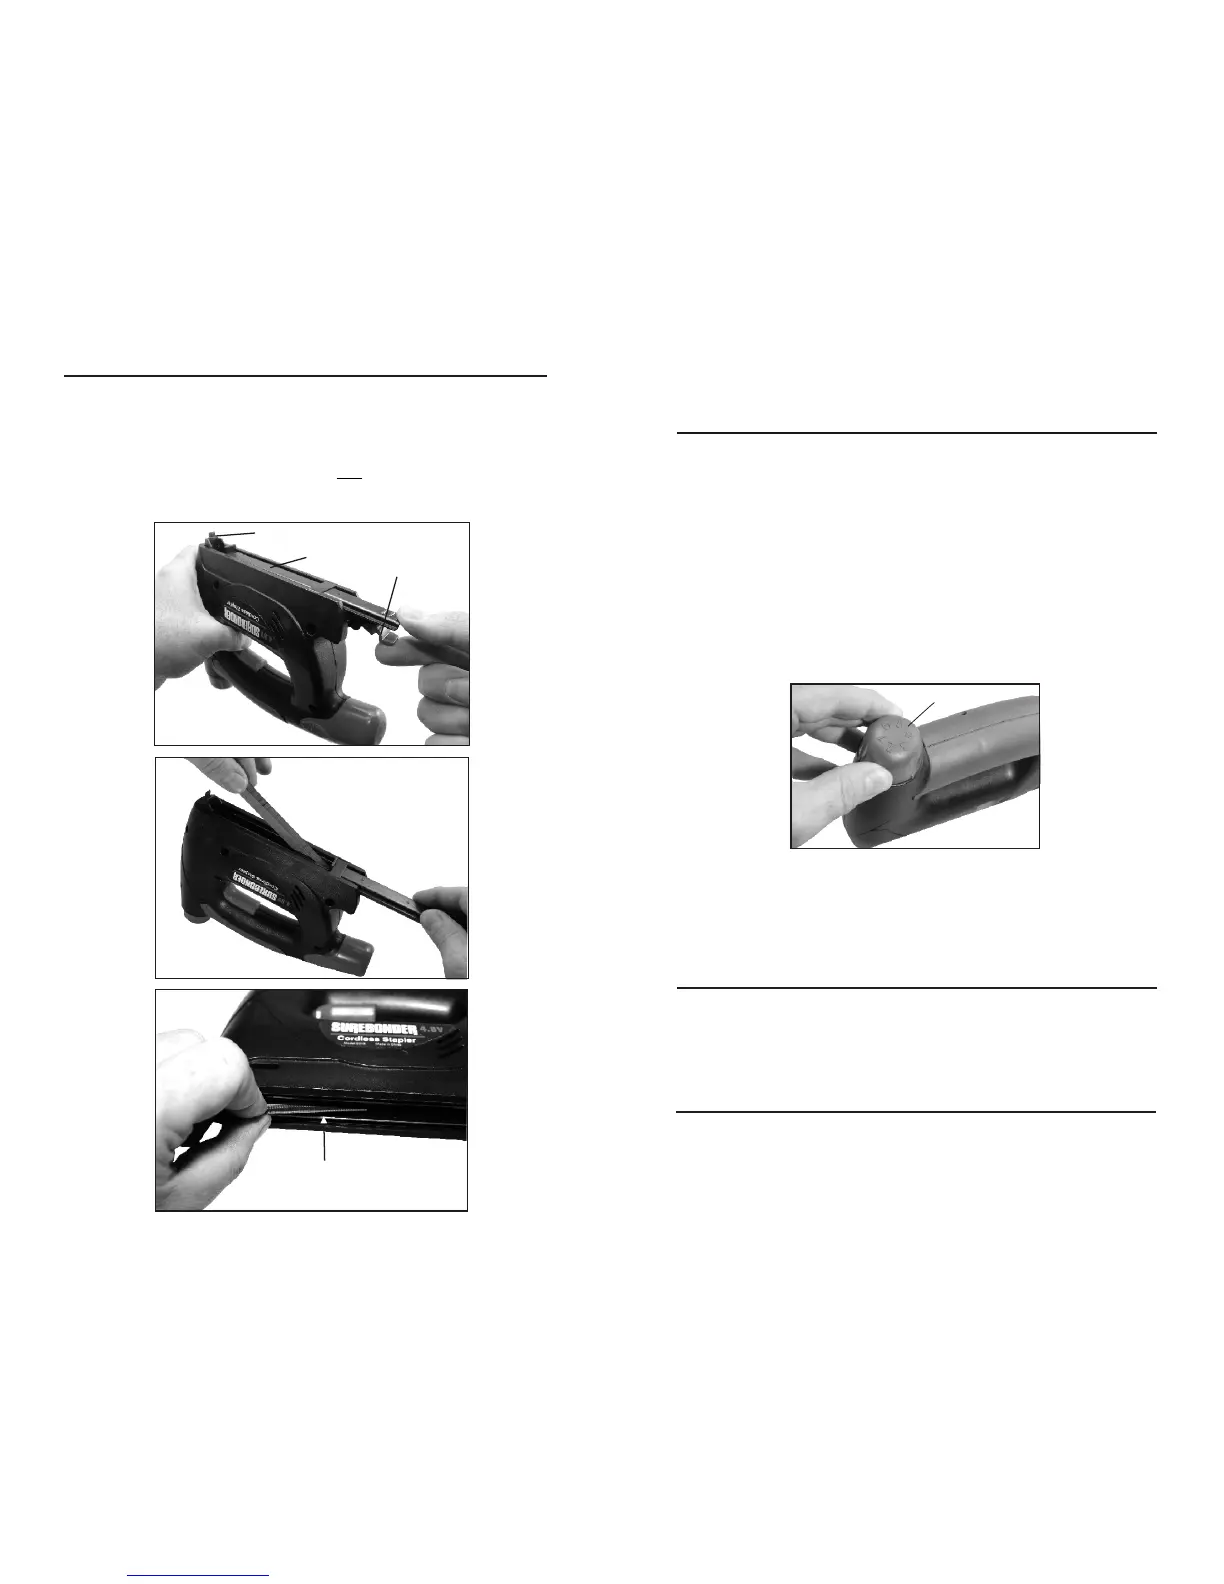
Loading the Stapler
Remove the battery. Turn the stapler upside down.
Squeeze the track release and pull out (Fig. 1). Determine length of staple to be used.
Leg Length should be 2 1/2 times longer than thickness of material being stapled. Drop
staples or nails into staple chamber with points facing up (Fig. 2). Note: When loading
Brad or Pin Nails, they must be in contact with the Load side of Staple Chamber (Fig. 3).
Push track closed. Staple gun WILL NOT close if loaded incorrectly.
Read all instructions. Failure to follow all instructions could result in
electric shock, fire and or serious injury.
Using the stapler
To install the battery: Insert the fully charged battery into the handle until it clicks into
place. If battery will not fit into handle remove, turn 180° then click into place.
To set staple: Firmly push the contact mechanism against the workpiece then press the
trigger and hold until the staple is set.
Use the power knob for adjusting the depth of the stapler. It is possible to preselect the
required power in steps when you turn the knob. The required power depends on the
length of the staples or nails, and on the hardness of the workpiece. The optimal power
knob setting is best determined though practical testing.
Maintenance and Cleaning
For safe and proper working condition, always keep the stapler ventilation slots clean.
If the stapler should fail despite the care taken in manufacturing and testing procedures,
repair should be carried out by a after sales service center for power tools.
Disposal
The stapler accessories and packaging should be sorted for environmental friendly
recycling.
Batteries should not be disposed into household waste, fire or water. They should be
collected, recycled or disposed of in an environmental friendly manner.
Power knob
Fig 1.
Fig 2.
Fig 3.
Track release
Staple chamber
Contact mechanism
Nails must be contact with load side of chamber
Nail load side
Load staples or nails with leg points up
 Loading...