43 - Self-Tapping screws ■
6 - Phillips pan head screws M6 x 10 ■
8 - Phillips pan head screws M6 x 40 ■
2 - Phillips sunken head screws ■
1 - Side burner knob with bezel ■
1 - “AA” battery ■
1 - Caster Swivel assembly wrench ■
3 - Towel bars ■
NOTE: Other hardware required is attached to the grill where
needed.
Tools Needed
# 2 Phillips screwdriver ■
Tape Measure ■
Adjustable wrench ■
Level ■
1/2” ■
wrench or socket
1/4” nut driver or socket ■
Non-corrosive leak detection solution ■
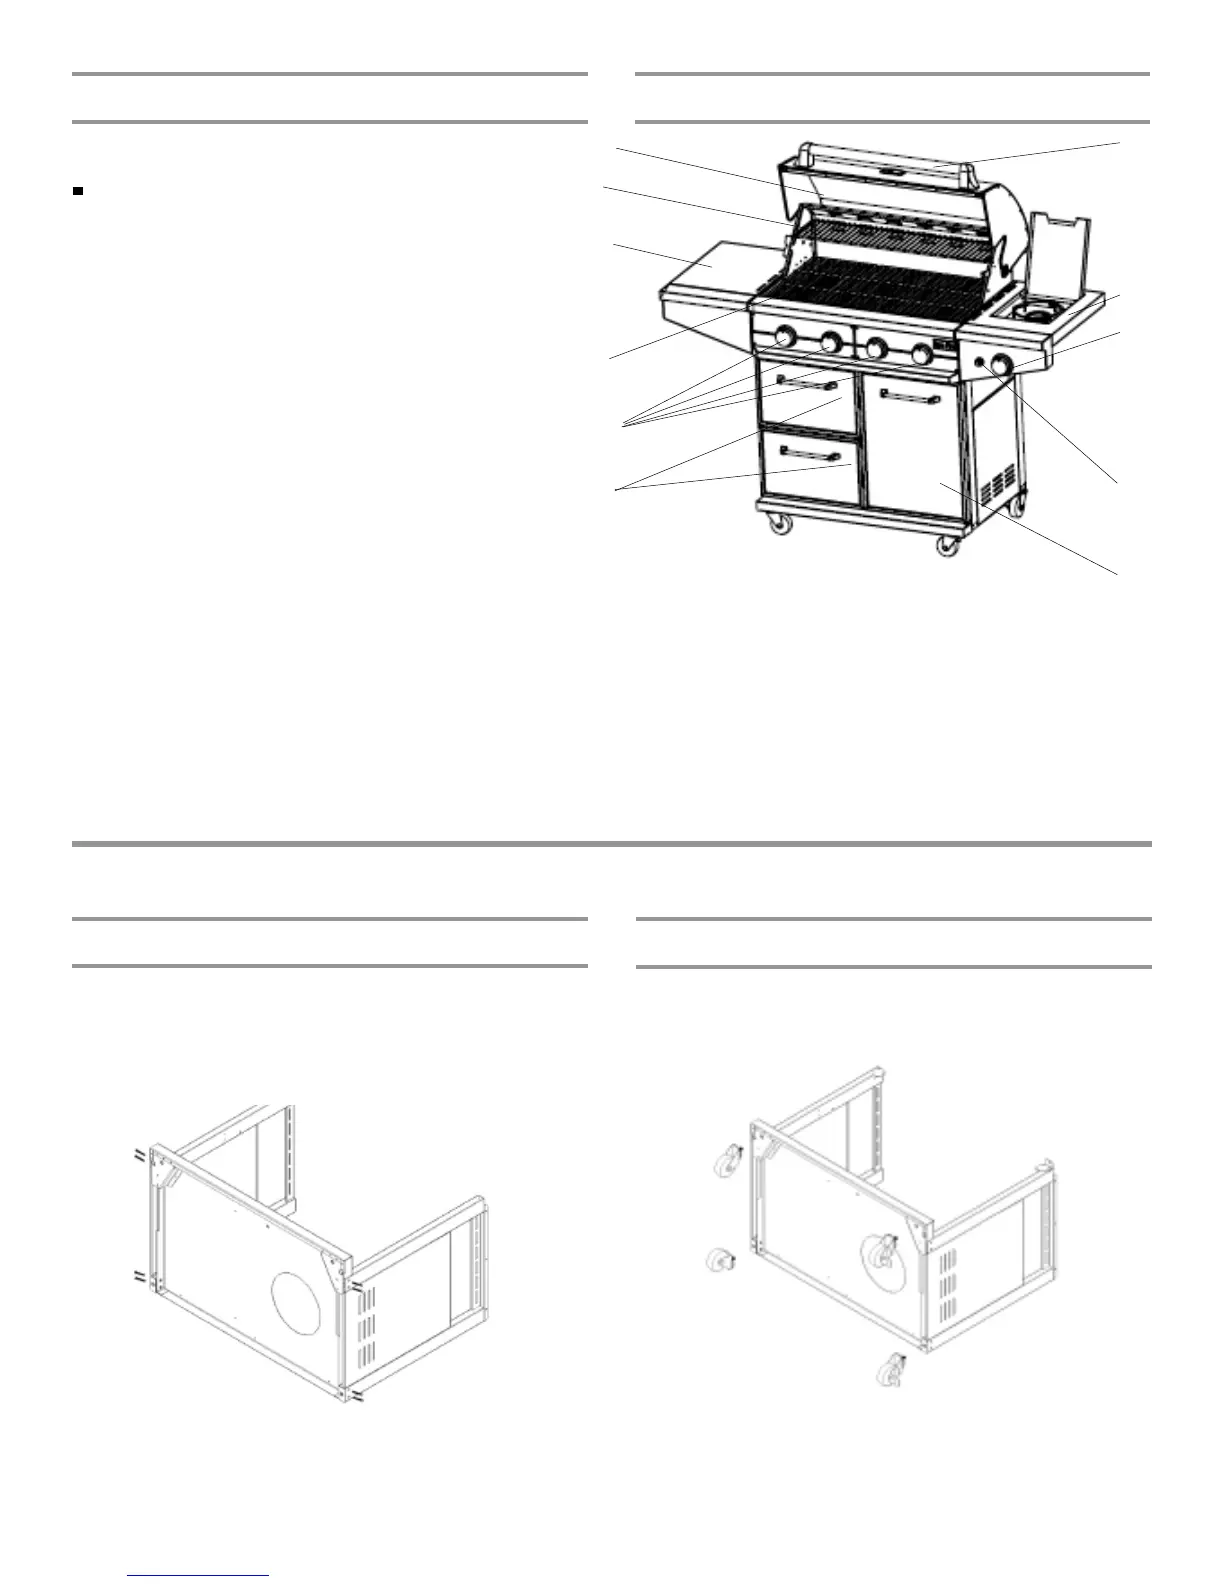
Assembled Grill View
Roll top grill hoodA.
Bread warming rackB.
Grilling/Cooking SurfaceC.
Side ShelfD.
Control knobs: Main E.
burners
DrawersF.
Hood handleG.
Side BurnerH.
Control Knob:Side BurnerI.
Electronic Igniter: main J.
burners and side burner
Cart DoorK.
Assembly Hardware Supplied
A
B
C
D
E
G
H
J
i
K
6
Assemble cart sides
1. Use four (4) Phillips pan head screws M6 x 40 to secure the
cart side left to the cart base.
2. Use four (4) Phillips pan head screws M6 x 40 to secure the
cart side left to the cart base.
Assemble wheels
ASSEMBLY INSTRUCTIONS
1. Use the Caster Swivel assembly wrench to screw the wheels
to the cart base. The Caster Swivels with lock should be on
the right side.
Parts Supplied
Gas pressure regulator/hose assembly set for 11” WCP LP gas ■
(attached to manifold).
Parts Needed
20 lb LP gas fuel tank ■
F