Whilst charging, the LED will ash. Once fully charged, the LED will
remain solid.
It is recommended to charge your remote control after every use.
SAFETY FEATURES – YOUR Ai NAVIGATOR GPS
+
WILL HALT IF ANY OF
THE BELOW CONDITIONS ARE MET
• It becomes out of range of the remote.
• If there is more than 2 minutes between commands from the
remote.
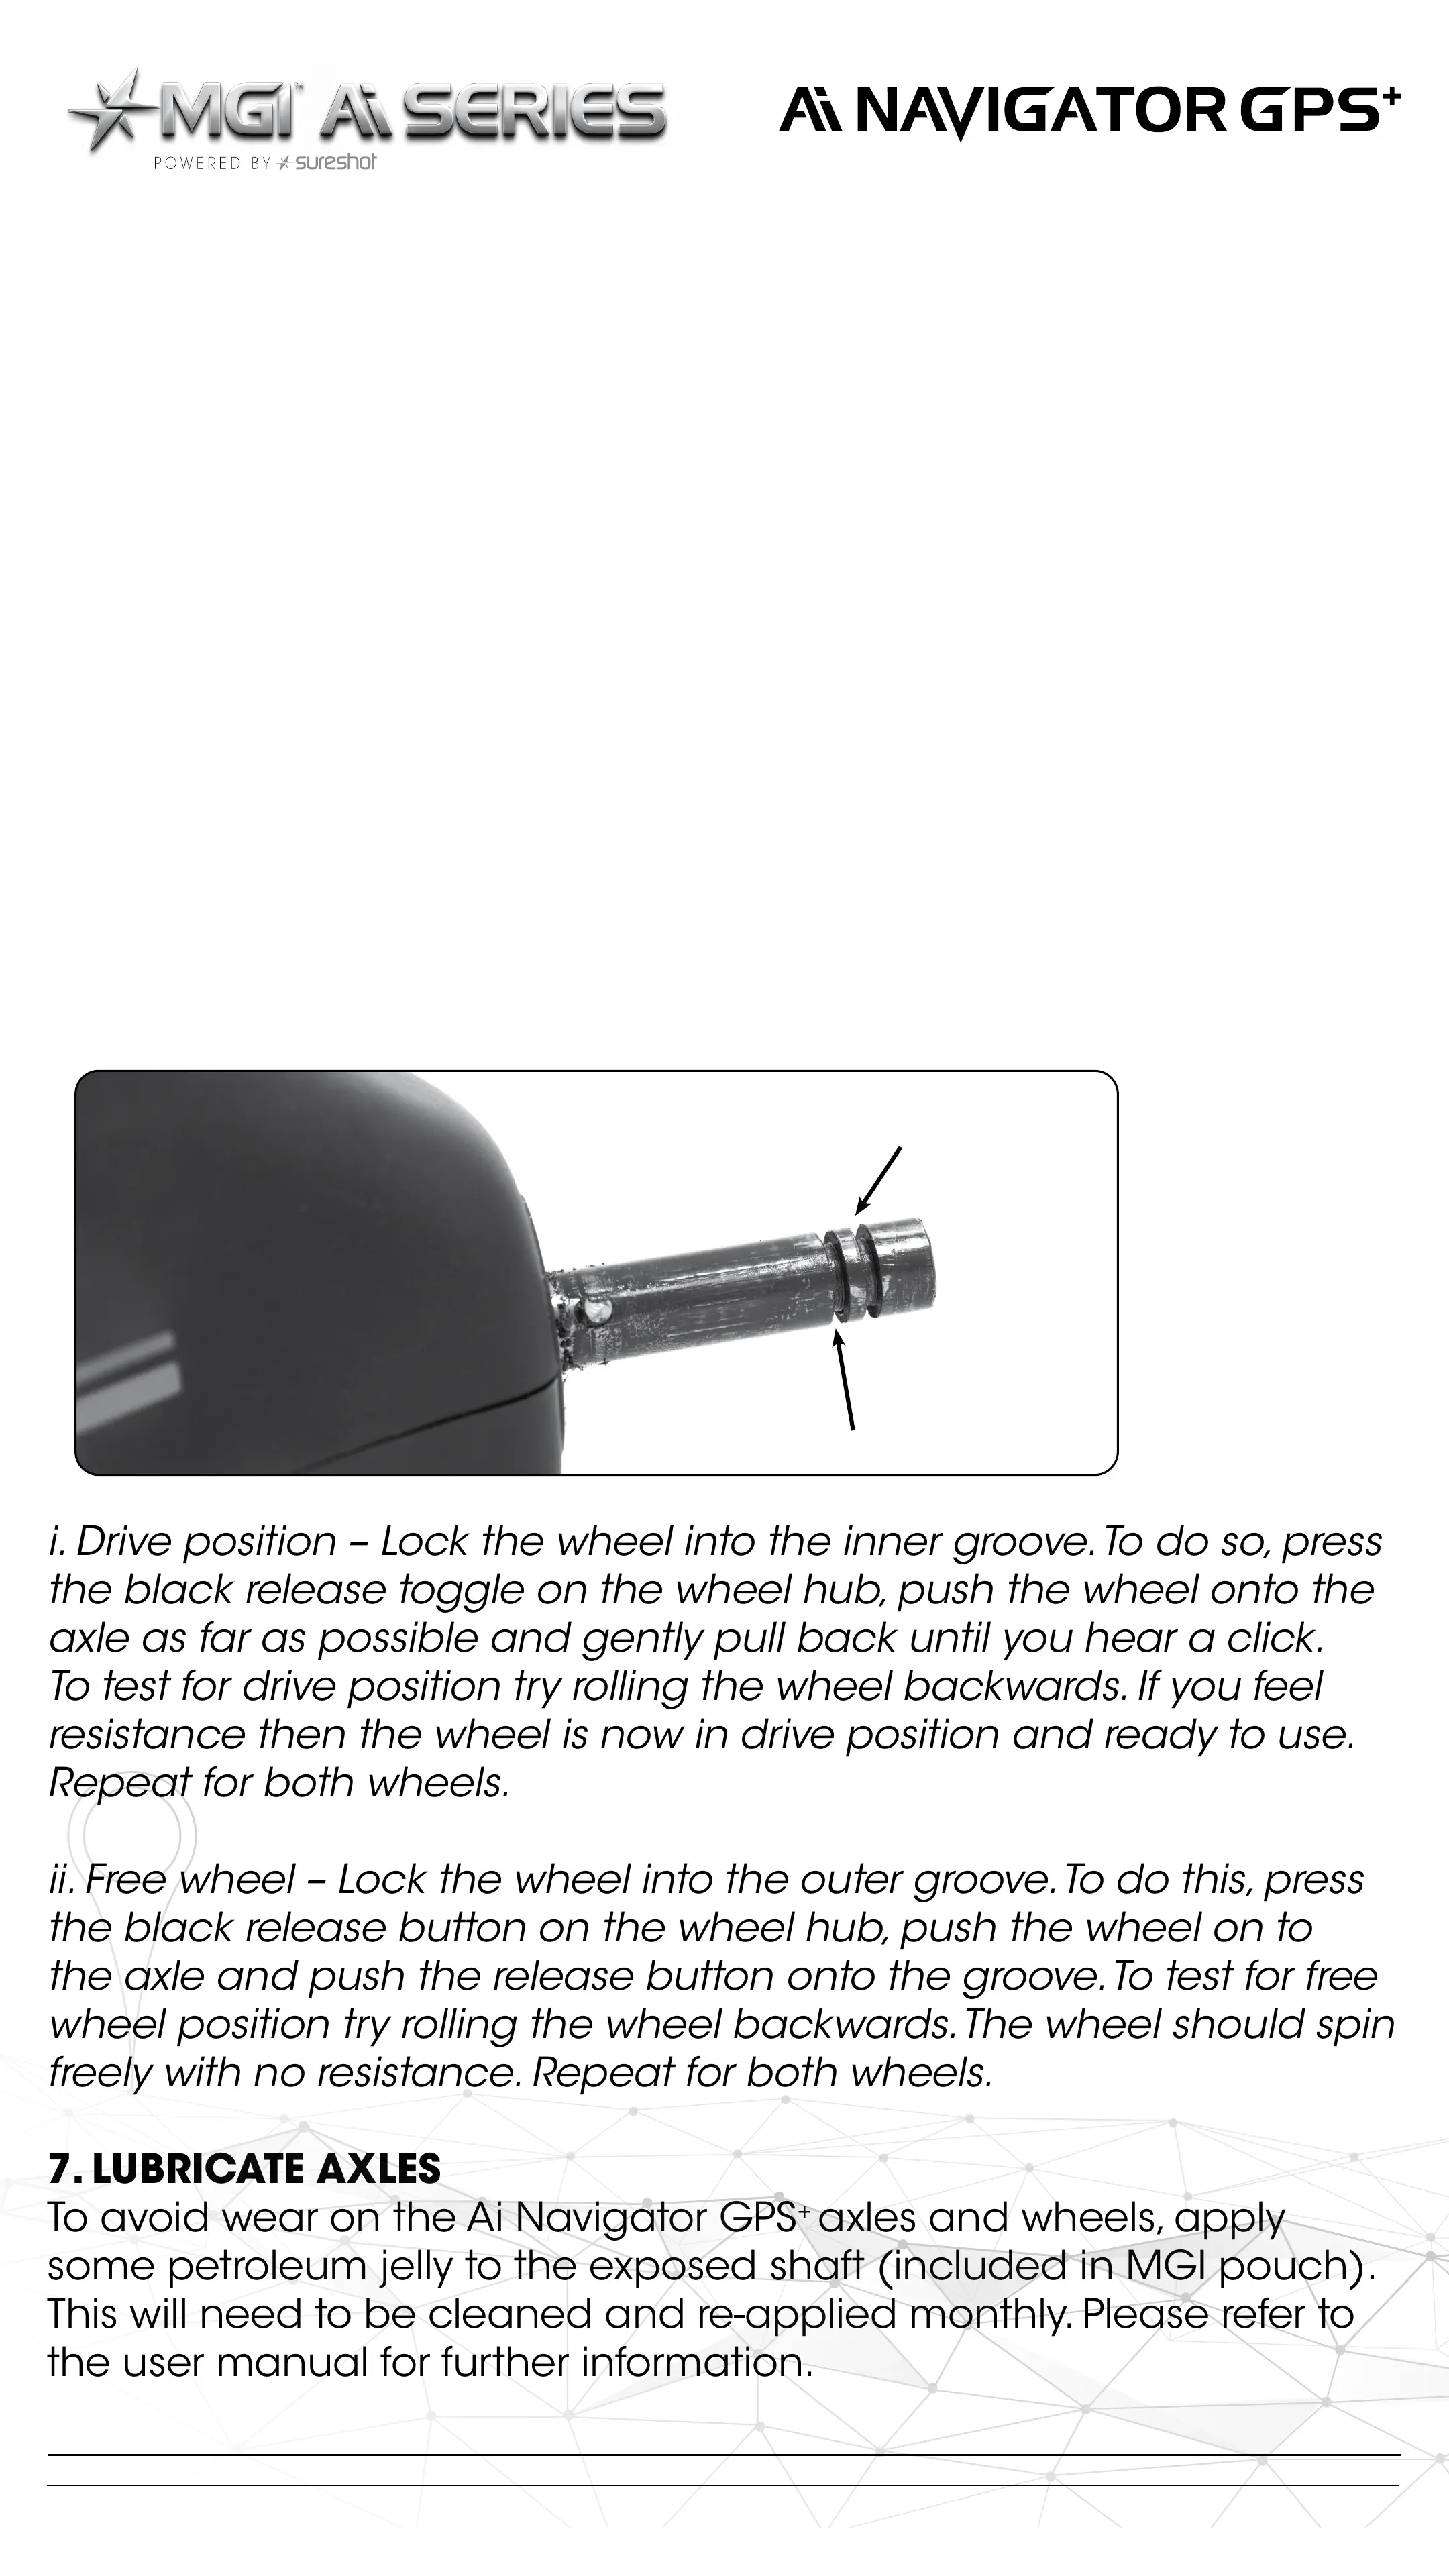
6. REAR WHEEL POSITIONS
The Ai Navigator GPS
+
is designed to allow the rear wheels to be
in two positions. The position is determined by where the wheel is
locked on the axle in either of the two grooves (see picture at the
top of the next page). The drive position is used during the normal
operation of the Ai Navigator GPS
+
. The free wheel position is used to
push the Ai Navigator GPS
+
freely, if required.
i. Drive position – Lock the wheel into the inner groove. To do so, press
the black release toggle on the wheel hub, push the wheel onto the
axle as far as possible and gently pull back until you hear a click.
To test for drive position try rolling the wheel backwards. If you feel
resistance then the wheel is now in drive position and ready to use.
Repeat for both wheels.
ii. Free wheel – Lock the wheel into the outer groove. To do this, press
the black release button on the wheel hub, push the wheel on to
the axle and push the release button onto the groove. To test for free
wheel position try rolling the wheel backwards. The wheel should spin
freely with no resistance. Repeat for both wheels.
7. LUBRICATE AXLES
To avoid wear on the Ai Navigator GPS
+
axles and wheels, apply
some petroleum jelly to the exposed shaft (included in MGI pouch).
This will need to be cleaned and re-applied monthly. Please refer to
the user manual for further information.
Free wheel position
Drive position
MGI Ai NAVIGATOR GPS
+
Quick Start Guide 1.1 6
 Loading...