Questions?
Call 1•800•854•1594
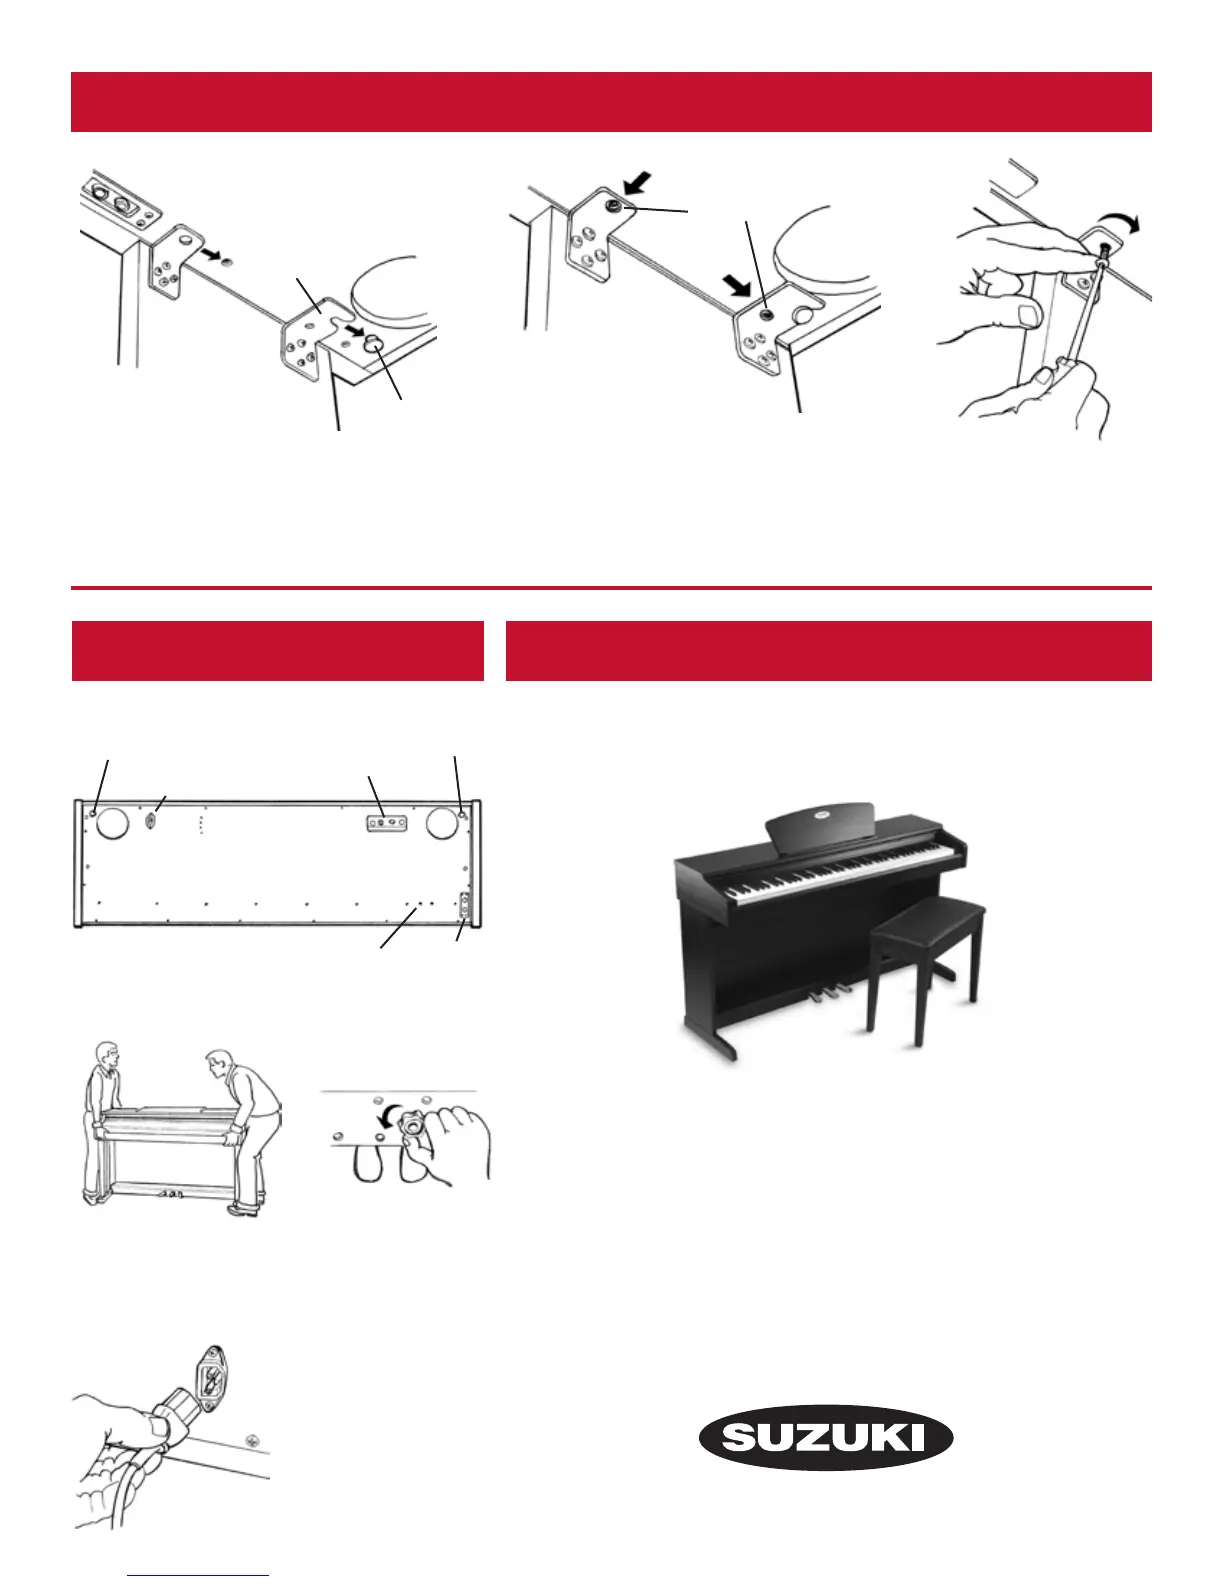
4. at t a c h i n g t h e pi a n o t o t h e St a n D
en j o Y Yo U r ne w SU z U k i Digital pi a n o !
© 2007 Suzuki Corporation
The Name You Know
C. Locate the Power Cord
and plug it into the Receptacle
on the bottom of the Piano.
Plug the Power Cord into an
appropriate wall socket.
D. Refer to the Owner’s
Manual for piano operation.
Stand
Positioning
Pin
5. co n n e c t i o n S & po w e r
Power
Receptacle
BACK
FRONT
Connection
Jacks
Stand
Positioning
Pin
Headphone
Jacks
Holes for Optional
Headphone Clip
A. Piano Bottom Attachments and Connections.
B. Slide the Piano onto the Stand
so the Position Pin is in the Slot of
the Rear Stand Bracket.
C. Align the Bracket Holes
with the Threaded Inserts.
D. Secure the Piano to
the Stand using four 1/2"
Machine Screws (E2).
Rear Stand
Bracket
Piano Bottom
Piano Stand
Position Pin
Bracket
Holes
(continued)
B. Place the piano in its final position then turn the
Pedal Brace Knob down to the firmly touch the floor.
Check and tigthen all screws at this time.


 To Previous Page