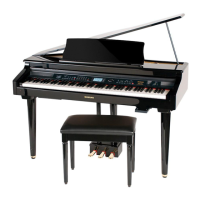
Do you have a question about the Suzuki MDG-100 and is the answer not in the manual?
| Category | Digital Grand Piano |
|---|---|
| Number of keys | 88 |
| Built-in Speakers | Yes |
| MIDI Compatibility | Yes |
| Weight | 60 kg |
| Type | Digital |
| Touch Sensitivity | 3 levels |
| Pedals | Soft, Sostenuto |
| Keys | Scaled Hammer Action Keyboard |
| Polyphony | 64 notes |
Remove the Leg and Pedal Assembly Box (the top box) from the Master Piano Carton.
Instructions on carefully lifting and handling piano parts to avoid scratches.
List of all parts and hardware expected after unwrapping.
Instructions on how to lift the piano out of the master carton using two people.
Guidance on placing the piano upright on a soft, scratch-free surface.
Instructions for removing the protective plastic cover from the piano bottom.
Identification of areas on the piano bottom for leg and pedal assembly.
Procedure for attaching the top piano leg using bolts and washers.
Tightening the bolts used for leg attachment with the provided tool.
Procedure for installing the back piano leg following the same method as the first leg.
Initial steps for the pedal assembly, involving tightening a knob.
Preparing the pedal assembly by locating and attaching support rods.
Connecting the pedal assembly to the piano bottom using threaded lugs and bolts.
Attaching pedal support rods to the piano bottom with brass screws.
Connecting the pedal cable to the pedal cable socket on the piano bottom.
Using a pad to pivot the piano onto its side for left leg installation.
Installing the final left leg while the piano is supported, then lifting.
Adjusting the pedal feet to ensure firm contact with the floor.
Connecting the power cord to the piano and a wall receptacle.
Using plastic clips to neatly attach the pedal cable to the piano.
 Loading...