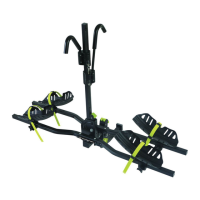
PRODUCT: 64705 Race Ready
INSTALLATION
1. Install the front wheel tray using the Allen screws and nuts
provided (diagram 1).
2. Remove the 4 wing nuts on the front and 2 on the rear crossbar
mounts and take o the lower crossbar clamp (diagram 2).
3. Position the front clamp onto the front crossbar. Attach the
crossbar clamp and loosely attach the 4 wing nuts (diagram 3).
4. Slide the rear crossbar mount into position over the rear
crossbar. Attach the crossbar mount and loosely attach the 2
wing nuts (diagram 3).
5. Move the rack from side to side on the crossbars to ensure it is
perpendicular with the vehicle.
6. nce it is the correct position tighten the 6 wing nuts.
NOTE 1: ou may encounter a situation where you will want to
move the rear wheel strap in front of the rear crossbar mount.
This may be necessary if you have a very short wheel base bicycle
or the crossbars are quite far apart. ou will need to slide the rear
crossbar mount o the back of the rack, then install the wheel
strap on the extrusion followed by replacing the rear crossbar
mount (diagram 4). ou need to remove the two small Allen bolts
that hold on the end cap so that the parts can slide o.
LARGER CROSS BARS
1. Remove the two Allen bolts holding the front crossbar mount
onto the extrusion.
2. Remove the 4 small bolts from the front crossbar mount. (ou
won’t need these).
3. Take the two bolts from the rear mount, plus the two shorter
bolts in the package and install the front mount.
4. Take the two long bolts in the package and put these into the
rear mount plate.
LOADING BIKES
1. Move the ratchet arm forward. Push the ratchet release and
move the ratchet hook assembly to the end of the ratchet arm
(NOTE 1).
2. Put the bike into the wheel trays with the front wheel in the
upswept wheel tray.
3. hile holding the bike rotate the ratchet arm upward towards
the fork crown.
4. Position the hook assembly tight against the fork crown or
front brake of the bike (diagram 5). NOTE: Failing to have the
hook tight against the crown of the fork can cause the bike to
dislodge.
2
1
Installation Instructions