This document describes the Swann Wi-Fi NVR Security Camera, an add-on camera with controllable lights designed for SecureAlert™ Systems.
Function Description:
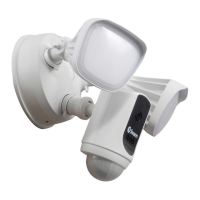
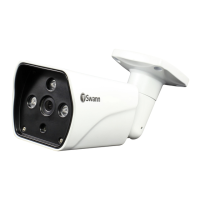
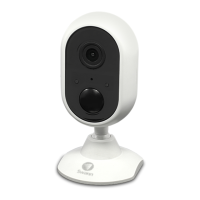
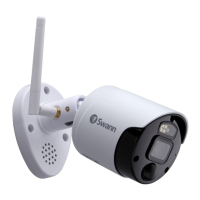
The Swann Wi-Fi NVR Security Camera is a sophisticated surveillance device offering 4K Ultra HD video recording. It integrates a sensor spotlight, a siren, and red & blue flashing lights to deter intruders and provide enhanced security. The camera utilizes True Detect™ Heat & Motion sensing technology, which allows for reliable alerts by distinguishing between significant heat and motion events, thereby reducing false alarms. A key feature is its powerful Night2Day™ color night vision, enabling the camera to capture full-color video even in low-light conditions, providing more detailed and useful footage compared to traditional black and white night vision. The camera is designed to operate effectively in various weather conditions, including rain and snow, ensuring year-round protection. It functions as an add-on camera, meaning it integrates with existing SecureAlert™ Systems and requires an NVR for full functionality, including recording and advanced settings.
Important Technical Specifications:
- Video Resolution: 4K Ultra HD, ensuring high-quality, detailed video footage.
- Detection Technology: True Detect™ Heat & Motion sensing for accurate alerts.
- Night Vision: Night2Day™ color night vision for clear, full-color images in low light.
- Deterrent Features: Sensor spotlight, siren, and red & blue flashing lights.
- Connectivity: Wi-Fi NVR compatibility, functioning as an add-on camera.
- Durability: Designed to work in rain and snow, indicating weather resistance.
- Power: Requires connection to a power adapter and outlet.
- Pairing: Features a pair/reset button for restoring factory default settings and pairing with an NVR.
Usage Features:
- Installation: The camera can be mounted onto a flat surface using provided screws and wall plugs. A mounting template is included to assist with marking screw holes. For wooden surfaces, the camera can be screwed directly; for masonry surfaces (bricks, concrete, etc.), wall plugs are necessary.
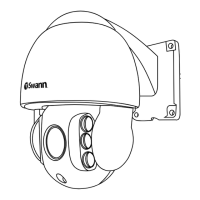
- Aiming and Adjustment: The camera offers flexible aiming capabilities. It features two screws that can be loosened with a Phillips head screwdriver to adjust the camera's orientation, allowing rotation to ensure images are always upright, regardless of the camera's facing direction. Another screw allows for tilting the camera up or down. To pan the camera left or right, a screw can be loosened and then tightened to secure the position.
- Pairing with NVR: To pair the camera with an NVR, users enter Live View mode on the NVR, select an available channel, and press the "Pair" button that appears. A prompt will then instruct the user to press the pair button on the camera itself. This button is typically covered by a cap and needs to be pressed and held for 3 seconds. The camera's IR LEDs will flash during the pairing process, and once successful, the camera's image will appear on the NVR screen.
- Optimal Camera Placement:
- Consider what area needs monitoring and where the best view can be obtained.
- Ensure cables and connections are protected from weather elements.
- Mount the camera at an elevated position to keep it out of harm's way.
- Position the camera close to the area of interest, ideally around 13ft/4m high, looking slightly downwards, to capture details effectively.
- Minimize the amount of sky in the camera's view, as bright daylight sky can darken the foreground of the image.
- Strategically place cameras to cover likely approach paths for potential offenders.
- Run cables inside wall cavities or other protected enclosures, ensuring all wiring and connectors are insulated and protected from moisture.
- Avoid placing cables near live electrical wiring to prevent radio "noise" interference with the camera's signal.
- Configuration: For advanced configurations such as motion detection settings, image adjustments, and other functions, users are directed to consult the manual for their specific NVR model. These manuals can be downloaded from support.swann.com.
Maintenance Features:
- Stability Check: It is crucial to ensure the camera is fixed correctly and stably once fastened in place to prevent accidental dislodgement or damage.
- Power Connection Care: Users are advised never to place any strain on the power connection and/or power adapter to prevent damage and ensure consistent power supply.
- Wiring Integrity: Do not operate the camera if wires and terminals are exposed, as this could pose a safety risk and lead to malfunction.
- Weather Resistance: While the camera is weather and water-resistant, prolonged exposure to adverse conditions like direct sunlight or excessive moisture can eventually damage internal components and affect performance. Proper placement and protection of cables are recommended to extend the camera's lifespan.
- Factory Reset: The pair/reset button can also be used to restore the camera to its factory default settings, which can be useful for troubleshooting or reconfiguring the device.
This camera is designed to be an integral part of a comprehensive security system, providing reliable monitoring and active deterrence capabilities.