EasyManua.ls Logo

Swim'n Play 7” XL User Manual

Default Icon
25 pages
To Next Page IconTo Next Page
Page #1 background imageLoading...
Page #1 background image
ROUND
POOL
ASSEMBLY
INSTRUCTIONS
Part# 420363-21
GENERAL
Installation of this above ground pool is not extremely hard
or confusing, but it is a big job. The secret to installing a
pool so that it will give you years of pleasure is to take the
time to follow instructions and do things right the first time.
Your pool warranty is void if these instructions are not
followed 100%. Read all instructions including accessories
such as filters, pumps, skimmers, decks, etc. prior to
starting. Before you start, check to see that you have the
correct number of parts. Use your parts list which is broken
down by carton. The manufacturer reserves the right to
revise, change, or modify construction of its pools.
NOTE: If a power drill is used during installation,
it should be a variable speed drill used on low
DANGER
DO NOT DIVE OR JUMP
into your pool. Your pool is
approximately 4' deep. It is
not designed for diving
or jumping. If you dive or jump
into your pool you run the risk
of permanent injury or death.
Alert all visitors
and family of
this and point
out all warning
labels supplied.
setting. Torque should not exceed 39 inch pounds.
FAILURE TO COMPLY COULD RESULT IN SCREWS STRIPPING OUT.
ADULT SUPERVISION REQUIRED
KEEP A CLEAR SPACE
OF AT LEAST 4 FEET
AROUND THE POOL
TO ELIMINATE
THE POSSIBILITY
OF CLIMBING
INTO THE POOL
313 REGINA AVENUE, RAHWAY, NEW JERSEY 07065-4891
Phone: (732) 574-1500 • Fax: (732) 574-1551 • www.swimnplay.com • E-mail: info@swimnplay.com
Question and Answer IconNeed help?

Do you have a question about the Swim'n Play 7” XL and is the answer not in the manual?

Swim'n Play 7” XL Specifications

General IconGeneral
BrandSwim'n Play
Model7” XL
CategorySwimming Pool
LanguageEnglish

Summary

DANGER - Safety Warnings

No Diving or Jumping Warning

Strict prohibition against diving or jumping due to shallow water and risk of severe injury or death.

Adult Supervision Requirement

Mandates constant adult supervision for all pool users for safety.

Clear Space for Pool Safety

Maintaining a 4-foot clear zone around the pool to prevent climbing access.

Drowning Prevention Measures

Emphasizes watching children at all times to prevent drowning incidents.

Safety Tips - Rules and Regulations

Drowning Risk

Children are at high risk; drowning is silent and quick, occurring in shallow water.

Diving Risk

Prohibits diving/jumping due to pool depth, preventing broken necks, paralysis, or death.

Electrocution Risk

Keep electrical appliances away from the pool to prevent shock or electrocution.

First Aid Preparedness

Post emergency phone numbers and ensure CPR certification is available.

Local Codes

Electrical Outlet Placement

Electrical outlets must be 5 feet from the pool perimeter, with GFCI protection.

Filter/Pump Placement on Deck

Avoid placing pumps or filters on decks; they could fall into water causing electrocution.

Barrier Requirements

Pool Barrier Height

If pool is less than 48" from ground, a 48" fence or barrier is needed.

Special Care

Pool Levelness

Pool framework must be level within 1 inch to avoid extreme pressure on walls.

Electrical Code Compliance

All electrical components must comply with National Electrical Code (NEC).

Selecting Pool Location

Site Levelness and Solidity

The pool surface must be absolutely level and solid, extending one foot beyond the pool area.

Surface Protection

Protect the pool and liner from surface chemicals or foreign matter with a ground shield.

Proximity to Structures

Do not set up near structures like houses or garages due to diving/jumping risks.

Preparing the Ground

Marking the Pool Area

Use a string tied to a center stake to mark the pool area for leveling.

Ground Leveling Process

Level the ground to the lowest spot, paying attention to the outer circle for the wall.

WARNING - Leveling the Ground

Importance of Ground Leveling

Emphasizes that ground leveling is the most important phase of pool site preparation.

Insert Wall into Bottom Rails

Wall Alignment with Bottom Rails

Align the center line of closure holes in the wall with the center of the bottom plates.

Closing the Wall

Screw and Nut Specification

Use 1/4" x 20 truss head screws and serrated flange nuts to close the pool wall.

Torque Specification

Tighten each screw to 85 inch pounds of torque to prevent failure.

DANGER - Pool Wall Assembly

Correct Fastener Usage

Use all specified screws and nuts for pool wall assembly and do not leave holes open.

Tightening Nuts Properly

Overtightening or undertightening nuts can cause pool failure; ensure snugness and proper turns.

Protect Your Liner

Rechecking Your Work

Ensuring True Roundness

Use the center stake to measure and ensure the pool is completely in true round.

Earth Mound

Material Compression Warning

Do not use materials that compress under pressure for the earth mound; it's crucial for stability.

Thru-the-Wall Skimmer

Skimmer Type Identification

Identify whether you are using a standard or deluxe wide mouth skimmer.

Liner Installation

EZ Hook Liner Installation

Beaded Liner Installation

Installation of Verticals Using the "Snap In" Resin Bottom Plate

Installing Ledges and Placement of Warning Labels

Warning Label Placement

Place specific warning ledges at entry points and opposite entry points as indicated.

Ledge Usage Warning

The top ledge is not designed as a walk-around; warn users not to walk or sit on it.

WARNING

Warning Label Application

Apply four (4) danger labels where easily visible to all pool users.

Do Not Remove Labels

Warning: Do not remove the danger or warning labels under any circumstances.

Pool User Warning Labels

Alerting Pool Users

The manufacturer provides warning signs to prevent diving/jumping; alert all users to these signs.

Preventative Maintenance Tips

WARNING - Corrosion and Deterioration

Metal Frame and Wall Inspection

Check metal parts for corrosion; deterioration can lead to structural failure and injury.

DANGER - Structural Changes

No Post-Assembly Structural Changes

Do not attempt structural changes or disassembly after the pool is assembled and filled.

Life Saving Equipment

Recommended Lifesaving Items

Keep a light, strong pole and a throwing rope with a ring buoy readily available.

How to Keep Water Clear and Healthful

Chlorine and pH Balance

Maintain proper chlorine (0.3-0.6 ppm) and pH (7.2-7.6) for water clarity and comfort.

Hard Water Treatment

For hard water, use alum powder to settle coagulated particles and soften water.

Daily Water Checks

Check chlorine and pH every evening and adjust as needed; re-check before use next day.

Dissolving Chemicals Properly

Always dissolve chemicals thoroughly to prevent clouding, filter issues, or liner damage.
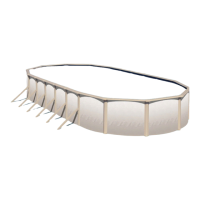
Related product manuals