Installation instructions
6 . Assembling the down rod and the ceiling cover
- Loosen the screw of the ball-joint and remove the pin of the ball-joint, so that it allows the ball-joint to be
disassembled from the down rod.
- Thread the wiring through the ceiling cover, and the down rod.
- Place the down rod on top of the fans motor housing and align the holes.
- Insert the pin through the extension rod (make sure the wires are not damaged) and insert the security pin.
- Reassemble the ball-joint and ensure proper installation of the ball-joint pin and the ball-joint screw.
5. Installing the ceiling fan at an angle
- This fan can be installed at a ceiling slope of up to 15 degrees.
Down rod
Fan motor
Pin
Ceiling cover
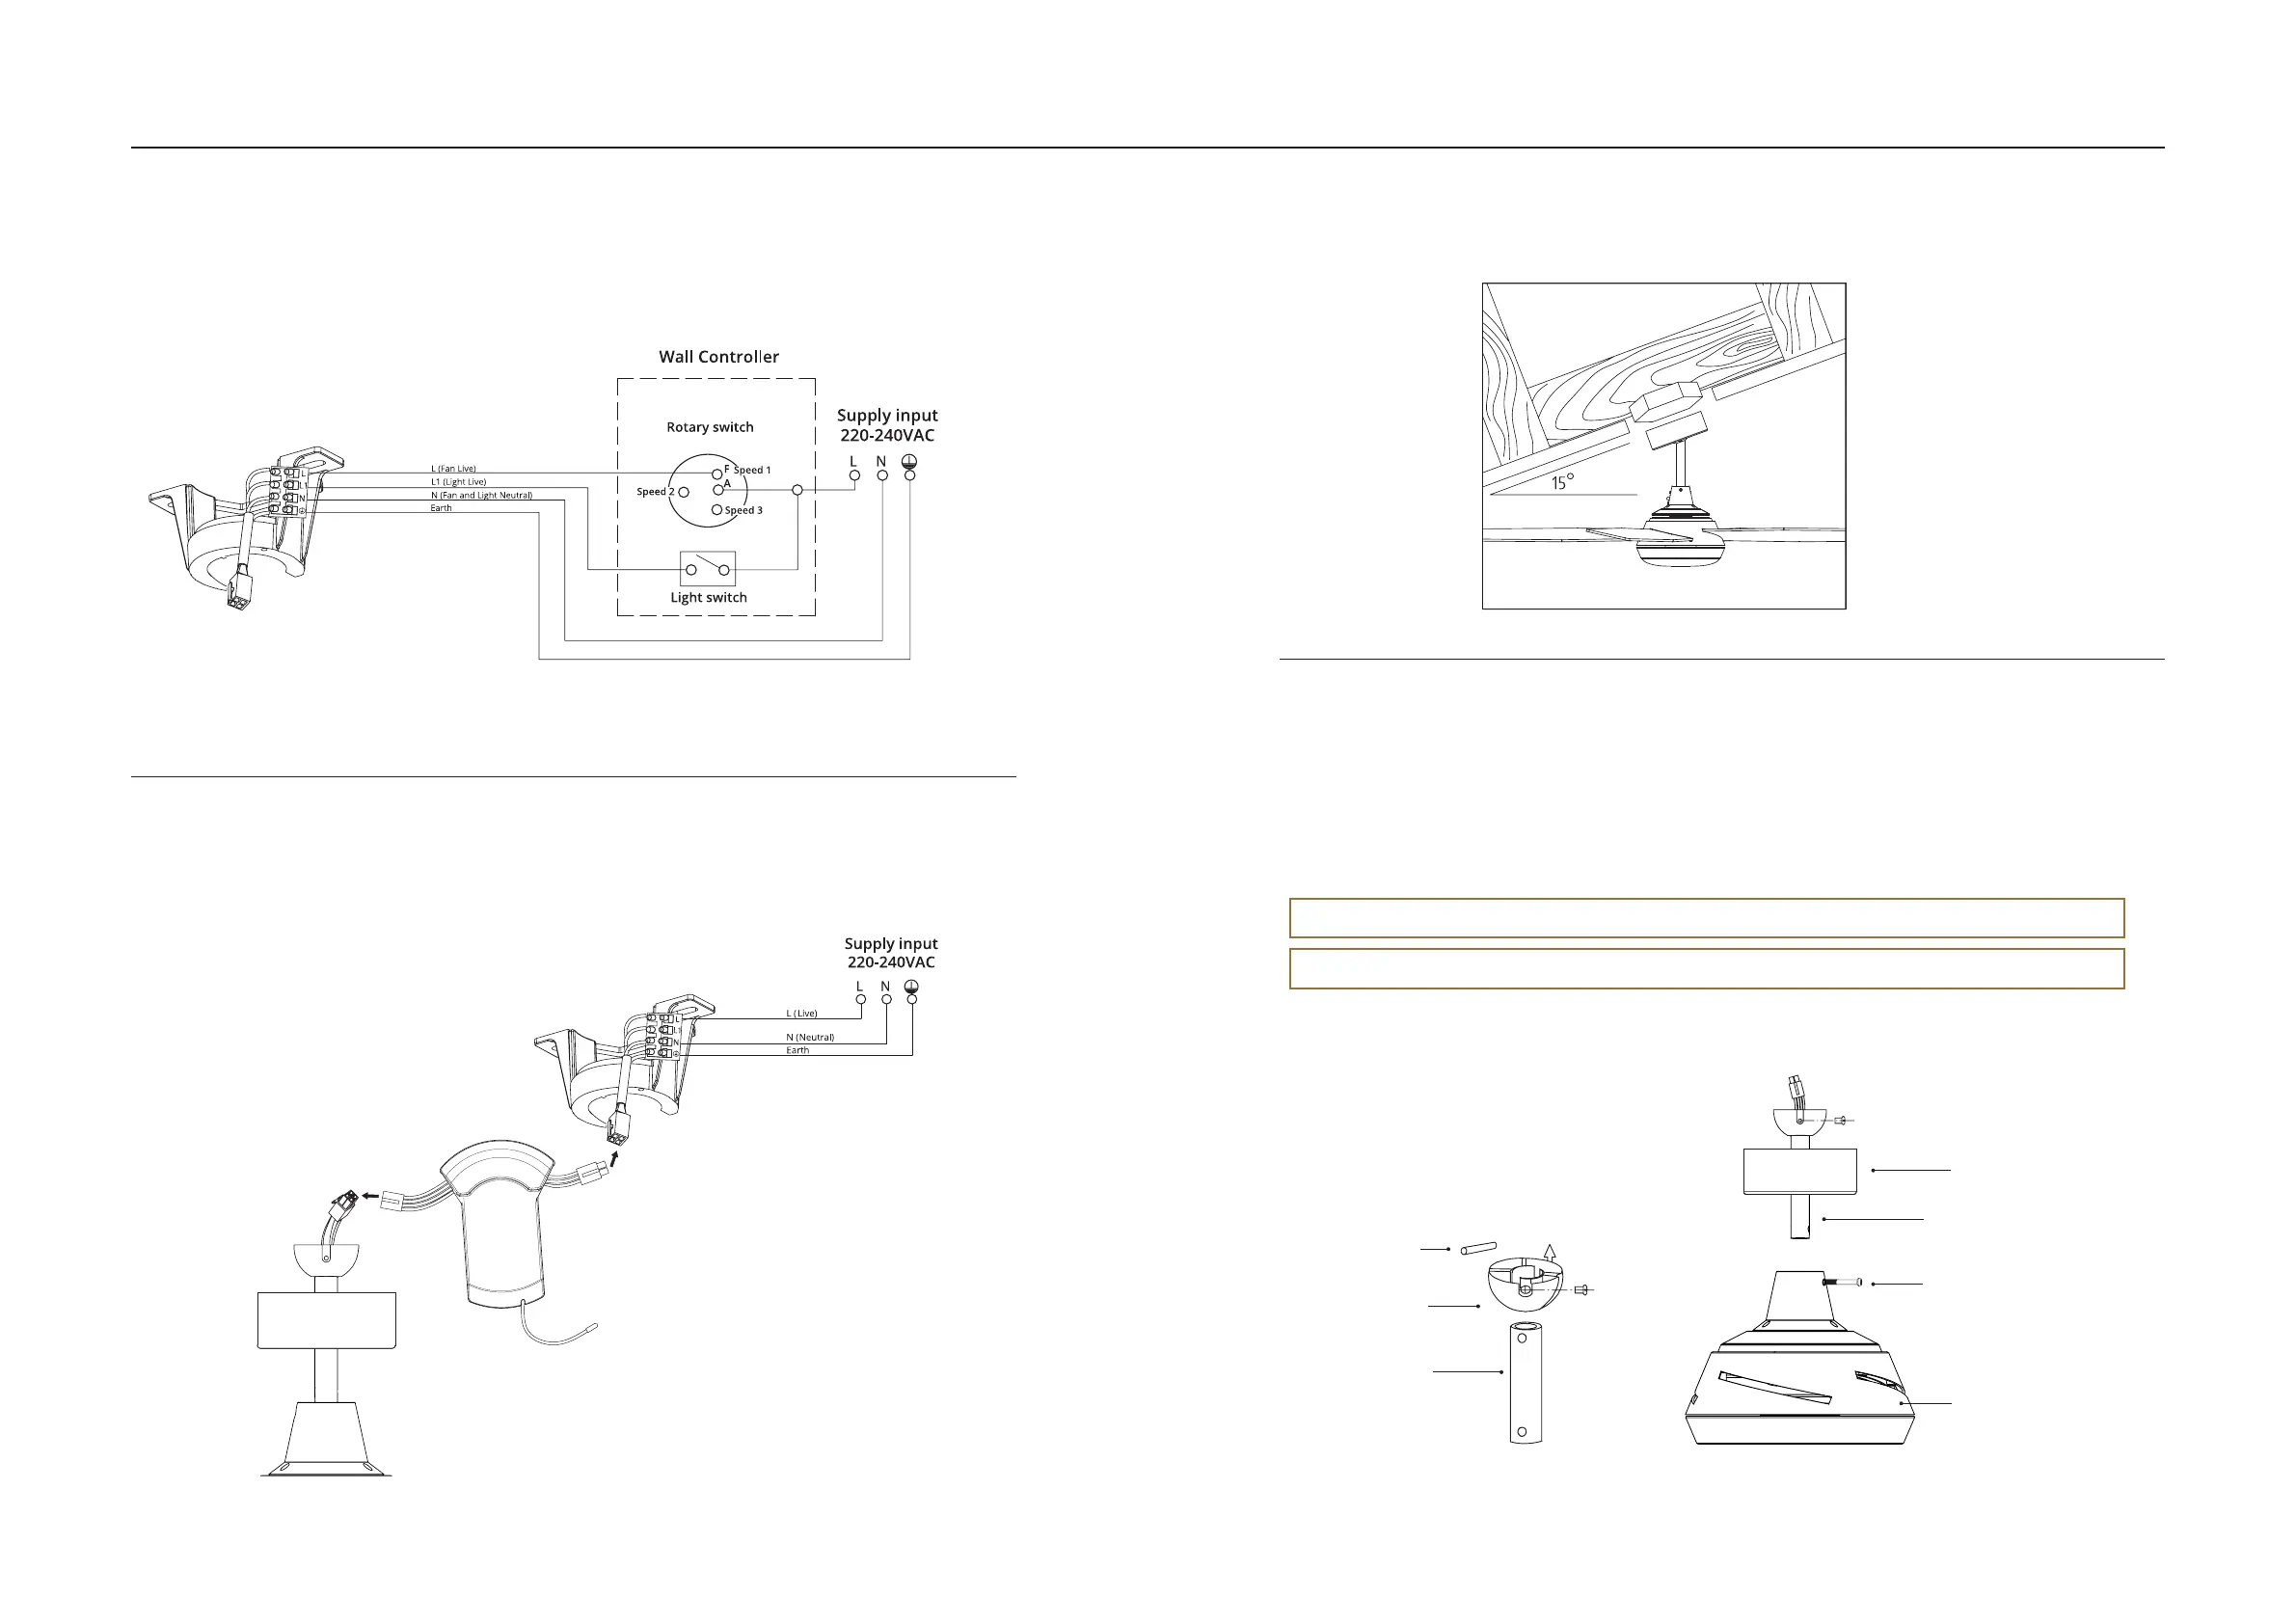
3. Mains Connection
- Connect the mains supply 220-240V to the terminal block in accordance with the markings.
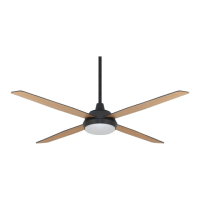
4. Mains Connection with remote control (Remote kit sold separately)
- Connect the mains supply 220-240V to the terminal block in accordance with the markings.
Ball-joint
Ball-joint pin
Down rod
Attention! Perform the assembly of the down rod and the upper cover with manual and non-electric tools.
Attention! It is mandatory to tighten the 2 screws of the down rod to the fan motor housing.
7
SWING MARBLE
Fan Installation Instructions | Version 1.22
6