2
4
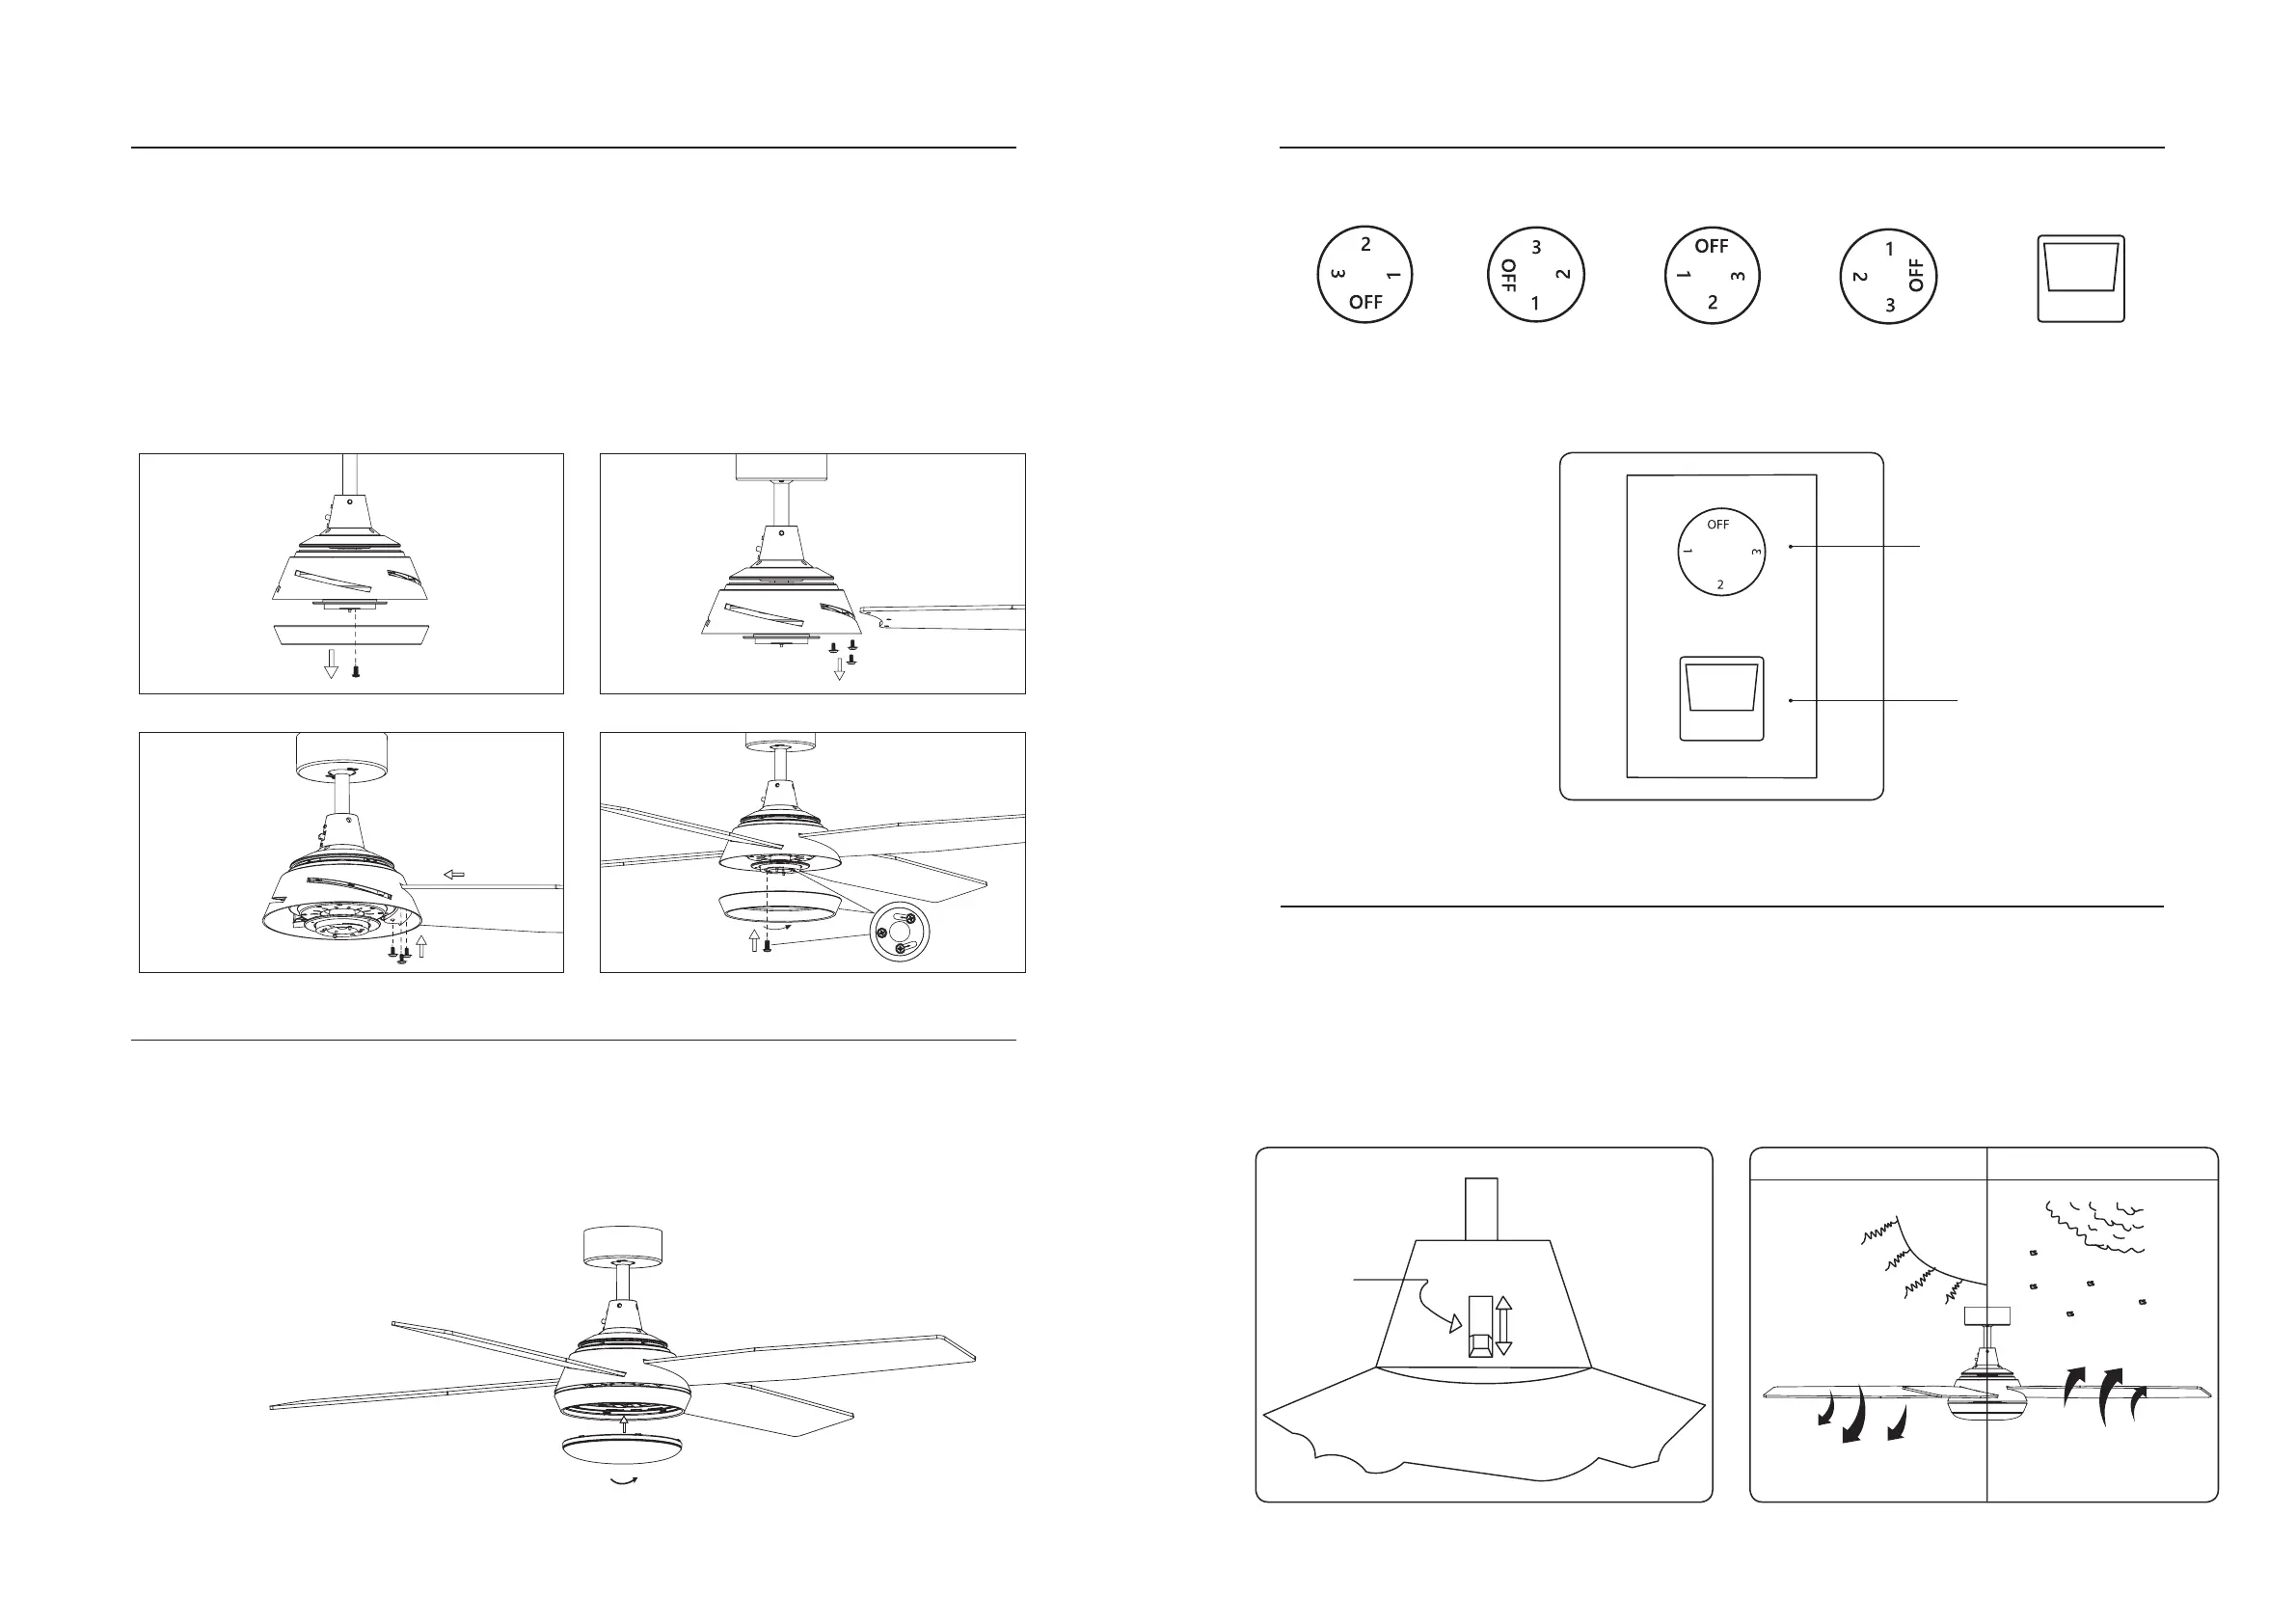
Installation instructions
11. Installing the light fitting
- Insert and rotate the light fitting counterclockwise to lock in place.
10. Fitting the blades
- Loosen the screws from the light base and remove the light base from the fan motor (Figure 1).
- Remove the 3 blade screws from the fan motor (Figure 2).
- Insert the blade through the slots on the side of the fan motor.
- Insert the 3 screws through the blade and secure them to the motor. (Figure 3).
- Repeat this securing process for all other blades.
-Put the light base back in place and tighten the screws on the light base. (Figure 4).
1
3
Your ceiling fan can operate in either summer or winter mode.
Summer mode - The reverse switch should be in the SUMMER position to make the fan rotate in a clockwise direction. The
airflow will be directed downwards, for cooling in summer.
Winter mode - The reverse switch should be in the WINTER position to make the fan rotate in a counter clockwise direction.
The airflow will be directed upwards assisting in the circulation of warm air, for energy conservation in winter.
Functions and operation of the wall controller
Setting fan direction for summer and winter
OFF position-
Fan off
Position 1-
High fan speed
Position 2-
Medium fan speed
Position 3-
Low fan speed
Toggle switch –
Light On/Off
Fan speed rotary switch
Light toggle switch
Winter
Winter
Summer
Downwards airflow
Clockwise rotation Counter clockwise rotation
Upwards airflow
Summer
Reverse
switch
11
SWING MARBLE
Fan Installation Instructions | Version 1.22
10