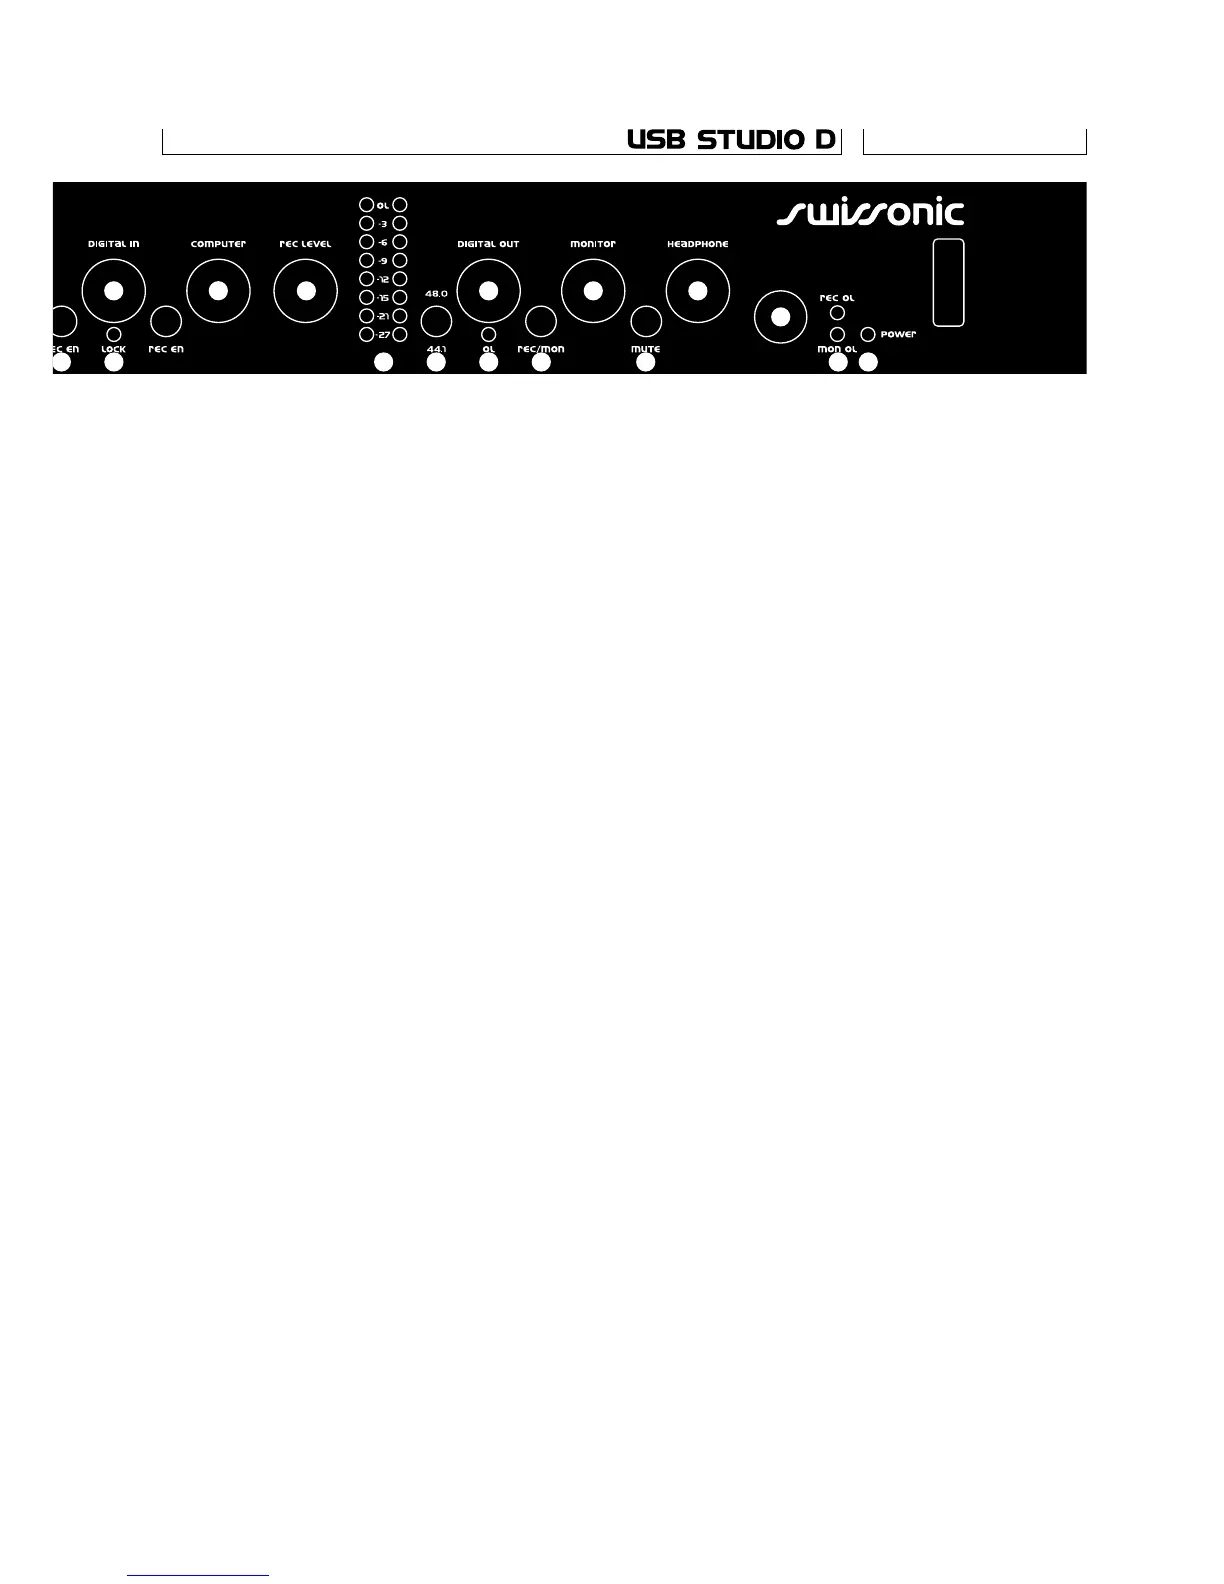
10 Record level pot. Adjusts the level of the signal
going to the computer via the USB bus interface.
The actual level is shown on the led bar next.
11 Recording level led bar. A peak level meter of the
signal that is recorded through the USB interface.
The red Led is only 1dB below clipping,
so it should never light, or distortion will occur.
12 Digital out level. Adjusts the level of the
signal going to the digital out interface.
13 Sample rate selector for digital output. Selects
the sample rate of the digital output when the
unit is not locked to a S/PDIF source. When
the unit is locked to a S/PDIF source, the digital
output will run at the same rate as the input.
14 Digital out overload Led. This Led lights when
the peak level at the digital output is less that
6 dB below clipping. So, it should only be allowed
to light briefly during the loudest transients.
15 Digital out source switch. This switch sets
whether the digital output is taken from the
record (switch out) or the monitor bus (switch in).
16 Monitor level pot. Adjusts the level of the
signal at the monitor output jacks on the back.
17 Monitor mute switch. Mutes the monitor
output when pressed in.
18 Headphone level pot. Adjusts the level
at the headphone output next.
19 Headphone jack. The headphone signal is taken
from the monitor bus. The output is capable of
pretty high levels, so be careful.
20 Record and monitor bus overload leds. These
Leds show when the level of the respective
busses is dangerously close to clipping (less
than 6dB headroom). If these light, one of the
inputs’ level pots should be turned down.
21 Power switch and Led.
7
8 11
9
10 12
13 14 15
16
17
18
19
20 217
6
 Loading...