Usage
1 Power supply
S-2070 accepts three ways of power supply: 1. By special slim battery S-8040; 2. By various standard DV camera
batteries; 3. By DC cable.
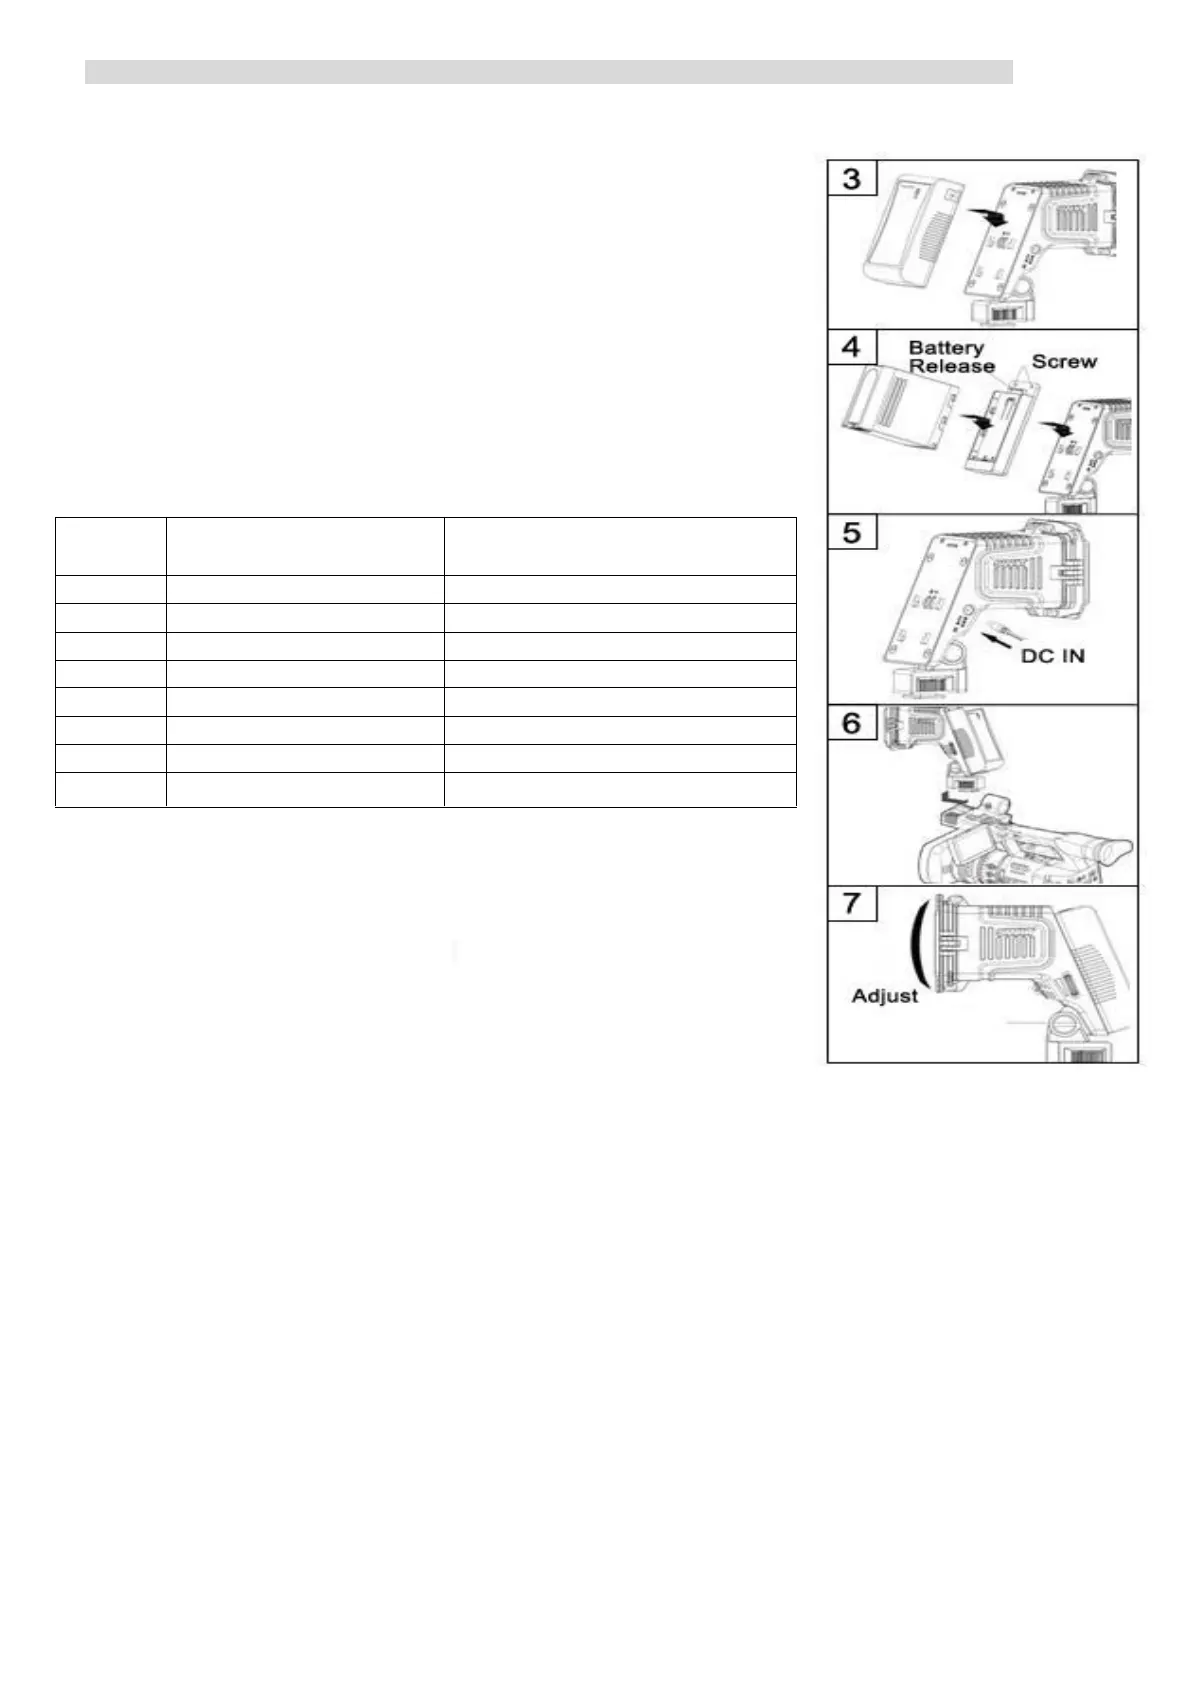
● By special slim battery S-8040 (Optional purchase)
Make sure there’s no power lead connected into DC-IN socket and the light is
switched off (turn the switch to “O”). Align a fully charged S-8040 battery to the DV
mount slot to the same side, and press tightly in. Slide the battery downward to snap
together. See Fig 3.
● By various standard DV camera batteries
① Align the S-7004 series battery plate to the DV mount slot to the same side,
and press tightly in. Slide S-7004 downward to snap together.
See Fig 4.
② Fix the DV mount with two screws.
③ Make sure the light is switched off (turn the switch to “O”). Mount a
fully charged battery to the S-7004 mount. See Fig 4.
Remark: Select a compatible S-7004 battery plate to match your DV battery:
● By DC cable
① Make sure the light is switched off (turn the switch to “O”). Plug S-7104
(Optional) into the DC-IN port of S-2070 and get power from D-tap power output
sockets, such as batteries, battery plates. You can also select SWIT pole-tap to pole-
tap DC cable S-7108 (Optional)) to get power from pole-tap DC adaptors.
② For third-party DC cables, please make sure the DC connector is 5.5/2.1mm
pole and input voltage should be 6-17V; and polarity inner positive, outer negative.
See Fig 5.
2 Fix the LED light to the camera
● By Cold shoe
① Anticlockwise revolve the fasten knob, till the screw bolt is back into the cold shoe slice.
② Align the cold shoe slice with the cold shoe mount on the camera handle.
③ Clockwise revolve the fasten knob to install the light onto the camera.
● By 1/4” screw mount
① Clockwise revolve the fasten knob, till the screw bolt is out of the cold shoe slice.
② Align the screw bolt with the 1/4” screw thread on the camera handle.
③ Continuously clockwise revolve the fasten knob to install the light onto the camera.
④
3 Adjust the angle of the light:
Hold the light, and adjust the light upward or downward. See Fig 7.
4. Open barn doors and filters:
Open the barn doors and filters to about 45°. See Fig 1
5. Switch on: Turn the switch to “I”.
6. Adjust the illuminance:
Adjust the illuminance from 10% to 100% by the dimmer knob.
7. Adjust color temperature:
Output 5600K light by using 5600K filter (See Fig1 -①)
Output 3200K light by using 3200K filter (See Fig1 –③)
 Loading...