This manual describes the Swytch LED Display, a component used to control the power and settings of a Swytch electric bike conversion kit.
Function Description
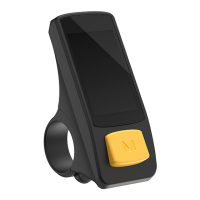
The Swytch LED Display serves as the primary interface for controlling the Swytch Kit's power and accessing its settings. It features three main buttons: a '+' button, an On/Off button, and a '-' button. These buttons allow users to change values, make selections, power the kit on or off, and navigate through various settings. The display also provides visual feedback through a battery level indicator and power level lights.
Usage Features
Basic Operation:
- '+' Button: Used for changing values or making selections in an upward direction.
- '-' Button: Used for changing values or making selections in a downward direction.
- On/Off Button: Used for powering the kit on or off, and for making selections or confirming values within the settings menu.
Walk Mode:
- To activate walk mode, hold down the '-' button. This feature is useful for testing the Kit, as it will cause the wheel to spin forward.
Accessing Settings:
- Enter Settings: Press and hold both the '+' and '-' buttons simultaneously to access the settings menu. Once activated, the battery indicator lights will start flashing.
- Navigate Settings: In the settings mode, use the '+' and '-' buttons to change the values of the selected setting.
- Confirm and Move On: Press the On/Off button once to confirm the current value and move to the next setting option.
- Exit Settings: To exit the settings menu and save the new values, hold down the On/Off button.
Settings Options:
The display allows adjustment of several key settings:
- Factory Reset:
- This setting allows the user to reset the device to its factory default configuration.
- To perform a reset, navigate to the "Factory reset" option. When "Yes" is highlighted, press the On/Off button to confirm the reset. The display will show "Yes" or "No" options.
- Top Speed:
- This setting controls the maximum assisted speed of the eBike.
- The default setting is 15kph, which is the legal limit for eBikes in the UK/EU.
- Available options include:
- 33kph (USA LIMIT)
- 28kph
- 25kph (EU & UK LIMIT)
- 20kph
- 15kph
- Wheel Size:
- This setting must be adjusted to match the actual wheel size of your bicycle before your first ride to ensure accurate speed and distance readings.
- Available options include:
- 28 inch
- 26 inch
- 24 inch
- 20 inch
- 16 inch
Visual Indicators:
- Battery Level: A series of bars indicates the current charge level of the battery.
- Power Level: A series of lights indicates the current power assistance level. In settings mode, these lights also indicate which value is currently selected.
- Flashing Battery Light: When in settings mode, a flashing battery light indicates the specific setting that is currently being adjusted.
Installation
The Swytch LED Display is designed for straightforward installation on bicycle handlebars.
-
Mounting the Display:
- Open the clasp on the base of the display.
- Fit the display around your bike's handlebars.
- Tighten the screw on the back of the display using a 3mm Allen key to secure it in place.
- Important Safety Check: After installation, ensure that your brakes and gear shifters work normally and are not obstructed by the display.
-
Connecting the Power Cable:
- Locate the green power cable coming out from the mount/harness.
- Connect this green cable to the corresponding green power cable on the display.
- Identify the arrow on each connector, align them, and push them together firmly until no green color is visible, indicating a secure connection.
Technical Specifications
- Version: 001
- Connectivity: Green power cable for connection to the Swytch Kit mount/harness.
- Mounting: Handlebar clasp with screw tightening (requires 3mm Allen key).
- Controls: Three buttons: '+', On/Off, and '-'.
- Indicators: LED battery level indicator, LED power level lights.
Maintenance Features
The manual does not explicitly detail maintenance features beyond the initial installation and setting adjustments. However, the robust design and simple connection suggest minimal user maintenance is required. Regular checks of the display's secure mounting and cable connections are recommended to ensure reliable operation. The "Factory Reset" option can be considered a maintenance feature for troubleshooting or reconfiguring the device.
Swytch Technology Ltd,
Unit 2A
455 Wick Lane
London
E3 2TB
For further assistance, users can scan the provided QR code to access the Swytch Help Centre.