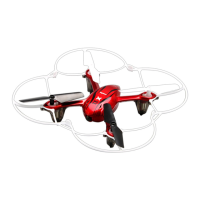
The SYMA X11/X11C Explorers is a 4-channel 2.4G remote control quadcopter, designed for users aged 14 and above. It integrates mechanics and electronics with expertise in aerodynamics and high-frequency transmitting, offering a precise and stable flying experience. The quadcopter features a four-axis structure, which contributes to its flexibility and rapid movement during flight. This design also enhances its wind resistance, making it suitable for both indoor and outdoor use. A built-in 6-axis gyroscope ensures precise hovering in the sky, adding to its stability and ease of control.
One of the key usage features is its modular design structure, which simplifies assembly and makes maintenance more convenient. The quadcopter also boasts a 360° 3D eversion function, allowing for impressive aerial stunts and tumbling operations. Additionally, it supports a throwing flight function, where the quadcopter can be smoothly launched into the air by throwing it or pushing up the throttle lever while it's rolling.
Before flying, users must ensure correct assembly and debugging to prevent accidents. The product is intended for individuals with prior experience in flying models. The flying ground should be a local, legal area for remote control flying. Safety is paramount, and the device should be kept far away from crowds, barriers, and moist environments. Users should also maintain a safe distance from high-speed rotating parts and heat sources. It is crucial to follow the correct power ON/OFF sequence to avoid loss of control and potential safety risks.
The remote control, or transmitter, features various controls for different functions. It includes a high/low speed switch, a 3D eversion button, and levers for controlling direction and throttle. Trimming and resetting functions are also available for fine-tuning the quadcopter's flight. The transmitter requires four 1.5V "AA" alkaline batteries, which should be loaded according to the correct polarity.
To prepare for flight, first press the ON/OFF power switch on the quadcopter. Then, insert the power line into the quadcopter and place it on a level surface. Push the throttle lever to its highest position and then pull it back to the lowest position. A clear sound from the transmitter indicates that the quadcopter has entered the pre-fly state. During signal matching, it's important to keep the quadcopter in a horizontal position for fast matching and stable flight.
Several cautions are important during operation. If the transmitter indicator is bright but the quadcopter indicator flashes slowly, decoding has failed, and the pre-flying steps should be repeated. If the quadcopter tilts or spins abruptly during hovering, both the quadcopter and transmitter should be switched off, and the pre-flying steps repeated. A slowly flashing quadcopter indicator signifies a low voltage protection state, indicating that the quadcopter needs to be charged.
The manual describes two control modes, Mode 1 (defaulted when starting) and Mode 2, which dictate how the levers control the quadcopter's movement. In both modes, pushing the throttle up or down controls upward or downward flight. The direction lever controls forward/backward and left/right flight. The throttle lever also controls left/right rotation. Fine-tuning buttons are available to correct any unwanted drifting or rotation during flight.
For photography and video, the quadcopter's camera works normally when its RED indicator changes from flashing to green and stays lit. If the RED indicator lights on and off quickly, it means the SD card is missing. To take a photo, ensure the camera is working, then push the "C" button up. A beep from the transmitter and a RED flash on the camera's GREEN indicator confirm a photo has been taken. For video recording, pull the "C" button down. The camera will start recording after a beep, and the GREEN indicator will turn RED and flash. Pressing "C" again stops the video, with another beep and the RED flashing light turning GREEN and staying lit.
Battery charging is done via a USB charging wire. One end connects to the quadcopter, and the other to a computer's USB port or a power adapter. A red indicator on the USB cable will be ON during charging and OFF when fully charged. Charging should occur in a dry, ventilated area, away from heat or explosives. Batteries should be removed from the quadcopter during charging, and the process should be supervised by an adult. Avoid charging a hot battery immediately after flying to prevent swelling or fire. Physical impact to the battery during charging should also be avoided to prevent short-circuiting. Only the original USB charging wire should be used. Old or swollen batteries should be replaced. Overcharging can lead to automatic discharge and battery exhaustion. Frequent charging/discharging can reduce battery life.
For battery repair and maintenance, store batteries in a dry, ventilated place at 18-25°C. Avoid repeated or excessive charging/discharging to prolong battery life. For long-term storage, charge the battery to 50-60% of its capacity. If unused for over a month, check the voltage monthly to ensure it's no less than 3V, recharging if necessary.
Troubleshooting tips are provided for common issues such as unsuccessful signal matching, insufficient power, unresponsive aircraft, or tilting during flight. These issues can often be resolved by re-matching the signal, replacing batteries, re-welding the antenna, or performing level calibration.