Do you have a question about the Synology DiskStation DS218+ and is the answer not in the manual?
Lists all items included in the product package.
Provides an overview of the DiskStation's components and ports.
Details essential safety precautions for using the device.
Lists necessary tools and compatible drive types for installation.
Step-by-step guide for physically installing hard drives into the DiskStation.
Instructions for connecting power and network, and turning on the device.
Guide for installing or replacing the RAM module for memory expansion.
Instructions for installing DiskStation Manager using the Web Assistant tool.
Information on where to find additional resources and support.
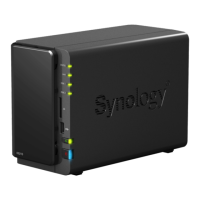
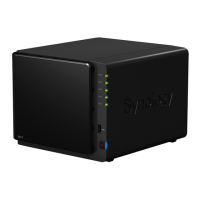
The Synology DiskStation DS218+ is a network-attached storage (NAS) device designed for home and small office use, offering a range of functionalities for data storage, management, and sharing. At its core, the DS218+ functions as a centralized storage solution, allowing users to store, back up, and access their files from various devices across a network. It supports two SATA drives, which can be 3.5" or 2.5" drives, providing flexibility in storage capacity and type. The device is powered by Synology's DiskStation Manager (DSM) operating system, a browser-based interface that simplifies setup, configuration, and daily operations.
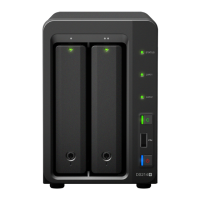
One of the primary usage features of the DS218+ is its ease of drive installation. The front panel features a removable drive bay cover, behind which are two drive trays. To install a drive, users simply push a latch upward and pull the handle to remove a tray. For 3.5" drives, fastening panels on the sides of the tray are removed, the drive is placed in, and the panels are reinserted to secure it. For 2.5" drives, the fastening panels are removed and set aside, the drive is placed in a designated blue area, the tray is turned upside down, and screws are used to secure the drive. Once loaded, the drive tray is inserted back into the bay until a click is heard, indicating it's locked in place. The device supports two drives, numbered 1 and 2, and after installing the drives, the hard drive bay cover is replaced. For users planning to create a RAID volume, it is recommended that all installed drives be of the same size to maximize storage capacity.
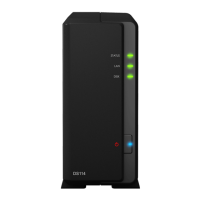
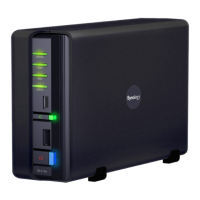
Beyond basic storage, the DS218+ offers several connectivity options to enhance its utility. On the front panel, it includes a USB 3.0 port and a copy button. When a USB device, such as a digital camera or external storage, is connected to the USB 3.0 port, the copy button lights up, allowing users to quickly copy data from the connected device to the internal drives. The front panel also features LED indicators for Status, LAN, and Disk activity, providing visual feedback on the system's operational status, network connection, and drive activity. The power button is also located on the front, used to power on the DiskStation with a single press, or to power it off by pressing and holding until a beep sounds and the Power LED blinks.
The rear panel of the DS218+ expands on its connectivity and management features. It includes additional USB 3.0 ports for connecting more external devices, an eSATA port for external SATA drives, and a LAN port for network connection. The power port is where the AC adapter connects, and a Kensington Security Slot is provided for physical security. A fan is integrated into the rear to dissipate excess heat and cool the system, emitting a beeping sound if it malfunctions. The RESET button on the back serves two important functions: a short press and hold until a beep sounds restores default IP address, DNS server, and admin account passwords; a longer sequence of presses and holds can return the DiskStation to a "Not installed" status, allowing DSM to be reinstalled.
Setting up the DiskStation involves connecting it to the network and power. Users connect the LAN cable from the DiskStation to a switch, router, or hub, then connect the AC adapter to the power port and the AC power cord to a power outlet. Once powered on, the DiskStation becomes detectable on the network.
The DS218+ also supports memory expansion, an important maintenance feature for users looking to enhance performance. To add a memory module, the DiskStation must first be shut down and all cables disconnected. The two hard drive trays are removed, revealing an empty memory slot on the inner right side of the device. The new memory module is inserted by aligning its notch with the slot's notch, ensuring it's properly seated, and then pushing down until a click is heard. It's crucial to handle the memory module by its edges and avoid touching the gold contacts. After installation, the drive trays are reinserted, cables reconnected, and the DiskStation powered on. To verify the new memory capacity, users can check "Total Physical Memory" in DSM's Control Panel > Info Center after installing DSM. If the DiskStation doesn't recognize the memory or fails to start, it indicates the module may not be installed correctly. Removing a memory module follows a similar process: shut down, disconnect cables, remove drive trays, then push the levers on both sides of the module outward to release it, and finally remove it by its notches.
The initial software setup, DSM installation, is facilitated by Web Assistant. After hardware setup, users open a web browser on a computer on the same local network and navigate to find.synology.com or diskstation:5000. Web Assistant will detect the DiskStation, showing its status as "Not installed." Clicking "Connect" initiates the setup process, guiding users through the DSM installation. For this, the DiskStation needs an internet connection, and it's recommended to use browsers like Chrome or Firefox. Both the DiskStation and the computer must be on the same local network. If the installation process is interrupted, users can log into DSM as "admin" with a blank password to resume.
Overall, the Synology DiskStation DS218+ is designed for user-friendly operation, from physical drive installation and memory upgrades to network setup and software management, making it an accessible yet powerful solution for centralized data storage and backup needs.
| RAID levels | 0, 1, JBOD |
|---|---|
| Storage drive size | 2.5/3.5 \ |
| Storage drive capacity | 6000 GB |
| Supported file systems | BTRFS, ext4 |
| Storage drive interface | Serial ATA II |
| Storage drives installed | Yes |
| Installed storage drive type | HDD |
| Supported storage drive types | HDD & SSD |
| Total installed storage capacity | 12 TB |
| Maximum supported storage capacity | 32 TB |
| Number of storage drives installed | 2 |
| Stepping | B1 |
| Tjunction | 105 °C |
| Processor code | SR2Z8 |
| Processor cache | 2 MB |
| Processor model | J3355 |
| System bus rate | 5 GT/s |
| Processor family | Intel® Celeron® |
| Processor socket | BGA 1296 |
| Processor codename | Apollo Lake |
| Processor frequency | 2 GHz |
| Processor cache type | Smart Cache |
| Processor lithography | 14 nm |
| Processor manufacturer | Intel |
| Processor package size | 24 x 31 mm |
| CPU configuration (max) | 1 |
| PCI Express slots version | 2.0 |
| Processor boost frequency | 2.5 GHz |
| Processor operating modes | 64-bit |
| ECC supported by processor | No |
| PCI Express configurations | 1x2+2x1, 4x1 |
| Thermal Design Power (TDP) | 10 W |
| On-board graphics card model | Intel® HD Graphics 500 |
| Maximum internal memory supported by processor | 8 GB |
| Internal memory | 2 GB |
| Internal memory type | DDR3L |
| Maximum RAM supported | 6 GB |
| Ethernet LAN data rates | 10, 100, 1000 Mbit/s |
| Supported network protocols | SMB, AFP, NFS, FTP, WebDAV, CalDAV, iSCSI, Telnet, SSH, SNMP, VPN (PPTP, OpenVPN™, L2TP) |
| USB 2.0 ports quantity | 0 |
| USB 3.2 Gen 1 (3.1 Gen 1) Type-A ports quantity | 3 |
| Chassis type | Compact |
| Cooling type | Active |
| Fan diameter | 92 mm |
| Product color | Black |
| Number of fans | 1 fan(s) |
| Cable lock slot type | Kensington |
| Type | NAS |
| Noise level | 19.3 dB |
| Device class | Home & Home Office |
| Share folder | 256 |
| Backup features | Cloud, iSCSI LUN |
| Number of users | 2048 user(s) |
| Browser supported | Chrome, Firefox, Internet Explorer 10, Safari 10; Safari (iOS 10 onwards), Chrome (Android 6.0) |
| Security algorithms | HTTPS, SSH, SSL/TLS |
| Operating system installed | - |
| Mac operating systems supported | Mac OS X 10.11 El Capitan |
| Windows operating systems supported | Windows 10, Windows 7 |
| Certification | FCC Class B CE Class B BSMI Class B |
| Sustainability certificates | RoHS |
| Operating altitude | 0 - 5000 m |
| Storage temperature (T-T) | -20 - 60 °C |
| Operating temperature (T-T) | 5 - 40 °C |
| Operating relative humidity (H-H) | 5 - 95 % |
| Number of execution units | 12 |
| Maximum number of PCI Express lanes | 6 |
| Memory types supported by processor | DDR3L, LPDDR3-SDRAM, LPDDR4-SDRAM |
| Memory channels supported by processor | Dual |
| Intel Identity Protection Technology version | 1.00 |
| Intel Small Business Advantage (SBA) version | 0.00 |
| Cables included | AC, LAN (RJ-45) |
| AC input voltage | 100 - 240 V |
| AC input frequency | 50 - 60 Hz |
| Power supply unit (PSU) capacity | 60 W |
| On-board graphics card base frequency | 250 MHz |
| On-board graphics card burst frequency | 700 MHz |
| Processor ARK ID | 95597 |
| Depth | 232.2 mm |
|---|---|
| Width | 108 mm |
| Height | 165 mm |