Do you have a question about the Synology DS110J and is the answer not in the manual?
Provides an overview of Synology DiskStation hardware and connectivity features.
Explains how to share files within the Intranet or over the Internet with Unicode support.
Details FTP service capabilities including bandwidth restriction and SSL/TLS support.
Covers using File Browser for easy file management via a web interface.
Describes designating storage space as an iSCSI Target for client access.
Outlines backup solutions for computers and DiskStation data.
Details using Download Station for file downloads and media sharing.
Explains how to share multimedia content and use blogging features.
Covers using Audio Station for music playback from various sources.
Explains the Virtual Host feature for hosting multiple websites.
Details managing IP cameras for recording and live view.
Describes how to share USB printers via the network.
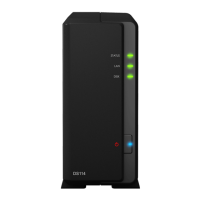
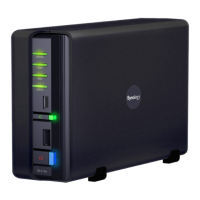
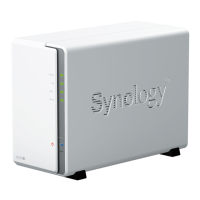
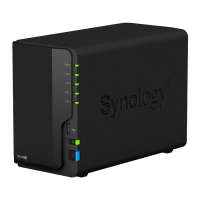
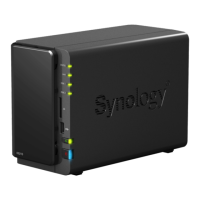
Overview of hardware features and ports for 1-bay and 2-bay models.
Overview of hardware features and ports for 4-bay models.
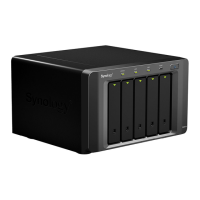
Overview of hardware features and ports for 5-bay models.
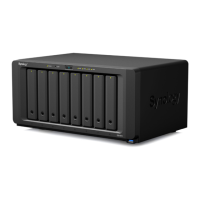
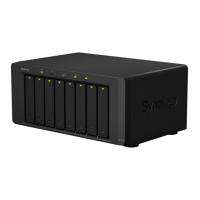
Overview of hardware features and ports for 10-bay models.
Guide to installing Synology DiskStation and DSM.
Instructions for logging into DSM via Synology Assistant or web browser.
Steps for using Synology Assistant to connect to DiskStation.
Instructions for accessing DiskStation Manager via a web browser.
Overview of the DSM interface, desktop, and taskbar.
Details on customizing the desktop and creating shortcuts.
Explanation of the functions available on the DSM taskbar.
Guide to navigating and using the Main Menu for DSM settings.
Instructions for rearranging application thumbnails in the Main Menu.
How to open and manage application windows in DSM.
Overview of the Control Panel and its setting categories.
How to manage user account settings like password and description.
View quota and capacity usage on DiskStation volumes.
Customize desktop background color or wallpaper.
Customize other personal options for DSM.
Modify basic DSM settings like login style and network configuration.
Customize the layout of the DSM login screen.
Configure HTTP/HTTPS port numbers and enable secure connections.
Modify security levels for DSM browsing sessions, including logout timers.
Activate and view logs for File Browser activities.
Configure DiskStation identification and network settings.
Set server name, DNS server, and default gateway.
Connect DiskStation to the network via LAN or wireless interfaces.
Configure LAN connection settings and IP address acquisition.
Combine multiple LAN interfaces using Link Aggregation.
Set up and connect to a wireless network.
Configure IPv6 settings for network interfaces.
Connect to the internet using PPPoE protocol.
Set up IPv6 tunnel for internet access.
Configure regional settings such as display and email language.
Set display language, email language, and codepage.
Configure server date, time, and time zone settings.
Manage power control settings like HDD hibernation and fan speed.
Configure settings for hard disk hibernation to save energy and extend lifespan.
Set power recovery functions like automatic restart after power failure.
Select fan speed mode for cooling or noise reduction.
Control beep alerts for abnormal situations.
Enable UPS support to prevent data loss during power failures.
Schedule automatic startup or shutdown times for the DiskStation.
Explanation of volumes and disk groups for file storage.
Methods for creating volumes, including combining disks.
Details on supported RAID types for data protection and capacity.
Use Storage Manager to create, set up, and manage volumes or disk groups.
Wizard to create a volume on your DiskStation.
Create a SHR volume optimizing space allocation.
Create a volume by combining multiple hard disks.
Create a volume using partial space from a Disk Group.
Create a Disk Group to organize disks and volumes.
Procedure to remove volumes or disk groups.
Repair volumes or disk groups experiencing drive failures.
Modify the RAID type of existing volumes or disk groups.
Increase storage capacity by changing volume size or replacing disks.
Increase volume capacity by adjusting its size.
Replace internal HDDs with larger ones to expand storage without data loss.
Expand storage by adding new hard drives to the DiskStation.
Manage iSCSI Targets for network-based storage access.
Manage iSCSI LUNs for performing storage operations.
Manage individual hard disks, including write cache support.
Enable write cache for enhanced performance on supported hard disks.
Perform S.M.A.R.T. tests to detect possible disk failures.
View detailed information about installed hard disks.
Manage attached external USB or eSATA disks.
Set up internet access with a simple wizard for firewall, PPPoE, and DDNS.
Configure router port forwarding rules for internet accessibility.
Steps to set up your router for port forwarding rules.
Specify destination ports for DiskStation services to receive traffic.
Register a DDNS hostname for easy access via the internet.
Methods to register a DDNS hostname with service providers.
Specific steps to register a DDNS account via No-IP.com.
Set up firewall rules to control access and prevent unauthorized logins.
Configure auto block to prevent brute-force attacks.
Configure login attempts, time limits, and email notifications for auto block.
Enable support for Windows, Mac, and Linux file sharing protocols.
Configure DiskStation as a Windows file server (CIFS server).
Configure DiskStation as a Mac file server (AFP Server).
Allow Linux clients to access DiskStation data via NFS.
Add DiskStation to a workgroup or domain for network integration.
Create and manage user accounts and groups for access control.
Steps for creating new user accounts and editing existing ones.
Create user accounts in bulk by importing a tab-delimited text file.
Modify existing user account information and permissions.
Enforce password policies for enhanced user account security.
Enable and manage private home folders for DSM users.
Create home folders for domain users.
Create and manage user groups for simplifying access control.
Control which applications users can access.
Create and manage shared folders for data storage and sharing.
List and description of system-created shared folders.
Steps to create a new shared folder.
Set access privileges for users and groups on shared folders.
Configure access permissions for domain users and groups.
Secure shared folders using AES 256-bit encryption.
Manage encrypted folders, including mounting and exporting keys.
Set Windows Access Control List privileges for shared folders.
Enable indexing for faster file searching within shared folders.
Steps to enable file indexing for a specific shared folder.
How users can access shared folders from Windows, Mac, or Linux computers.
Methods to access shared folders from Windows, including mapping network drives.
Accessing shared folders using Windows Explorer's Map Network Drive feature.
Accessing shared folders from Mac computers via SMB or AFP.
Accessing shared folders from Linux computers via NFS.
Accessing shared folders using an FTP application.
Limit DiskStation users' FTP access settings.
Enhance FTP security by changing user roots and enabling anonymous FTP.
Manage and edit files remotely via HTTP using WebDAV.
Use File Browser to access DiskStation folders via web browsers.
Filter and perform advanced searches for files and folders.
Methods to download files and folders from DiskStation to your computer.
Methods to upload files and folders from your computer to DiskStation.
Instructions for copying or moving files and folders between DiskStation locations.
Steps to rename files or folders.
Steps to create a new folder within a shared folder.
Steps to delete files or folders.
Extract contents from archive files.
Compress files or folders into archive formats.
Preview files instantly in a new browser tab or window.
Edit access privileges, copy download links, and open files.
Set access privileges for files and subfolders.
Get a direct download link for files or folders to share with others.
View or edit metadata for music files.
View documents directly in Google Docs.
View photos in a Photo Viewer window with playback controls.
Play video files using the Video Player.
Show extra attributes like size and modified date in file columns.
Enable and access files through the File Station application.
Back up data from Windows computers to Synology DiskStation.
Install and use Synology Data Replicator for Windows backups.
Steps to install Synology Data Replicator software.
Configure DiskStation as a backup destination for Apple Time Machine.
Back up Linux data to Synology DiskStation using rsync.
Methods for backing up data stored on the DiskStation.
Back up data to local shared folders or external disks.
Back up data to another DiskStation or rsync-compatible server.
Back up data to Amazon S3 server.
Perform various backup tasks using the Backup and Restore feature.
Step-by-step guide to creating a new backup task.
Modify settings for an existing backup task.
Remove backup tasks.
Initiate a backup task immediately.
Stop backup tasks that are in progress or waiting.
Restore data from backup using the wizard.
Back up and restore DiskStation settings, users, and shared folders.
Sync shared folder contents between two DiskStations.
Enable the Shared Folder Sync service on the server DiskStation.
Create, edit, delete, or cancel shared folder sync tasks.
Use Time Backup for flexible backup and restore of shared folders.
Copy data from USB devices to shared folders using the Copy button.
Copy data from SD cards to shared folders using the Copy button.
Set up websites with Web Station, supporting PHP and MySQL.
Activate Web Station to create a website and save web page content.
Host up to 30 websites with different ports or hostnames.
Allow DiskStation users to host their own personal websites.
Activate MySQL database function for website use.
Configure PHP settings such as register_globals and caching.
Add additional HTTP ports and enable HTTPS connections.
Enable WebDAV to manage and edit files remotely.
Manage files via WebDAV on different operating systems.
Configure DiskStation as a mail server for users.
Steps to enable and configure the DiskStation mail server service.
Install Mail Station package for webmail access.
Configure DiskStation as a print server for local network printing.
Steps to set up the print server on DiskStation.
Enable AirPrint support for iOS printing.
Print from iOS devices to the connected printer.
Connect clients (Windows, Mac, Linux) to the DiskStation print server.
Release printer connection for multifunctional printers.
Manage network printers connected to DiskStation.
Activate Photo Station service for DSM admin.
Allow DiskStation users to enable their own Personal Photo Station.
Enable Photo Station service for individual DSM users.
Create, update, and delete Photo Station user accounts.
Upload new albums to shared folders using various methods.
Upload albums using Photo Uploader via Synology Assistant.
Create new albums directly within Photo Station.
Upload albums using file sharing protocols or File Browser.
Upload photos from mobile devices using the DS photo+ app.
Manage albums with upload, delete, download, and reorder functions.
Allow users to upload photos and videos to specific albums.
Allow users to download albums via Photo Station.
Reorder albums by dragging and dropping.
Make albums accessible only by specific users.
Display recent photos and videos in virtual albums.
Move albums between folders or delete selected albums.
View and edit details, rotate, delete, or blog photos and videos.
Customize album layout and photo thumbnail settings.
Post blogs, personalize blog space, and manage posts.
Create new blog posts with titles, content, and media.
Browse blog archives by year or search posts by keywords.
Activate Audio Station to play music from various sources.
Select audio sources like Library, Personal Playlists, or Media Servers.
Browse music library organized by categories like All Music, Folder, Album, Artist, Genre.
Create and manage personal or shared playlists.
Create smart playlists based on specific rules.
Listen to Internet radio stations or add custom stations.
Browse and play media from DLNA/UPnP servers or other DiskStations.
Browse music, change views, and organize music into playlists.
Navigate music library, change views, and use search.
Search music by category, keyword, artist, album, or genre.
View or edit metadata for music files.
Show extra attributes like title, album, artist, etc., in new columns.
Organize songs into personal or shared playlists.
Play music from the queue panel using the music player.
Manage output modes (Streaming, USB) and queue panel for playback.
Add songs from the library to the queue panel for playback.
Add or append playlists to the queue panel.
Manage songs within the queue panel, including reordering and removal.
Control music playback using the music player interface.
Enable transcoding to support more audio formats for streaming.
Enable music download and download songs to your computer.
Activate Download Station for downloading files from the internet.
Configure settings for BitTorrent, HTTP, FTP, and NZB downloads.
Set download schedule, destination folder, and prioritize process order.
Limit download tasks to specific times and alternative speeds.
Set the default destination folder for downloads.
Use premium accounts for direct downloads from file sharing websites.
Edit settings for downloading BitTorrent files, including rates.
Search for torrent files using default or custom search engines.
Set simultaneous connections and download rates for FTP/HTTP.
Download files via news servers using NZB files.
Create download tasks by uploading files or entering URLs.
Create tasks by uploading Torrent, NZB, or URL files.
Create download tasks by entering URLs for files.
Search for torrent files and create download tasks.
Download files from RSS feeds.
Select specific RSS feeds to create download tasks.
Create download tasks automatically based on filter criteria.
View and manage created BT/HTTP/FTP/NZB download tasks.
Edit settings for individual download tasks.
Configure eMule settings including ED2K server and bandwidth.
Manage eMule server settings and connection preferences.
Set up connection parameters for eMule downloads.
Set default destination folder and sharing options for eMule.
Set upload/download rates and schedule for eMule bandwidth.
Connect to ED2K servers for searching and downloading resources.
Add ED2K servers by IP address, port, or ED2K link.
Create download tasks using uploaded files or URLs.
Create eMule tasks by uploading a text file with ED2K links.
Resume paused or incomplete eMule download tasks.
Create download tasks by entering file URLs.
Search for files using eMule and create download tasks.
Perform general searches for files in eMule.
Perform advanced searches with specific criteria.
View and manage eMule download tasks.
Manage download tasks in the queue, including pause, resume, and remove.
Edit priority and destination folder for eMule download tasks.
View shared files uploaded to other eMule clients.
Activate Surveillance Station for managing IP cameras.
Add, edit, and manage IP cameras, including setup and guard settings.
Steps to add a new IP camera, including setup options.
Configure basic camera information like name, IP address, and brand.
Set image quality, resolution, and frame rate for live view and recording.
Configure motion detection, alarm recording, and video file length.
Define event archive folder name and file naming conventions.
Set schedule plans for continuous, motion detection, or alarm recording.
Modify camera settings and recording schedules.
Configure motion detection sensitivity, threshold, and detection areas.
Set up preset positions, patrols, and guard schedules for cameras.
Remove cameras from the Surveillance Station setup.
Temporarily disable cameras without deleting their settings.
Enable selected cameras within Surveillance Station.
Export or import camera settings for backup or transfer.
View real-time video streams from configured cameras.
Customize the display layout for live camera views.
Control camera pan, tilt, and zoom functions.
Utilize functions like digital zoom, volume adjustment, and presets.
Browse, play, delete, or download recorded events.
View and play recorded events using a timeline interface.
Select sources for playing events, including local DiskStation or others.
Navigate the timeline to find specific recorded events.
Search events based on specific situations like motion or object changes.
Enhance event images with brightness, contrast, and saturation adjustments.
Manage recorded events, including playback and locking.
Download video clips of recorded events.
Filter events based on specific criteria to find desired recordings.
Delete specific selected events.
Delete all recorded events.
Delete events that match the filter criteria.
Delete all events displayed on the current page.
Export recorded events to shared folders or external storage.
Mount exported archives onto Surveillance Station for playback.
Add, edit, and delete E-Maps to visually represent camera locations.
Set up email or SMS notifications for important events.
Configure advanced settings for Surveillance Station.
Choose the initial page displayed after logging into Surveillance Station.
Set up DiskStation as a client or host server for centralized management.
Manage VisualStation for direct camera view on TV/LCD monitors.
View critical events and camera settings changes in logs.
Assign privileges to users for Surveillance Station functions.
Manage camera licenses for Surveillance Station.
Enable and manage VisualStation for camera monitoring.
Add a VisualStation to manage its settings.
Delete a VisualStation entry.
Enable DLNA/UPnP media server to browse multimedia content.
Customize the multimedia display menu language and style.
Reconstruct the media file index if files are missing.
Configure browsing settings for DMA, such as image resolution and display format.
Improve DMA compatibility for smoother multimedia playback.
Enable iTunes service for browsing and playing music/videos.
Activate iTunes service and set shared name and password.
Create and edit smart playlists for music organization.
Reconstruct the audio file index for iTunes compatibility.
View system overview including basic info, network, time, and disk status.
Get a status overview of DiskStation and connected devices.
View network configuration status and interface details.
Check free/used space of DiskStation volumes and hard disk status.
View system logs, filter records, delete, save, or refresh logs.
Monitor CPU usage, memory usage, and network flow.
Check for and install the latest DiskStation Manager (DSM) updates.
Install, uninstall, upgrade, and manage packages.
Set up email or text notifications for important system events.
Configure email notification settings, including SMTP server details.
Set up SMS notification for critical events.
Reset the admin password to blank if forgotten.
Restore DiskStation to factory default settings.
Reinstall the Synology DiskStation system.
Enable SNMP service for network monitoring software.
Enable Telnet or SSH services for system login and management.
Use Synology apps (DS audio, DS cam, DS photo+, DS file) to communicate with DiskStation.
Log in to DiskStation using other mobile devices and web browsers.
Technical specifications for Synology DiskStation 1-bay models.
Technical specifications for Synology DiskStation 2-bay models.
Technical specifications for Synology DiskStation 4-bay models.
Technical specifications for Synology DiskStation 5-bay models.
Technical specifications for Synology DiskStation 10-bay models.
Continued technical specifications for Synology DiskStation 10-bay models.
Notes on limitations for USB printers, digital cameras, and file systems.
LED status indications for 1-bay models.
LED status indications for 2-bay models.
LED status indications for 4-bay DiskStations.
LED status indications for RackStation models.
LED status indications for 5-bay models.
LED status indications for 10-bay models.
Continued LED status indications for 10-bay models.
| Drive Bays | 1 |
|---|---|
| Network Interface | 1 x Gigabit Ethernet |
| USB Ports | 2 x USB 2.0 |
| File System | ext4 |
| Maximum Internal Capacity | 2 TB |