EasyManua.ls Logo

Syntace P6 User Manual

Syntace P6
3 pages
To Next Page IconTo Next Page
Page #1 background imageLoading...
Page #1 background image
Syntace GmbH · Dammweg1 · 83342 Tacherting · Germany · Tel. +49 (0)8634-66666 · Fax: +49 (0)8634-6365 · E-Mail: syntace@syntace.de · www.syntace.de
D
\\ Anleitung.
20190923
P6 SEATPOST
CARBON & ALU
CONGRATULATIONS ON THE PURCHASE OF YOUR NEW SYNTACE
P6 SEATPOST. Please carefully read all instructions as we have
included some important information and helpful tips. Your Syntace
seatpost has been carefully designed and constructed. However, it is
necessary that you follow all the instructions provided in this manual.
Please retain this manual and provide it to the new owner should
your seatpost ever find a new owner.
Please note that the responsibility of checking the product regularly
to determine if it needs repair or replacement, lies with the end
consumer. Please be aware that all the components of your bicycle
related to your safety have a “memory like an elephant,” they re-
member any damage (crashes, overloading, etc.) which can add up
to a shorter lifespan of the component. We at Syntace have built in a
proper amount of “Overload Safety” into all our components.
A regular replacement schedule (ie: Every two years), of Syntace
seatposts is, at this writing, not necessary. However, after any crash
or impact, especially to your stem or handlebars, check for signs of
fatigue (ie, discoloration, cracks, dents.), and to determine if the stem
or handlebars have bent. At the slightest sign of damage replace your
components!
Damaged components should under no circumstance be straight-
ened or repaired, but immediately replaced. Otherwise the compo-
nent may fail and a crash with serious injury could result.
Proper Use of Components
The Syntace P6 seatposts are for use with mountain bikes and road
bikes. Syntace P6 seatposts can be used for on-road and off-road use
up to a rider weight of 130kg.
Installation & Compatibility
Makes sure that the seatpost has the correct diameter for your
frame.
If necessary, ask your dealer, if the diameter of the seatpost is
correct for your bike frame. The internal diameter of the seat
tube should be at least 0.1mm and at most 0.3mm larger than the
seatpost diameter.
Please do not use a reduction shim shorter in length than the
minimum insert length of the P6 seatpost. If the frame requires a
greater minimum insert, use this as the valid length.
Preparation
• Before installation, read your bike‘s manual.
Check the seat tube for sharp edges and burrs - not only at the
upper edge but also along the clamping slot.
Deburr all sharp edges, especially at the upper edge of the seat
tube, with a file and fine sanding paper.
Note: Sharp edges, especially at the end of the seat tube, can cause
damage leading to breakage of the seatpost.
Check (as described in Installation & Compatibility) the diameter
of the seat tube. An ill fit of seatpost and seat tube can lead to
damage and/or breakage of the seatpost.
Remove all chips and other residue with a cloth and compressed
air. Turn your bike upside down if needed.
Installation of seatpost
TIP: FOR CARBON-FIBER SEATPOSTS
Do not use grease for installation. Remove grease from seat tube if
necessary. Special friction pastes abrade the finish after a while.
Spray a little silicon spray into seat tube. Be assure that it does not
reach your brake rotors (watch the wind direction!).
Carefully insert seatpost into seat tube with height markers poin-
ting forward. If too much force is needed, the seat tube may require
reaming.
Question and Answer IconNeed help?

Do you have a question about the Syntace P6 and is the answer not in the manual?

Syntace P6 Specifications

General IconGeneral
BrandSyntace
ModelP6
CategoryBicycle Accessories
LanguageEnglish

Summary

Installation & Compatibility

Seatpost Diameter Check

Ensure seatpost diameter matches frame tube internal diameter within 0.1-0.3mm. Consult dealer if unsure.

Seatpost Insert Length

Ensure minimum insert length is not less than specified. Adjust using shims if required.

Preparation and Installation Steps

Seat Tube Preparation

Check seat tube for sharp edges and burrs. Smooth with file and sandpaper to prevent damage.

Carbon Seatpost Installation

Use friction paste for carbon. Avoid grease. Insert carefully with markers forward.

Aluminum Seatpost Installation

Apply a little mounting paste onto seatpost for easier insertion and to prevent sticking.

Seatpost Usage and Maintenance

Correct Seatpost Insertion

Insert seatpost at least to the 'minimum insert' marking for safe operation.

Maintenance and Care

Clean seatpost regularly with water and mild soap. Avoid harsh cleaning agents.

General Precautions

Do not use grease on carbon seatposts. Avoid contamination. Check for damage regularly.

Warranty Information

Oval Seat Rail Compatibility

Oval rails up to 11mm height are compatible. Check thread engagement for bolts.

Product Warranty Terms

Syntace offers a 10-year warranty on material and manufacturing defects.

Reporting a Warranty Case

Send faulty components with written explanation to Syntace GmbH for assessment.
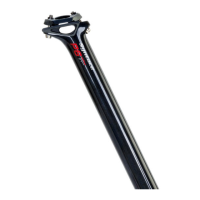