12 Systematics , Inc. 1025 Saunders Lane West Chester, PA. 19380
MIG SPOT WELDING ON STEEL
(Continued)
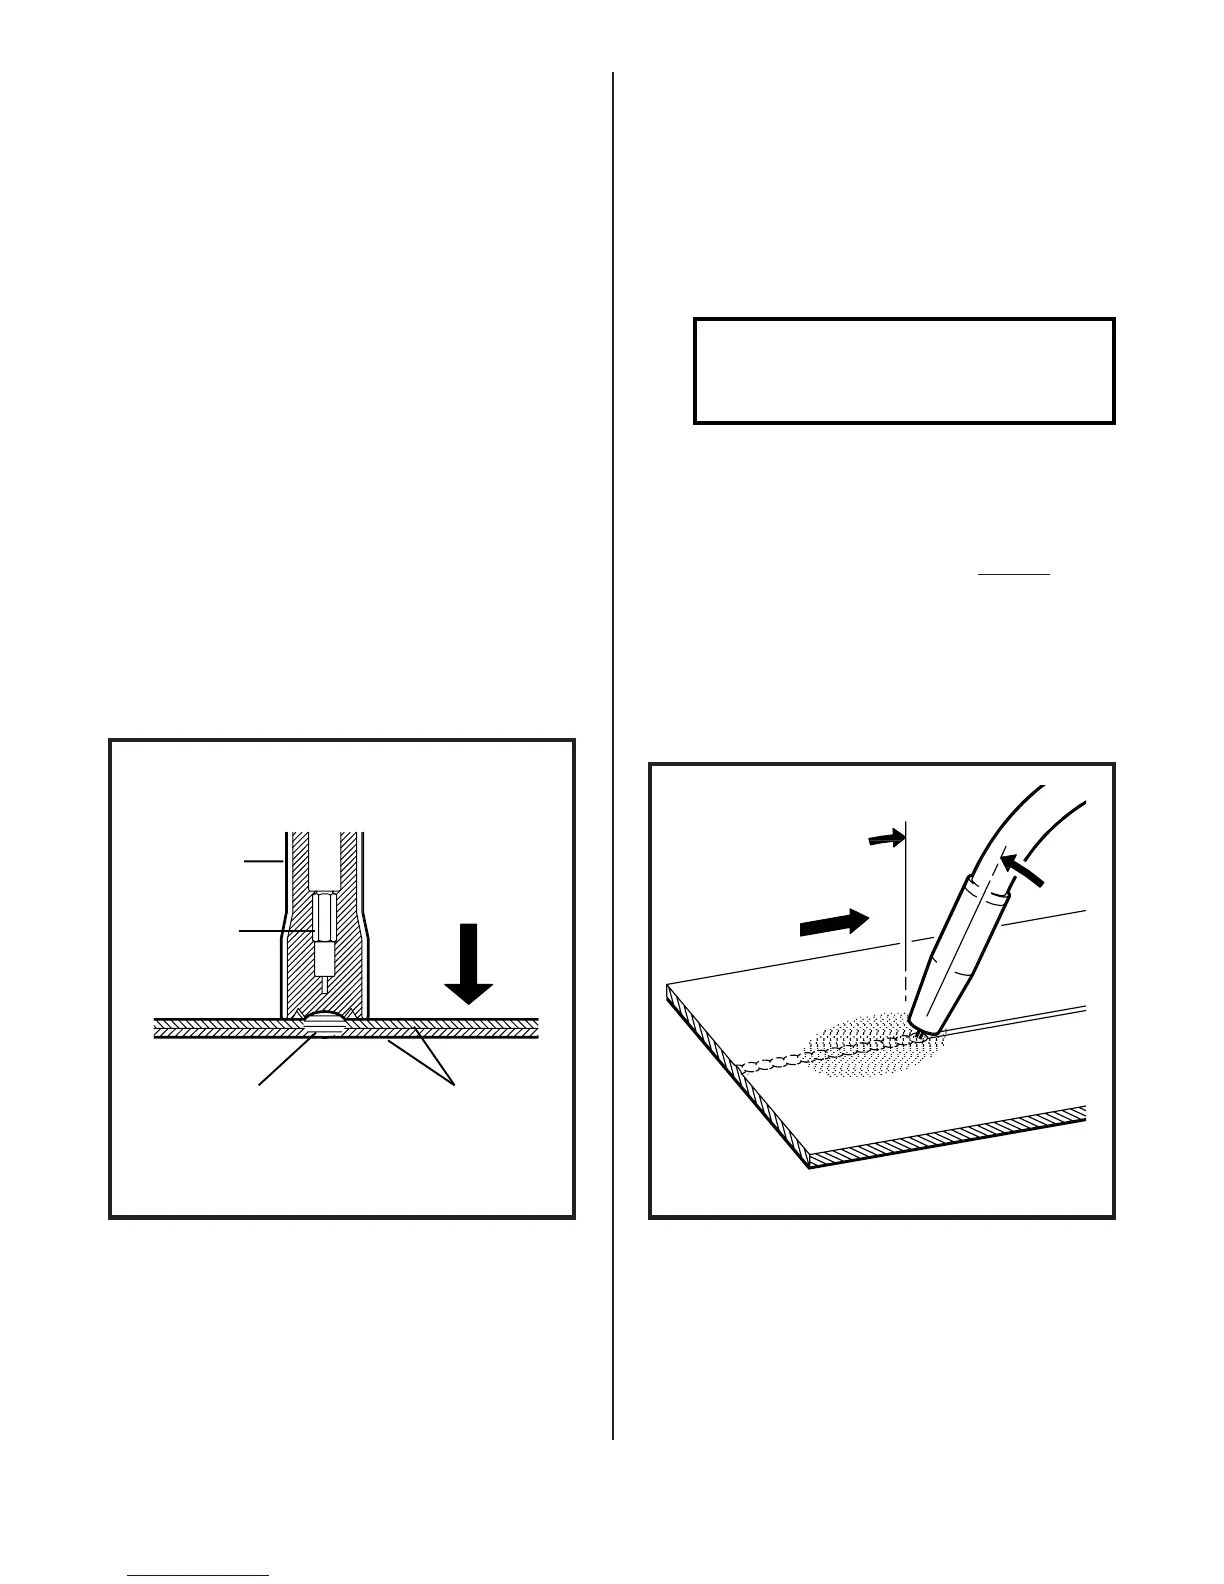
3. Locate the torch on the area to
be welded and press the nozzle
firmly against the work to hold
the metals in place.
4. Guard the eyes against stray
arc flash. A weldor’s helmet is
not necessary when spot weld-
ing. However,
extreme caution
must be taken to avoid looking
at the arc.
5. Actuate the torch trigger to
start the weld sequence. When
the timer switches off the weld
current, release the trigger
but maintain firm contact be-
tween the torch and work. Wait
one second for the weld puddle
to solidify, then move to the
next spot position. If the wire
freezes in the puddle, a quick
squeeze of the torch trigger
will melt it off.
6. To ascertain a good spot weld,
look at the back side of the
welded material. A small melt-
through of approximately 1/16
inch diameter is ideal.
STITCH WELDING ON STEEL
(OPTIONAL)
NOTE
Stitch Welding is used for
very light material.
1. Set Function Switch to "STITCH".
2. Adjust the TIME control to set
the time the welder is "on" and
feeding wire. The lower the
setting, the shorter the "on"
time and the faster the unit
cycles on and off.
3. Weld using "Continuous Weld-
ing" torch position and direc-
tion of travel.
DIRECTION
OF TRAVEL
WORK
SHIELDING GAS
30 DEGREES
FIGURE 15. STITCH WELDING
WORK
SPOTWELD
SPOTWELD
NOZZLE
CONTACT
TIP
PRESS NOZZLE
FIRMLY
AGAINST WORK
FIGURE 14. MIG SPOT WELDING