2.
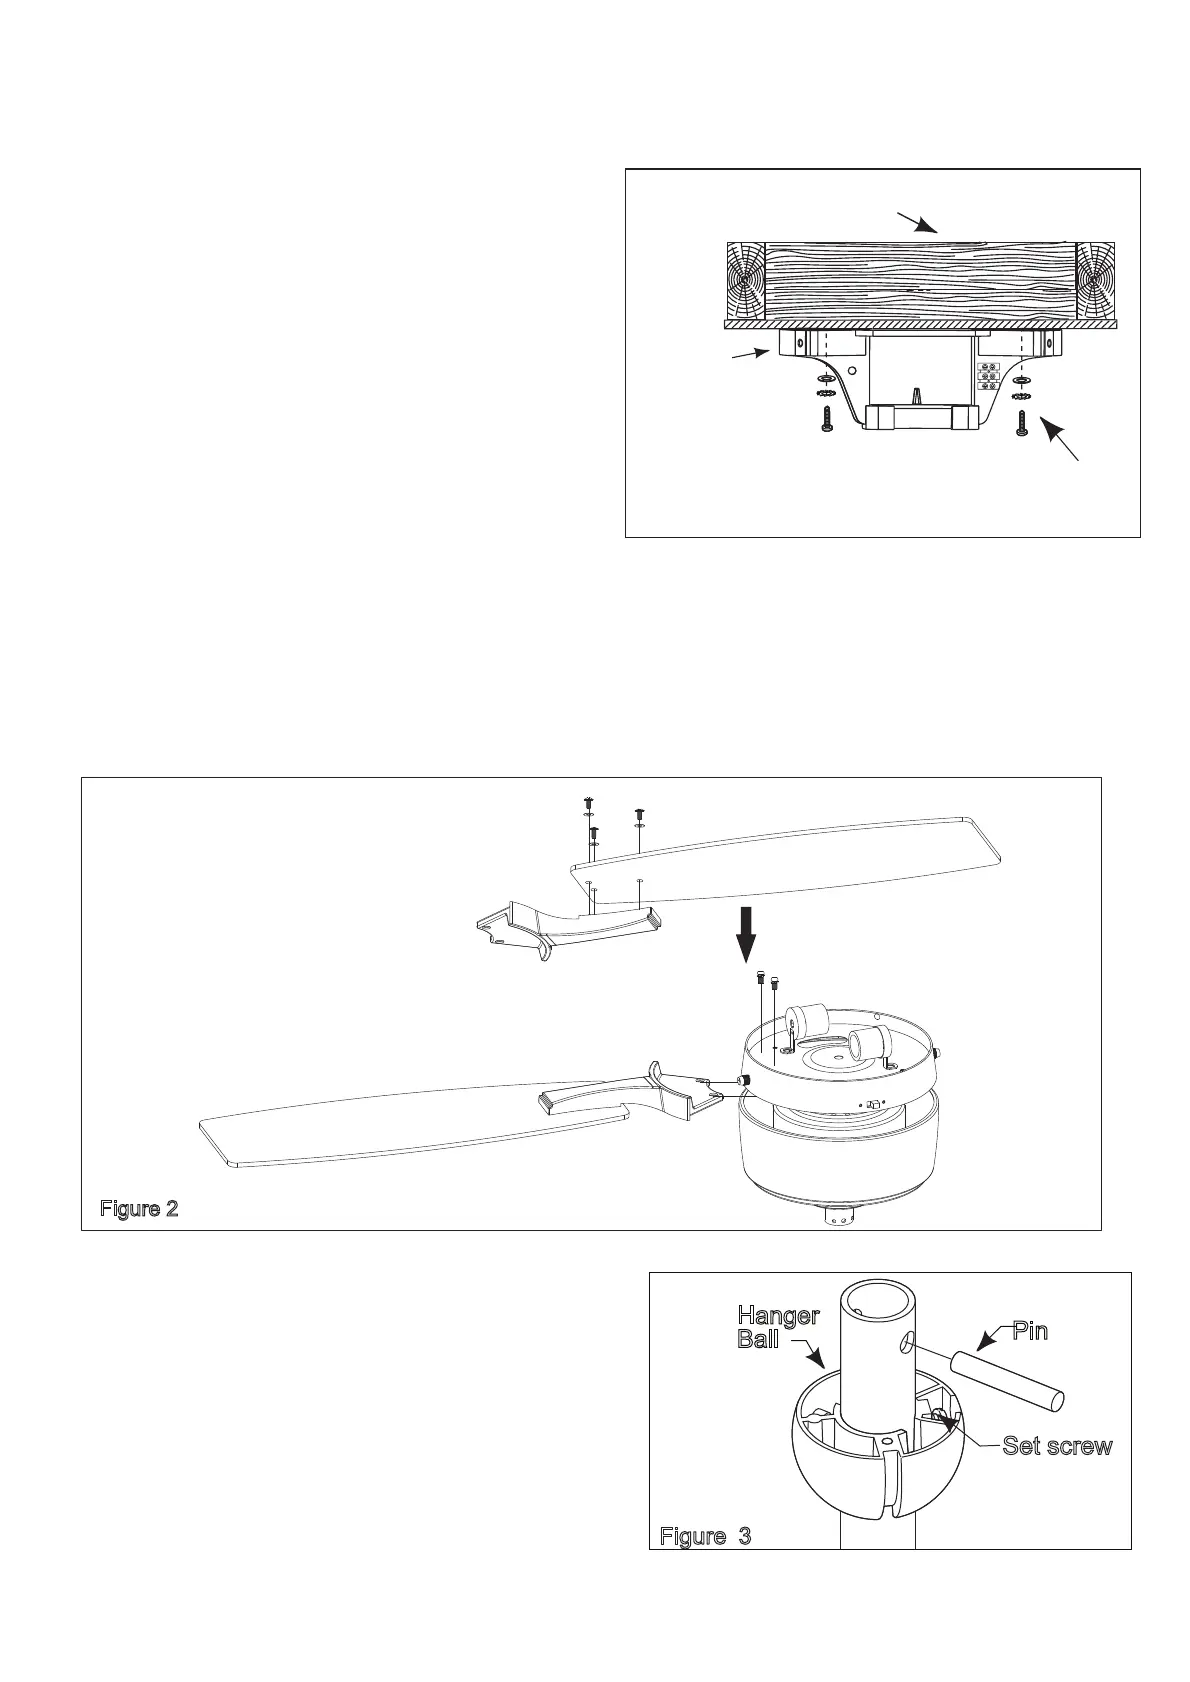
Screw the fan blades to the motor assembly.
Repeat to install the remaining 5 blades.
(Figure 2)
Make sure the set screws securing the blade
are tight and the blades are properly seated.
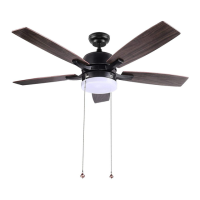
Figure 1
Lag Bolt/ FlatW asher/
Lock Washer
Ceiling joist
Hanger
Bracket
1. Securely attach the hanger bracke tto the
ceiling joist using the lag bolt, flat wash e anrsd
springwasher
supplied.
(Figure 1)
3.Loosen the set screws in the Hange rBall
assemblyun titlhe ball slides carefully down
the downrod.Remove the Pin from the downrod.
(Figure 3)
Figure 3
Hanger
Pin
Ball
Set screw
-Re-install the hanger ball after step 5 below-
3
Figure 2
Insert the blades to the blades bracket with
blade screws and washers.
HOW T O INST ALL THE FAN-WITH LIGHT
 Loading...