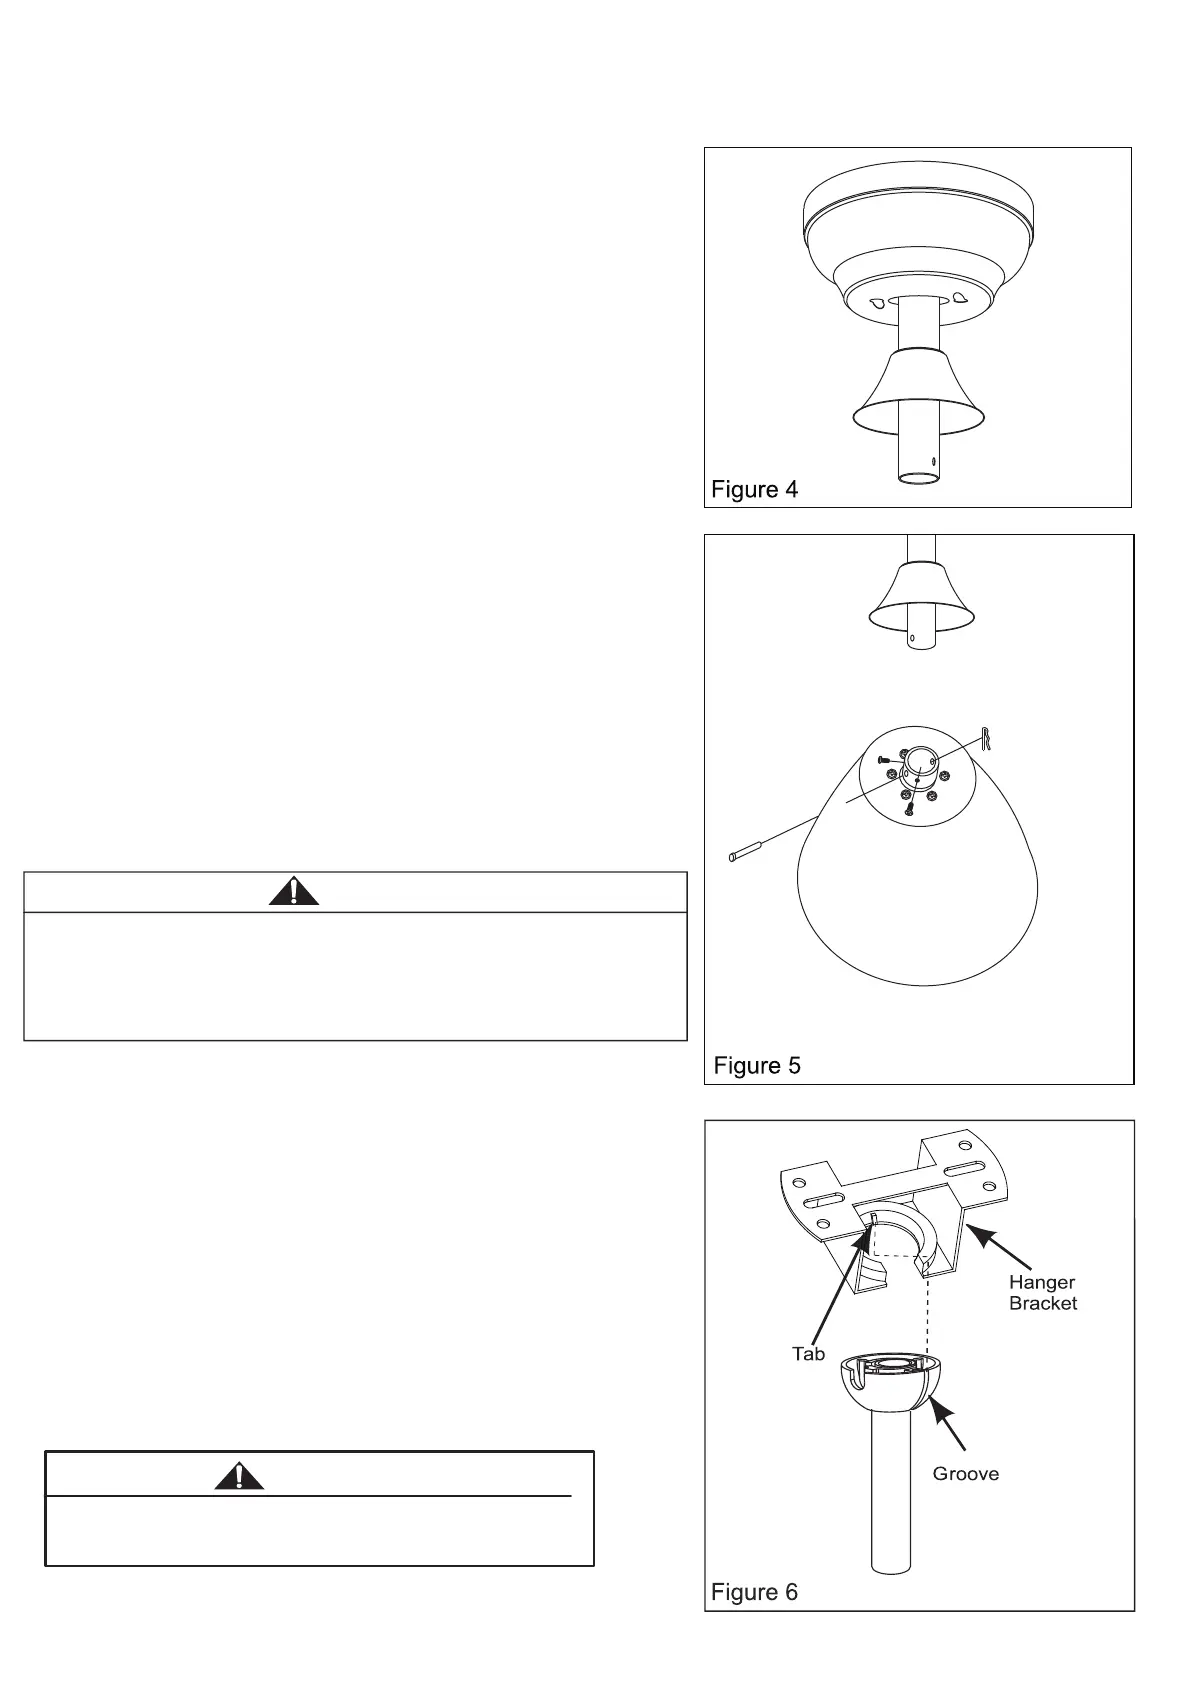
4.Remove and save the clevis pin and hairpin of the
downrod.Put the downrod through the canopy and
coupling cover.
(Figure 4)
5. Loosen two set screws on the downrod support
and then place the downrod into thedownrod
support.(Figure 5).
Thre ad the electrical wires and the earth wire
through thedownrod.
Align the Clevis Pin holes in the Downrod
with the holesin the Downrod Support. Be sure
to push the straight leg of the Hairpin Clipthrough
the hole near the end of the Clevis Pinuntil the
curved portion of the Hairpin snapsaround the
Clevis Pin.
Finally, re-tighten the two set screws.
It is critical that the clevis screw in the downrod support is properly
installed and the set screws are securely tightened.
Failure to verify the clevis screw, hairpin clip and set screwsare
properly installed could result in the fan falling.
W ARNING
6. Carefully lift the fan, and set the downrod / hanger ball
assembly on the hanger bracket attached to the
ceiling joist. Be sure the groove in the ball is properly
aligned with the tab on the hanger bracket.
(Figure 6)
WARNING
The fan must be hung with at least
230 cm
of clearance from floor to blades.
4
HOW T O INST ALL THE FAN-WITH LIGHT
 Loading...