Model #: 554-8 Wireless Remote Transmitter Button
Includes: 1 Remote Transmitter Button
6. Place the control board back into the remote receiver cover and reinstall the cover
by aligning the four plastic posts on the base with the four holes in the cover. Make
sure the white wire is properly inserted into the cover cutout. Gently snap the cover
and base together.
PROGRAMMING INSTRUCTIONS
1. Unplug the On Command circulator from the 115V wall outlet.
2. Remove the remote receiver cover (rectangular black box wired to the On Command
circulator) separating the top cover from the base plate. A small straight tip screw
driver may be used if necessary. Lift the control board out from the case.
NOTE: The remote transmitter button is provided with a “coin” type lithium battery
installed in the remote transmitter and is ready for programming. 554-8 Remote
Transmitters purchased separately must be synced with the remote receiver.
3. Plug the On Command circulator back into the 115V wall outlet. Circulator will auto-
matically turn on and operate until hot water is detected at the On Command tem-
perature sensor.
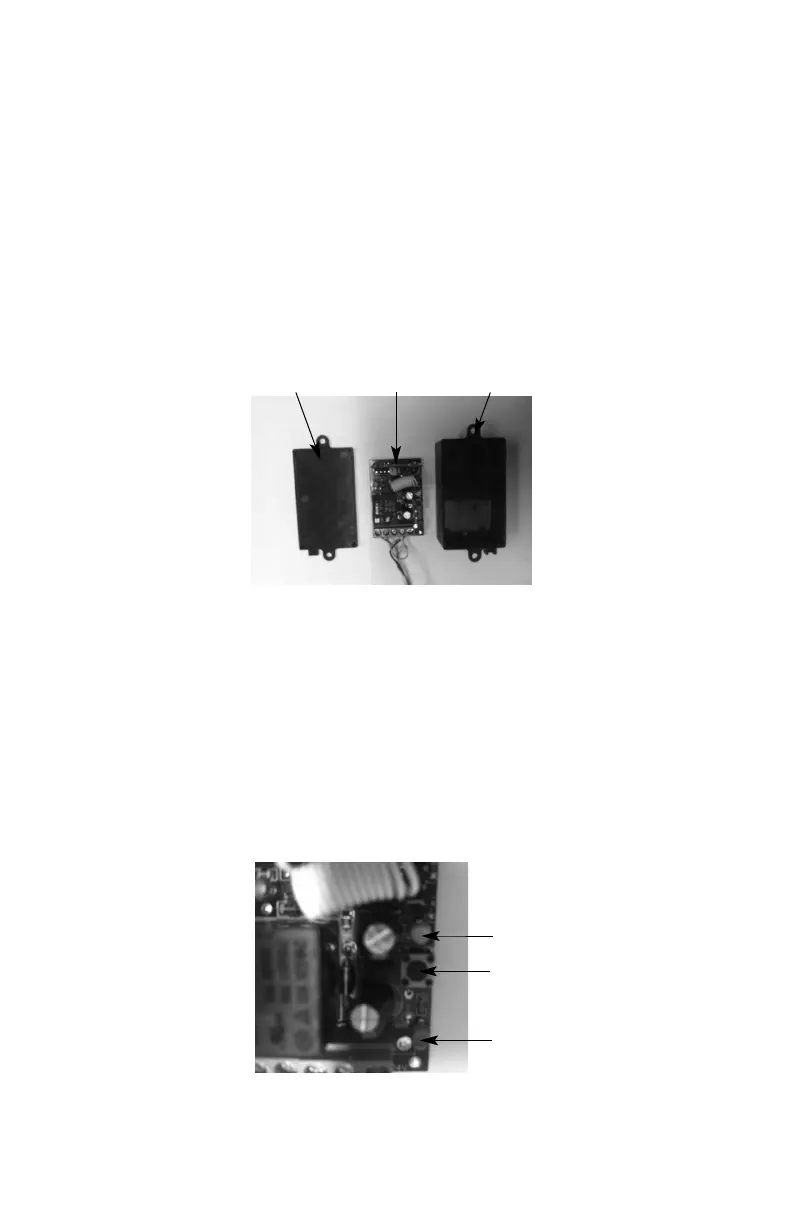
4. A red LED will light on the remote receiver electronic control board once the On
Command is plugged into the wall outlet. The remote receiver must be powered with
the red LED on to properly sync remote receivers.
5. Next to the red LED is a small black button. Press and hold down the black button
and a yellow LED on the other side of the black button will light. While the yellow LED
is on, press and hold the 554-8 Remote Transmitter Button for 3 seconds. Release
the transmitter button, then release the remote receiver button and the yellow LED
will turn off. The Remote Transmitter Button is now synced and ready for operation.
Control BoardBase Cover
Black Button
Yellow LED
Red LED
 Loading...