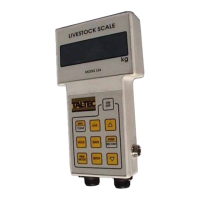
The Tal-Tec Livestock Scale is a robust electronic weighing system designed for farmers to manage and control their livestock herds. This quality equipment, affordable and durable, has been serving the agricultural sector since 1974. The complete product package includes two loadbars (also referred to as loadcells), an indicator, a battery cable, an AC-DC adaptor, a pack of bolts, and a user manual. The loadbars are available in either 600mm or 1000mm lengths. Optional extras such as a cattle platform, a cattle crate with gates, or a sheep/pig crate can be integrated with the scale system.
Function Description
The primary function of the Tal-Tec Livestock Scale is to accurately weigh livestock. The system displays the current live weight on the platform in kilograms. It features a resolution of 1kg, which can be adjusted to 0.1kg in "Fine Mode" for weighing items less than 200kg, offering higher accuracy. The scale is designed to handle a total capacity of 2000kg, which includes the live weight of the animal and the platform/crate itself.
A key feature is its ability to calculate an average weight when an animal is restless or jumping on the platform. If the weight fluctuates around half-way between two values, the instrument will compute and display the average weight, providing a stable reading.
The scale also incorporates a built-in statistics feature. By pressing the 'STATS' key, users can access various data points including:
- COUNT: The total number of weights recorded.
- TOTAL: The cumulative mass of all weighed animals.
- AVE: The average mass of all weighed animals.
- HI: The highest mass recorded.
- LOW: The lowest mass recorded.
This statistical data can be cleared using the 'CLEAR' key.
The "RECORD" function allows users to save a weight into the statistics. Pressing "ENTER/RECORD" once will momentarily flash 'rEc' on the display, confirming that the weight has been recorded.
The scale offers different "WEIGH MODES" to accommodate animal behavior:
- HI: For high movement of the animal.
- Lo: For low movement of the animal.
- Std: Standard weighing (default setting).
Usage Features
Operating the Tal-Tec Livestock Scale is designed to be straightforward and logical.
Installation:
- Unpack and place the indicator in a secure position.
- Install the loadbars.
- Run the loadbar cables to the indicator, ensuring they are protected from damage.
- Insert the plugs into the sockets at the bottom of the indicator, tightening the retaining collars by hand. The plugs can go into either socket, but it's crucial to keep them clean and dry.
- The instrument has an internal battery, but can also be powered by a 12-volt battery cable (e.g., from a vehicle) or the supplied AC-DC adaptor.
- Connecting the instrument to a power supply (battery cable or AC-DC adaptor) will charge the internal battery. The instrument is reverse polarity protected. The scale will not function correctly if the internal battery is flat or the external power supply is insufficient.
- Once these steps are completed, the scale is ready for operation.
Weighing Process:
- Ensure the indicator displays 0kg. If not, re-zero the scale.
- Move the animal onto the platform, making sure it does not lean on or touch any other structure.
- Wait for the reading to stabilize.
- The weight is then displayed and can be recorded.
Key Functions:
- ZERO: To zero the scale, press the 'ZERO' key. The display will show "- 0 -" and then "0 kg" before returning to live display. It's important not to stand on the scale during the zeroing process.
- HOLD: Pressing the 'HOLD' key will continuously display the weight even after the animal has been removed from the platform. To return to zero or display the next weight, press the 'LIVE' key.
- FINE MODE: For weighing items under 200kg, this mode increases accuracy by changing the resolution to 0.1kg.
- LIVE: This acts as an escape key, allowing users to exit setup functions or statistics screens and return to the main weigh screen.
- SETUP: This mode allows users to check battery voltage and change weigh modes. Navigation is done using the UP and DOWN arrow keys, and settings are changed with the 'ENTER' key. Remember to press 'LIVE' to exit setup.
- ZERO TRACKING: This feature allows the instrument to automatically re-zero itself when it registers weights of 10kg or less. This helps compensate for temperature fluctuations or added weight from animal excrement during a weighing session.
- Platforms and crates require mounting holes to fit the loadbars.
- The 'hoof' width of the platform/crate must not exceed the length of the loadbars.
- Loadbars should be mounted as close to the ends of the platform/crate as practical.
- Select a level concrete foundation or other firm surface for installation. Crucially, for accurate weighing, the platform or crate must not touch any part of the race.
- Place the crate in the desired position. Lift each end and position the loadbars, aligning mounting holes.
- Caution: Dropping the crate or platform onto the loadbars, or dropping the crate/platform with loadbars already fitted, can overload and damage the loadcells.
- Attach the crate to the loadbars using the supplied M10 x 75 bolts and nuts.
- If necessary, fit shims under the foot pads to prevent rocking.
- The loadbar foot pads can be bolted or pegged to the foundation to prevent sliding, though this is not always strictly necessary for weighing.
- Mark hole positions, unbolt the platform, drill holes, and fit at least one raw bolt into each end of the loadbar (leaving them slightly loose).
- Gently lower the platform onto the loadbars, ensuring mounting holes align. Adjust foot pads or platform if needed, or drill out mounting holes in the platform.
- Bolt the platform to the loadbars, then tighten the foot pad bolts. Important: Forcing bolts if holes don't align will prevent the scale from zeroing properly.
Maintenance Features
The Tal-Tec electronic scale is built to be rugged for farm environments, but proper care ensures maximum lifespan.
General Care:
- Water Exposure: The loadbars are splash and rinse proof but should never be submerged in water.
- Moisture and Manure: For maximum life, avoid prolonged exposure of loadbars to moisture or animal manure, as this can cause corrosion and lead to cell failure despite electroplating.
- Storage: Store loadbars in a clean and dry condition.
Cable Care:
- Protection: Cables must be positioned to prevent them from being walked on, squashed, tugged, or knotted. Options include fitting them inside heavy plastic, under timber, underground, or up posts.
- Damage: Any cuts or splits in the cable, even minor ones, will affect scale performance and can lead to failure if moisture enters.
- Repair: It is advisable to return damaged equipment to Tal-Tec for repair. If emergency repairs are necessary, ensure the cable is thoroughly dried, and each core is individually soldered and insulated.
Troubleshooting (Fault Finding):
Indicator and Loadbars:
-
Problem: Indicator on, loadbars plugged in, display shows a large erratic positive or negative value.
-
Cause: Problem with cables, cable damage.
-
Solution: Repair the cables.
-
Problem: Indicator on, loadbars connected, display doesn't stay on zero, creeps up and down by a few kilograms.
-
Cause: Loadbars bolted to the ground with uneven horizontal forces on the loadbar feet.
-
Solution: Loosen the foundation bolts and re-align them.
LS4 Instrument – Battery:
- The instrument is powered by a 6-volt (lead-acid sealed) battery. A low battery will affect performance. Charge using the Mains adaptor or car battery jumper lead.
- To check internal battery voltage: Turn on the instrument, press 'SETUP', then the up arrow until position 5. The display will show "5 = X.XX" (e.g., 6.20). Good voltage is above 6V, but it will operate from 5.80V. Position 4 shows charging voltage if the charger is connected.
- If the battery is too discharged to turn on the instrument, it needs replacement; charging will not help.
- The displayed battery voltage must be stable. If it fluctuates, the circuit board may need replacement.
LS4 Instrument – Operation:
- Operational issues are rare if the battery is kept fully charged.
- To test the instrument, place a wet finger on the pins at the bottom (shorting them) and observe if the instrument responds. If not, it could be faulty.
LS4 Loadbars – Testing:
- Each loadbar has two loadcells. An electric current flows through them, and an animal's weight causes a resistance change (in millivolts). Damage to cables, plugs, or loadbars will result in incorrect mass readings.
- To rule out installation faults, remove the loadbars and place them on a level concrete slab (e.g., workshop floor). Place a wooden plank across both loadbars to prevent rocking when stepped on.
- Switch on the instrument. Connect one loadbar plug at a time. Observe the display: the reading (offset) should be less than ±100kg and stable.
- Offset above 100kg: Possible overloaded loadcell.
- Offset fluctuating in hundreds: Possible water damage.
- Offset fluctuating in thousands: Possible cable damage.
- Once loadbars are connected and zeroed, test them: Climb onto a corner of the scale, note the reading, then climb off (display should return to zero). Repeat for all corners. Consistent readings across all corners indicate good condition.
- If readings are inconsistent, identify the problematic loadbar. Inspect it for cable damage, loose bolts, a shifted loadcell, or plug damage. Repair yourself or return to Tal-Tec.