When clearance is too small
The cutters do not move properly and the sliding surfaces may seize.
When clearance is too large
The cutters are poor in sharpness.
To adjust the cutter clearance
1. Loosen the cutter fi xing nuts.
2. Fully tighten the cutter fi xing bolts and then loosen them approx.
1/2 turn.
3.
With the bolts set at that position, tighten the cutter fi xing nuts.
Be sure to replace cutter guide fi xing bolts when they are loosened,
worn or damaged. Also be sure to replace damaged cutter blade.
NOTE
Properly lubricate the cutter sliding surfaces with machine oil.
Gear case (Fig. 18)
Apply a good
quality lithium based grease through the grease fi tting
until a small amount comes out between the cutter blades and the gear
case.
Fig. 18
NOTE
Lubrication should be applied at 50 hour intervals and more
frequently with heavy use.
Fuel fi lter (Fig. 19)
Remove the fuel fi lter from the fuel tank and
thoroughly wash it in
solvent. After that, push the fi lter into the tank completely.
Fig. 19
NOTE
If the fi lter is hard due to dust and dirt, replace it.
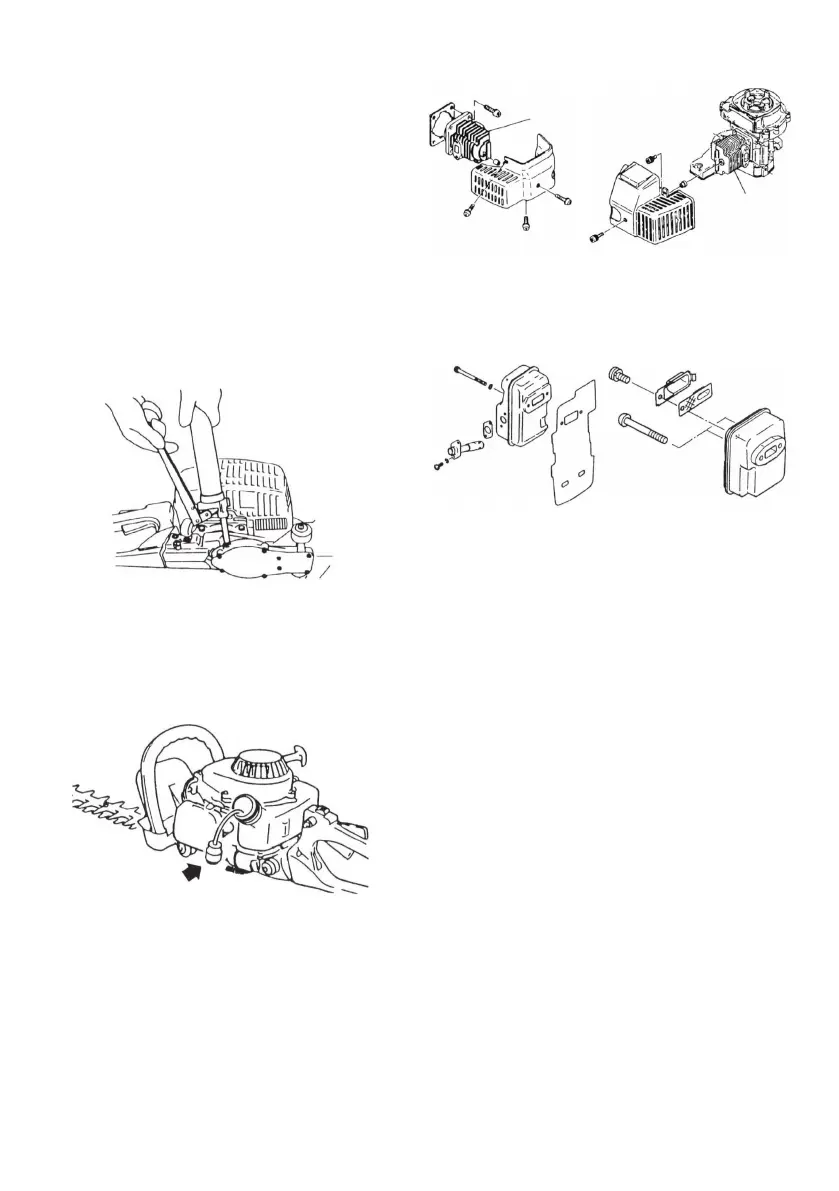
Cleaning the cylinder fi ns (Fig. 20)
When leaves get caught between cylinder fi ns (16), the engine may
overheat, resulting in lower output. To
avoid this, always keep cylinder
fi ns and fan case clean.
Every 100 operating hours, or once a year (more often if conditions
require), clean fi ns and external surfaces of engine of dust, dirt and oil
deposits which can contribute to improper cooling.
Fig. 20
Cleaning the muffl er (Fig. 21)
Remove the
muffl er and spark arrestor (if so equipped), and clean out
any excess carbon from the exhaust port or muffl er inlet every 100
hours of operation.
Fig. 21
For long-term storage
Drain all fuel from the fuel tank. Start and let engine run until it stops.
Repair any damage
which has resulted from use. Clean the unit with
a clean rag, or high pressure air hose. Put a few drops of two-cycle
engine oil into the cylinder through the spark plug hole, and spin the
engine over several times to distribute oil. Cover the unit and store it
in
a dry area.
Maintenance schedule
Below you will fi nd some general maintenance instructions. For further
information please contact your Tanaka dealer.
Daily maintenance
○ Clean the exterior of the hedge trimmer.
○ Check the blade guard for damage or cracks. Change the guard in
case of impacts or cracks.
○ Check that the blade
is sharp, and without cracks.
○ Check that the blade nut is suffi ciently tightened.
○ Make sure that the blade transport guard is undamaged and that it
can be securely fi tted.
○ Check that nuts and screws are suffi ciently tightened.
Weekly maintenance
○ Check the starter, especially cord and return
spring.
○ Clean the exterior of the spark plug.
○ Remove it and check the electrode gap. Adjust it to 0.6 mm, or
change the spark plug.
○ Clean the cooling fi ns on the cylinder and check that the air intake
at the starter is not clogged.
○ Check gear case is fi
lled with grease.
○ Clean the air fi lter.
Monthly maintenance
○ Rinse the fuel tank with gasoline.
○ Clean the exterior of the carburetor and the space around it.
○ Clean the fan and the space around it.
16
16
10
000BookTHT-210BEng.indb10000BookTHT-210BEng.indb10 2009/08/188:52:252009/08/188:52:25
 Loading...