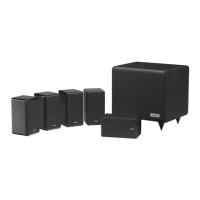
HTS101 XP MANUAL_05
HTS101 XP
5. POSITIONING THE HTS101 XP SPEAKERS
Place the speakers in positions relative to the viewing screen in your room. (See Fig. 2)
• Centre speaker close to, and either above or below the screen.
• Front Left speaker 1 to 2 metres (approximately 3 to 6 foot) to the left of the screen.
• Front Right speaker 1 to 2 metres to the right of the screen Try to get all 3 front speakers to be in the same
plane - the same distance from the viewing position and at least 300 mm (12 inches) away from any back wall
which may be present behind the screen. Left Rear speaker 1 to 2 metres behind the viewing position and to
the left.
• Right Rear speaker 1 to 2 metres behind the viewing position and to the right. Viewed from above, Front Left,
Front Right, Left Rear and Right Rear speakers should form a rectangle with the viewing position in the centre
of the rectangle.
• Place the subwoofer on the oor alongside the wall nearest to the screen. The exact position isn’t critical and
can be adjusted once the system is up and running. Refer to subwoofer Owner’s Manual.
This is an ideal positioning set-up, in practice there will be inevitable compromises depending on your room layout
and the furniture within it. Refer to your decoder or AV Home Cinema receiver instructions for further advice in
compensating for non-ideal situations.
6. CONNECTING THE HTS SPEAKERS TO YOUR A/V RECEIVER OR AMPLIFER
Connect the speakers to the AV Home Cinema receiver or separate amplier terminals. (See Fig. 3)
• Measure out suitable lengths of cable, to reach between the speakers and your AV or Home Cinema receiver
speaker output terminals.
• Wire up the system connecting each speaker to the appropriate terminals on the receiver or amplier making
quite sure that cables connect red to red terminals (+ to +) and black to black terminals, (- to -). Take care to
distinguish between left and right channels, and the front and rear channels, as seen from the viewing position.
This is a very important stage in setting up. Getting things wrong at this stage is the most likely reason for
disappointing results when troubleshooting the system.
7. CARE OF CABINET
The cabinets should only be cleaned with a dry cloth or with a light application of quality non-silicone furniture
polish.

 Loading...