OR
09
Food Processor
USING YOUR
FOOD PROCESSOR
03
Requisite
Workhorse in
Your Kitchen
120 ml
90
60
30
2000
ml
1500
1000
P
o
1
2
1-1
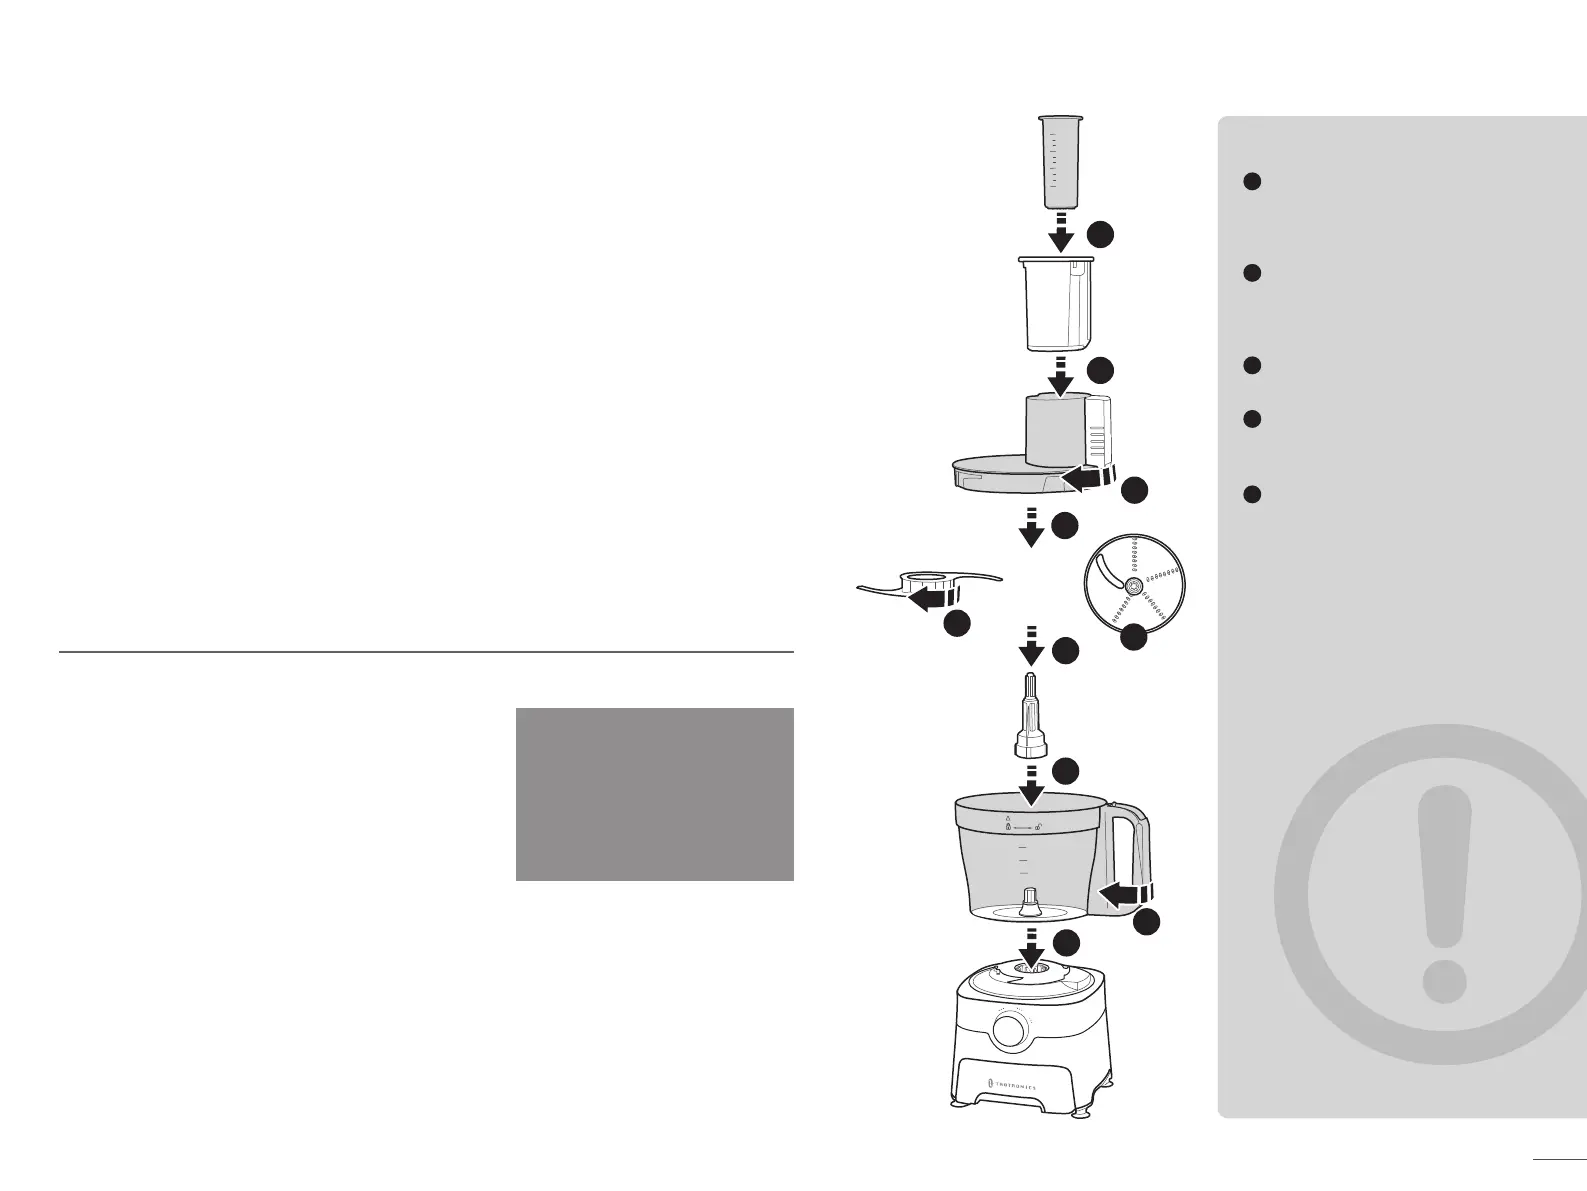
Processing with the Bowl
1-2
2-1
2-2
2-3
3-1
3-2
Put the processing bowl on the
housing base, keep its handle to
the right, and turn clockwise to
lock.
Put the drive shaft in the center
of the processing bowl. Put the
slicing/shredding discs or the
rotary blades onto the shaft.
Put on the processing bowl lid
and turn clockwise to lock securely.
Push the big food pusher into the
lid. Put the ingredients through
the feeding opening.
Plug into an electrical outlet.
Select a proper processing speed
with the knob switch to start
processing.
1
2
3
4
5
· Always turn the switch to "O"
position during assembly. Plug
into a socket and use pulse
function to confirm whether the
machine is assembled well. If
there is anything abnormal,
unplug the appliance
and re-assemble it as above.
· Make sure the accessories are
locked up in place, or the
processor will not work to
prevent accidental injuries.
· The rotary blades are stored in
the storage case. During
assembly, keep the blade side
with “UP” upwards and turn to
lock to the shaft.
· The discs are reversible for
cutting different shapes of
ingredients.
4-1
4-2
2-3