12
ERC Square Back Rotary Cutter
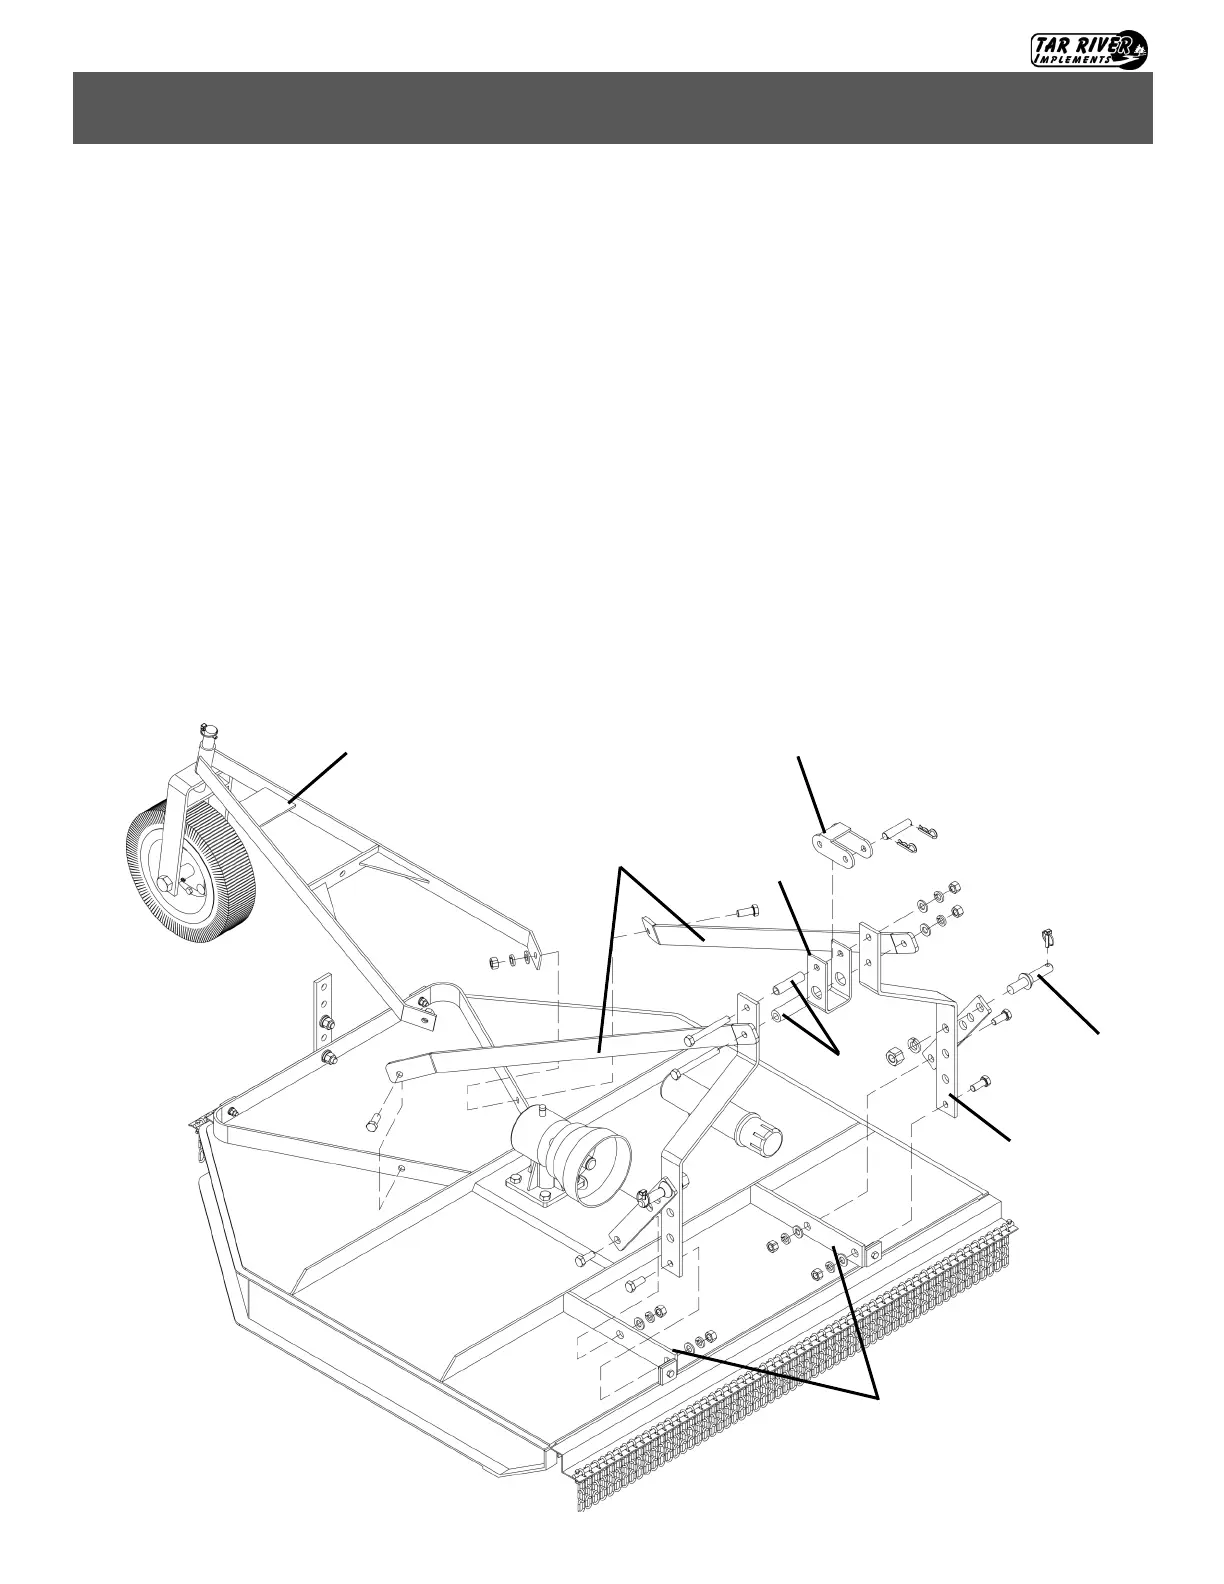
Three Point Hitch Assembly (Fig. 1)
1. Attach the Lift Arms to the ERC front hitch mounts with M16 bolts, washers and nuts. Do not tighten
hardware at this time. See Parts Section for hardware part numbers.
2. Attach the rear braces and the tail wheel arm with M16 bolts, washer and nuts. Do not tighten hardware at
this time.
3. Insert the M16x160 bolt thru the RH Lift Arm, RH Rear Brace, Steel Sleeve (M32x16.5), U-bracket, LH
Rear Brace, LH Lift Arm, flat washer, lock washer and nut.
4. Insert a M16x140 bolt thru the RH Lift Arm, U Bracket, Hitch Bracket, Steel Sleeve (M22.5x16.5), LH
Lift Arm, flat washer, lock washer and nut.
5. Attach a Support Bar to Front Hitch Mounts with M16x45 Bolt, flat washer, lock washer and nut. Attach
the other end of the Support Bar to the lift arm with Hitch Pin, lock washer and nut. Repeat for other side.
6. Attach the Rear brace and Tail Wheel Arm to the cutter frame with M16x45 bolts, flat washers, lock wash-
ers and nuts.
7. Tighten all hardware according to the proper torque values. Refer to the “Torque Specifications” Chart on
page 19.
8. Make sure the Hitch Bracket swivels freely between the Rear Brace and Lift Arms. If not, it may be neces-
sary to loosen the nut slightly. The Hitch Bracket must swivel freely in order for the deck to float properly.
Assembly
Steel Sleeves
U-Bracket
Rear Brace
Front Hitch Mounts
Lift Arm
Tail Wheel Arm
Fig. 1
Hitch Bracket
Hitch Pin
 Loading...