
D
Danielle WheelerAug 14, 2025
How to fix Targa CR 3 A1 Dash Cameras that won't turn on?
- BBarry ToddAug 14, 2025
If your Targa Dash Camera won't power on, the battery pack might be empty. Try recharging the battery.
How to fix Targa CR 3 A1 Dash Cameras that won't turn on?
If your Targa Dash Camera won't power on, the battery pack might be empty. Try recharging the battery.
What to do if Targa CR 3 A1 Dash Cameras say 'Need Class6 or Higher SD Card'?
If your Targa Dash Camera displays a 'Need Class6 or Higher SD Card' message, it means the microSD memory card you're using doesn't meet the minimum speed requirements. You need to insert a faster microSD memory card that supports at least Speed Class 6.
Why does my Targa CR 3 A1 Dash Cameras keep turning off?
There are a couple of reasons why your Targa Dash Camera might be suddenly powering off: * The battery pack is empty, so try recharging it. * Auto power-off is enabled. Check the settings to disable it.
What does 'Cluster size wrong. Please format' mean on Targa Dash Cameras?
If your Targa Dash Camera displays the message 'Cluster size wrong. Please format', it indicates that the microSD memory card isn’t properly formatted. You should format it again.
What to do if Targa CR 3 A1 freeze and won't turn off?
To fix a Targa Dash Camera that is unresponsive and cannot be switched off, press the Reset switch (17) using a pointed object and wait a few seconds. The Dash Camera should then work as normal again. Note that after performing a reset, all user-defined settings are lost, except the date and time.
How to clean Targa CR 3 A1 lens?
If your Targa Dash Camera recordings show stains or shadows, clean the lens with a soft, dry, lint-free cloth. Avoid using any detergents or chemicals.
What to do if my Targa Dash Cameras displays 'Need Class6 or Higher SD Card' message?
If your Targa Dash Camera displays the message "Need Class6 or Higher SD Card", it means that the microSD card you're using doesn't meet the minimum speed requirements (Speed Class 6). To resolve this, replace the current microSD card with a faster one that supports at least Speed Class 6.
What to do if my Targa CR 3 A1 displays 'Custer size wrong. Please format' message?
If your Targa Dash Camera displays the message "Custer size wrong. Please format", this indicates that the microSD card isn’t properly formatted. You should format it again to solve the problem.
What to do if Targa CR 3 A1 is frozen?
If your Targa Dash Camera freezes and won't switch off, press the Reset switch (17) using a pointed object and wait a few seconds. The camera should then function normally. Note that performing a reset will erase all user-defined settings, except for the date and time.
Defines the intended use of the device and lists trademarks.
Illustrates and lists all components included in the package.
Provides detailed technical specifications for the dashboard camera.
Covers essential warnings for safe operation and handling of the device.
Explains the meaning of various symbols used in the manual.
Details critical warnings related to environmental conditions and device care.
Highlights dangers related to children, suffocation, road use, and privacy.
Covers warnings about using the device on the road and battery safety.
Provides safety advice for screen, cables, and details repair procedures.
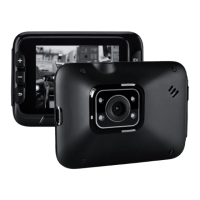
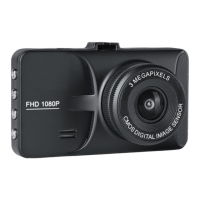
Identifies and describes the main external parts and controls of the dashboard camera.
Details the function of buttons, LEDs, and the display screen.
Provides a comprehensive list of button and LED functions for operation.
Instructions for memory card insertion and car mount setup.
Explains how to charge the device's battery using a USB cable and computer.
Details the process of charging the battery using the provided car charger.
Instructions for turning the dashboard camera on and off.
Guide to selecting the preferred language for the device interface.
Instructions for configuring the device's date and time settings.
Basic steps for initiating and concluding video capture.
Explains the icons displayed on the screen during video recording.
Details how to set up continuous video recording with clip length options.
Adjusting video exposure and safeguarding clips from overwriting.
Steps involved in capturing still photographs with the device.
Explains the icons displayed on the screen during still image capture.
Adjusting photo brightness settings for desired image results.
Features and controls for reviewing recorded video files.
Identifies and explains symbols shown during video playback.
Features and controls for reviewing captured still images.
Identifies and explains symbols shown during photo playback.
Options to delete or protect recorded videos and photos.
Customizing parameters for video recording mode.
Settings for loop recording duration and time-lapse video feature.
Adjusting exposure, motion detection, and audio recording settings.
Customizing parameters for still photo capture mode.
Selecting capture mode (self-timer) and image resolution.
Adjusting image quality presets and white balance for photos.
Applying color effects, adjusting ISO, and exposure for photos.
Enabling anti-shaking and configuring date stamp for photos.
Procedures for deleting current or all recorded files.
Procedures for locking or unlocking recorded files.
Configuring date/time, car number plate, auto power off, and parking monitor.
Adjusting beep sound, menu language, and screen saver settings.
Formatting the memory card, resetting device, and viewing firmware version.
How to connect the device to a television for playback via HDMI.
Methods for copying recordings to a computer via USB or card reader.
Steps to transfer files to a PC using the USB cable.
Alternative method for transferring files using a card reader.
Guide to prepare video files for use with Apple devices.
Instructions for replacing a blown fuse in the car charger.
Table of common errors and their solutions for self-help.
Guidelines for storage, cleaning, and environmentally responsible disposal.
Details warranty coverage, claim procedures, and service contact information.
Steps and information required for making a warranty claim.
Contact information for service and support for the product.
| Display | LCD |
|---|---|
| Loop Recording | Yes |
| G-Sensor | Yes |
| Night Vision | Yes |
| Display Size | 2.4 inches |
| Video Resolution | 1920 x 1080 |
| Memory Card Support | MicroSD up to 32GB |