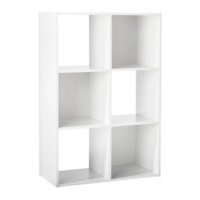
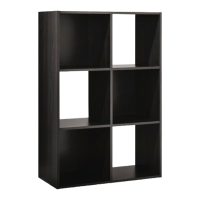
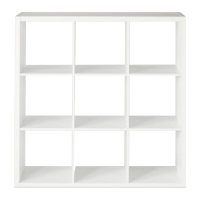
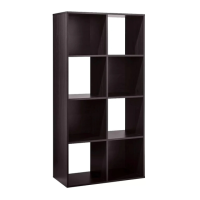
This document provides assembly instructions and safety guidelines for an 8-Cube organizer storage unit, available in white (dpci # 002 - 11 - 0589) and espresso (dpci # 002 - 11 - 0616). The unit is designed for general storage and organization within a room.
Function Description:
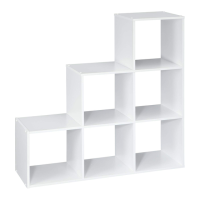
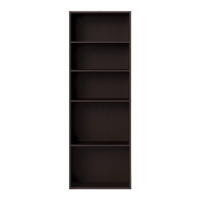
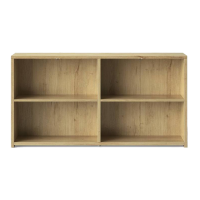
The 8-Cube organizer storage unit is a versatile furniture piece designed to provide ample storage space through its eight individual cube compartments. It can be assembled in a horizontal or vertical orientation, offering flexibility to suit different room layouts and storage needs. The unit is intended for storing various personal belongings, books, decorative items, and other household goods. It is explicitly stated that the unit should not be used as a television stand, a bench for climbing or stepping, or for wall hanging, as these uses can lead to instability, tipping, and serious injury or damage. The unit must be secured to a wall stud using the provided L-bracket and wall screw to prevent tipping.
Important Technical Specifications:
- Dimensions (assembled): The exploded diagram and assembly steps illustrate a rectangular unit with eight cube compartments. The exact external dimensions are not provided, but the internal structure suggests uniform cube sizes.
- Weight Capacity:
- Top Panel: 40 lbs (for horizontal orientation) or 50 lbs (for vertical orientation).
- Individual Shelves/Cubes: 15 lbs per cube.
- Exceeding these weight limits can cause excessive sagging, unit failure, and potential injury.
- Hardware Components:
- (H1) x 6 long dowel 6 x 60 mm
- (H2) x 12 short dowel 6 x 30 mm
- (H3) x 18 screw cover
- (H4) x 18 assembly screw #DIRECTRA NO.5 x 38
- (H5) x 48 nail
- (H6) x 1 L-bracket
- (H7) x 1 L-bracket screw #7 x1/2" F/N
- (H8) x 1 wall screw #6 x1.1/2" P/N
- Panel Components:
- (A) x 2 side panels
- (B) x 2 top/bottom panels
- (C) x 1 horizontal divider
- (D) x 6 vertical dividers
- (E) x 4 back panels
- Materials: The instructions refer to "wood pieces" and "wood floors," indicating the unit is likely constructed from wood or wood-composite materials.
Usage Features:
- Versatile Orientation: The unit can be assembled and used in both horizontal and vertical configurations. However, stacking is only permitted for horizontal mounting, and vertical mounting is for single units only.
- L-Bracket for Stability: A crucial safety feature is the L-bracket, which must be installed to secure the unit to a wall stud. This prevents accidental tipping, a significant hazard, especially for children. Instructions detail how to install the L-bracket against a wall stud, with a required gap of 1/2 inch to 1 inch between the unit and the wall for proper installation. An optional "hidden hardware" method is also described, involving cutting the back panel to install the L-bracket under the top panel.
- Two-Person Assembly: Assembly is recommended to be performed by two people for ease and safety.
- Hand-Tighten Screws: Screws should be hand-tightened to prevent overtightening, which can strip the wood and hardware. Power screwdrivers are explicitly discouraged.
- Finished Edges: The instructions highlight the importance of understanding finished (visible) and unfinished (raw wood) edges during assembly. Finished edges should generally face forward, and finished sides should face up when the product is fully assembled and upright.
Maintenance Features:
- Cleaning: The care instructions recommend dusting the unit with a clean, lint-free dry cloth.
- Safety Precautions (Preventative Maintenance):
- Choking Hazard: Small parts are included, posing a choking hazard for small children. Adult supervision is required.
- Unload Before Moving: Always unload the unit before moving it to prevent instability and collapse due to the weight of personal belongings.
- Avoid Overloading: Do not overload shelves. If any shelf or panel bows or bends more than 1/2 inch, it is overloaded and could collapse.
- No Climbing/Stepping: The unit is not a bench; climbing or stepping on it can cause instability and tipping.
- No TV Stand Use: Do not use the unit as a television stand.
- No Attachments: Do not mount or attach anything to the sides, rear, or front of the unit, as this can create forces leading to tipping.
- No Vertical Stacking: Stacking units vertically is an unsafe tip-over hazard.
- No Wall Hanging: The unit is not designed for wall hanging.
- Secure to Wall Stud: Always secure the unit to a wall stud using the provided L-bracket and wall screw. If a wall stud is not accessible, consult a local hardware store for appropriate mounting hardware. Failure to do so creates an unsafe tipping hazard.
- Protect Work Surface: It is recommended to protect the work surface during assembly to prevent scratching or damage to tabletops, wood floors, etc.