EasyManua.ls Logo

Tarptent Rainbow User Manual

Tarptent Rainbow
2 pages
To Next Page IconTo Next Page
Page #1 background imageLoading...
Page #1 background image
Tarptent Rainbow Setup
Setup is very easy. It will take 2 to 3 minutes once you get the hang of it. To
watch the setup video visit: https://www.tarptent.com/videos/
Your Rainbow order includes: tent body with carbon ber cross strut, stuffsack,
six blue stakes + bag, and an arch pole (carbon or aluminum).
I. Layout and Positioning
1. Once you have found a place to pitch your Rainbow, spread out the tent
body with the black bathtub oor facing the ground. If using a ground
sheet, lay it down rst.
2. Remove six stakes from the stake bag and have them ready to place in the
guyline loops (1 stake at each corner, 1 for the vestibule door, and one for
the back wall).
3. Check to make sure that the oor corners are clipped above the
corresponding y line tightener, to ensure the bathtub oor is correctly
tensioned (Image 1).
4. Insert assembled arch pole into the yellow arch pole sleeve. Point the pole
tip downwards as you slide it through the sleeve--there should be almost
no resistance from the fabric. Do NOT use force when inserting the arch
pole as the pole may break or fabric may tear.
5. Place pole tips into the black end pockets. Once the pole is inserted, tighten
the pockets so the arch pole is well secured in the sleeve.
II. Pitching the Rainbow
1. After you have the arch pole secured, stake out the adjacent tent corners
by placing the stakes through the O-rings. Stake out the corners as far as
possible from the center of the tent (Image 2).
2. Walk to the other end of the tent and ensure that the arch pole is centered
before staking out the corners as you did previously (Image 2).
3. Pull out the vestibule and back wall and stake.
4. Bathtub end walls can be lifted from the interior using the clip above the
head and foot ends of the shelter.
III. Free Standing Set Up
1. You can use trekking poles OR vertical support poles ordered from Tarptent
to make the Rainbow free standing.
2. Adjust the poles to a minimum height of 51 in (130 cm). Position the poles
parallel to each end of the tent (Image 3).
3. Snap the clip on to the pole shaft and rotate under the arch pole tip (Image
3C).
Image 2: Stake placement and tensioning
Stake out each corner as
if you were pulling as
far as possible from the
“center” of the tent. This
ensures even tensioning.
The backwall cording
loops around the stake.
Slip O-ring over
pole tip
Form a “noose” and
slip over pole handle
Clip for center of pole
Image 3: Free standing set-up
(B)
(A)
(C)
Clip to pole
Wrap under grommet
pole 51in/130cm
Image 1: Clipping oor to y
Clip oor corners to the corresponding
y corner, directly above the line tight-
ener, to ensure bathtub oor is correctly
tensioned
oor corner clip
y corner line tightener
4. The tent corners have O-rings to t over the tip and handle (Image 3A and
3B).
5. Repeat above steps for the other end of the tent. Tension vestibule doors
with guylines as needed. The shelter should now be free standing.
stake
stake
stake
stake
stake
stake
Question and Answer IconNeed help?

Do you have a question about the Tarptent Rainbow and is the answer not in the manual?

Tarptent Rainbow Specifications

General IconGeneral
Number of Doors1
Number of Poles1
Pole MaterialAluminum
Number of Vestibules1
Seasons3-season
Capacity1 person
Rainfly FabricSilnylon
TypeSingle-wall

Summary

Layout and Positioning

Tent Body Placement

Spread out the tent body with the black bathtub floor facing the ground. Lay down ground sheet first if using.

Stake Preparation

Remove six stakes and have them ready for placement in guylines at corners, vestibule door, and back wall.

Floor Corner Tensioning

Ensure bathtub floor is tensioned by clipping floor corners above corresponding fly line tighteners.

Arch Pole Insertion

Insert assembled arch pole into sleeve, tip downwards. Do not use force to avoid fabric damage.

Securing Pole Tips

Place pole tips into black end pockets and tighten pockets to secure the arch pole.

Pitching the Rainbow

Corner Staking

Stake out adjacent tent corners as far as possible from the center, ensuring even tensioning.

Vestibule and Back Wall

Pull out vestibule and back wall, then stake them securely.

Bathtub End Walls

Lift bathtub end walls from interior using the clip above head and foot ends.

Free Standing Setup

Pole Adjustment

Adjust trekking or support poles to a minimum height of 51 inches (130 cm).

Pole Positioning

Position poles parallel to each end of the tent and clip to the arch pole tip.

Securing Tent Corners

Fit tent corner O-rings over pole tips and handles for stability.

Final Tensioning

Repeat pole setup for the other end and tension vestibule doors with guylines.

Door Tie Up

Rain Porch Setup

Connecting Fabric

Attach connecting fabric near the zipper to the other side of the vestibule door via velcro.

Trekking Pole Setup

Angle trekking poles (40in/102cm off ground) and place tips in loops to create an extended entrance.

Seam-Sealing

Sealant Preparation

Mix silicone sealant with mineral spirits or white gas to a thick olive oil consistency.

Seam Application

Paint sealant onto seams from outside using a brush or paper towel.

Interior Floor Coating

Apply thick silicone lines to the interior floor to create an anti-skid mat.
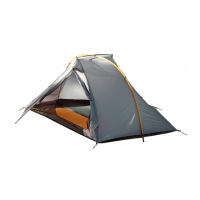
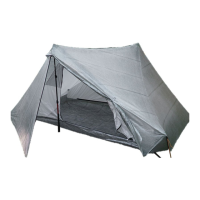
Related product manuals